The 3D Cloud AMS Product Renderer is the utility used to generate photorealistic 2D images from single 3D product(s) or Product Configurators on the platform.
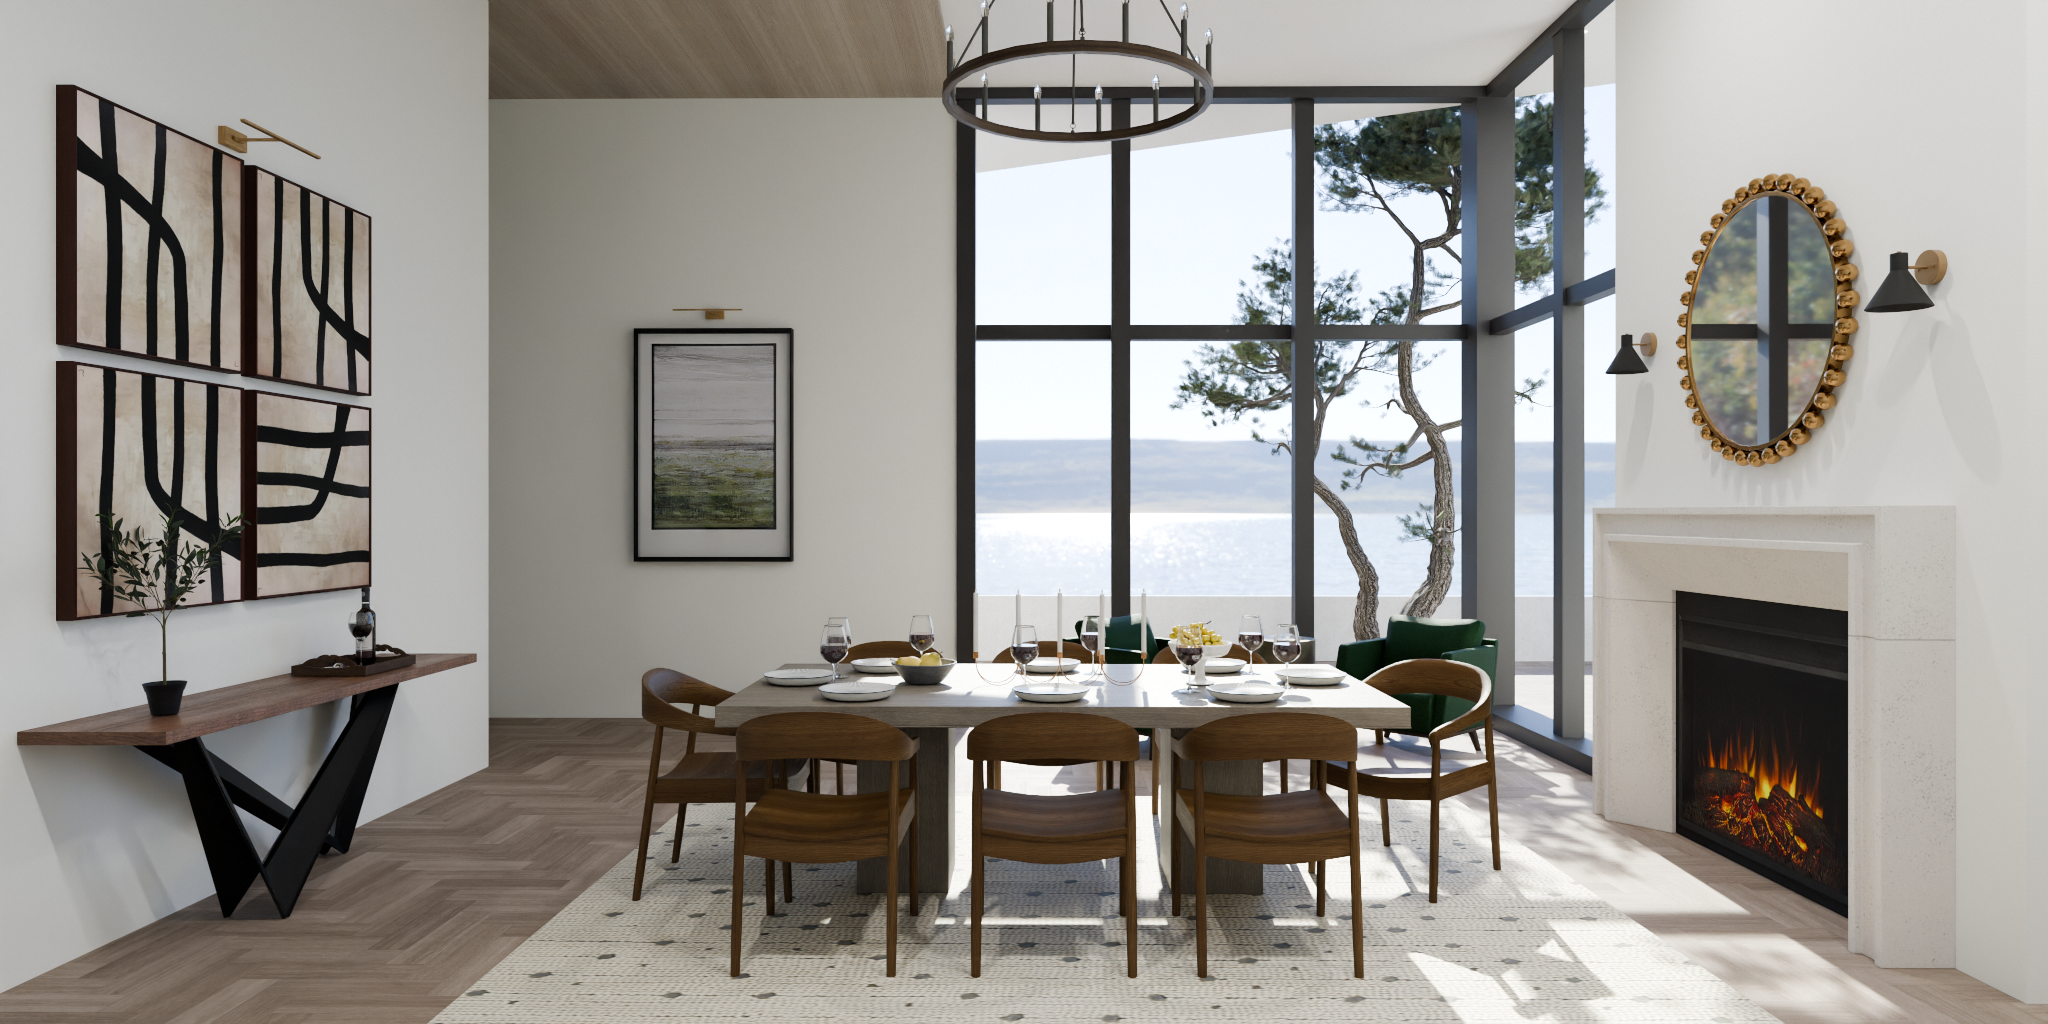
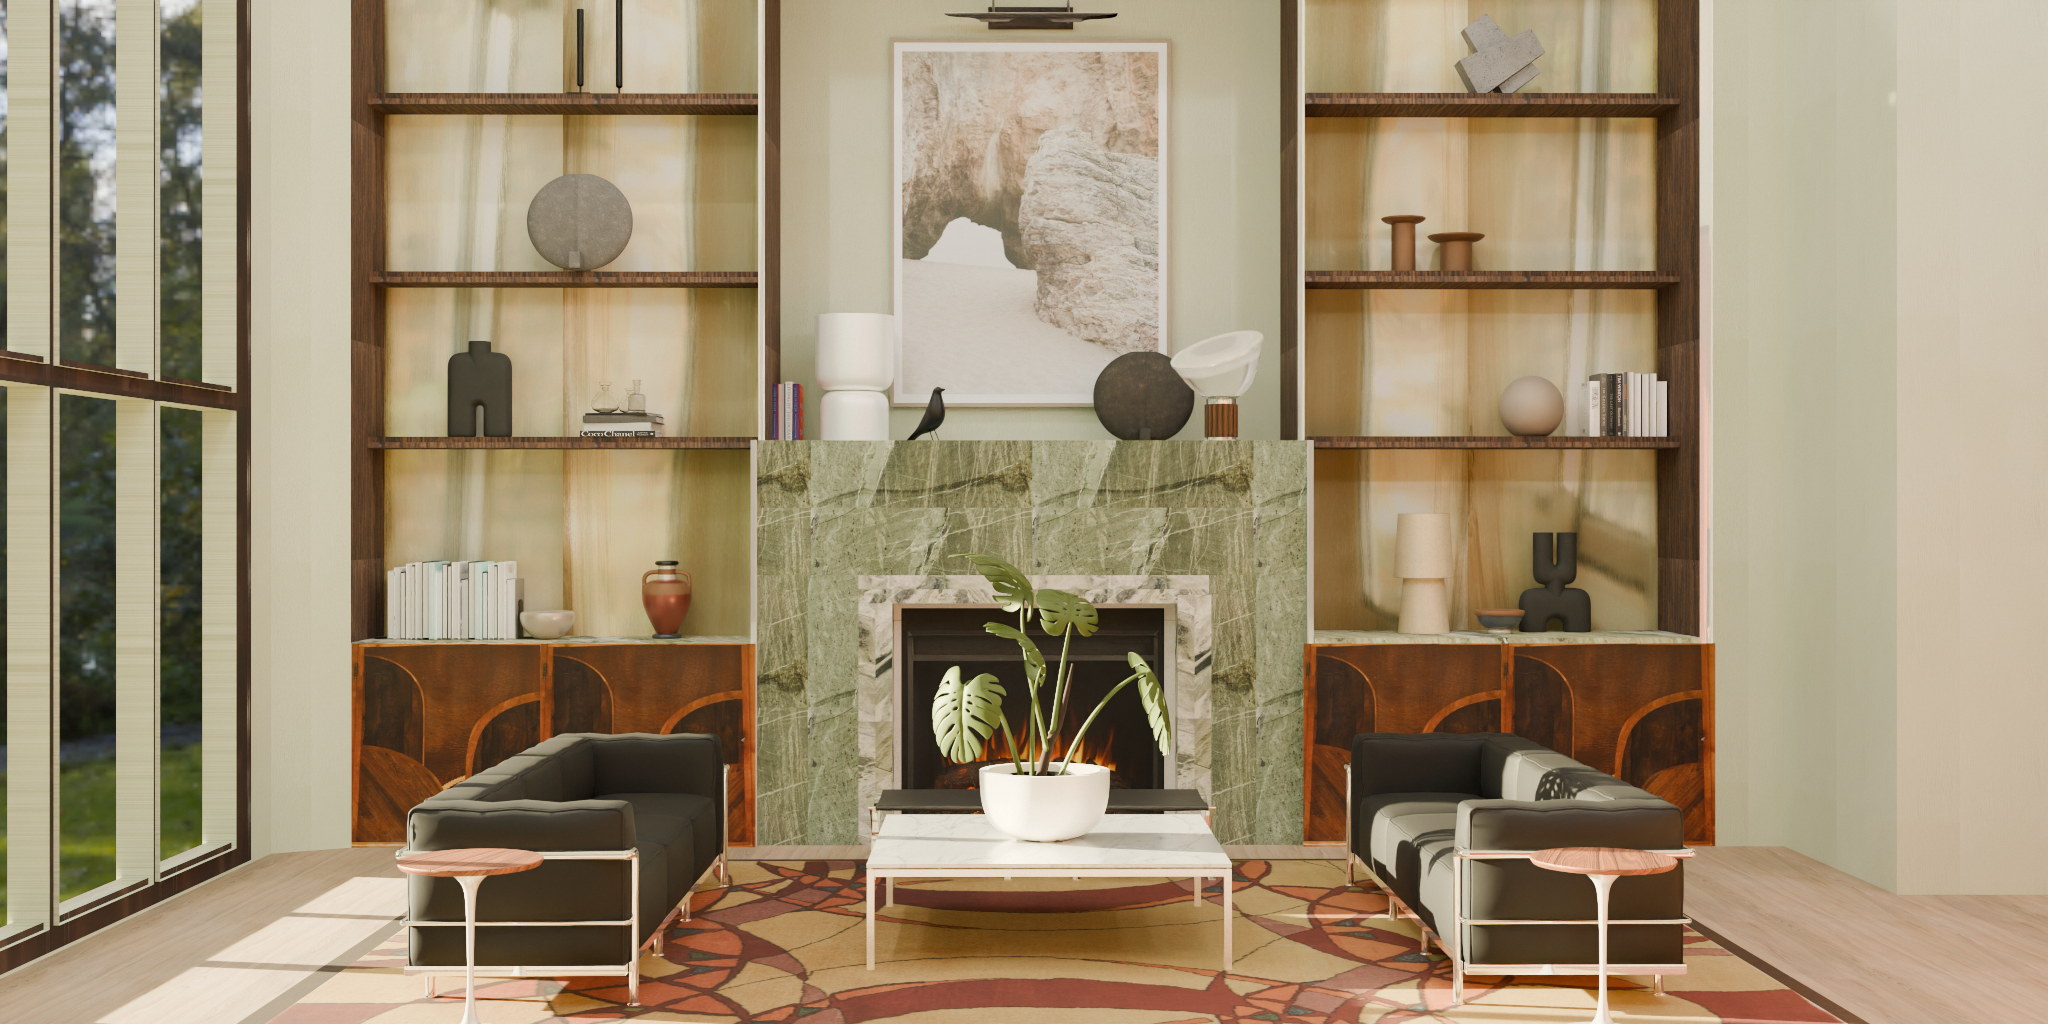
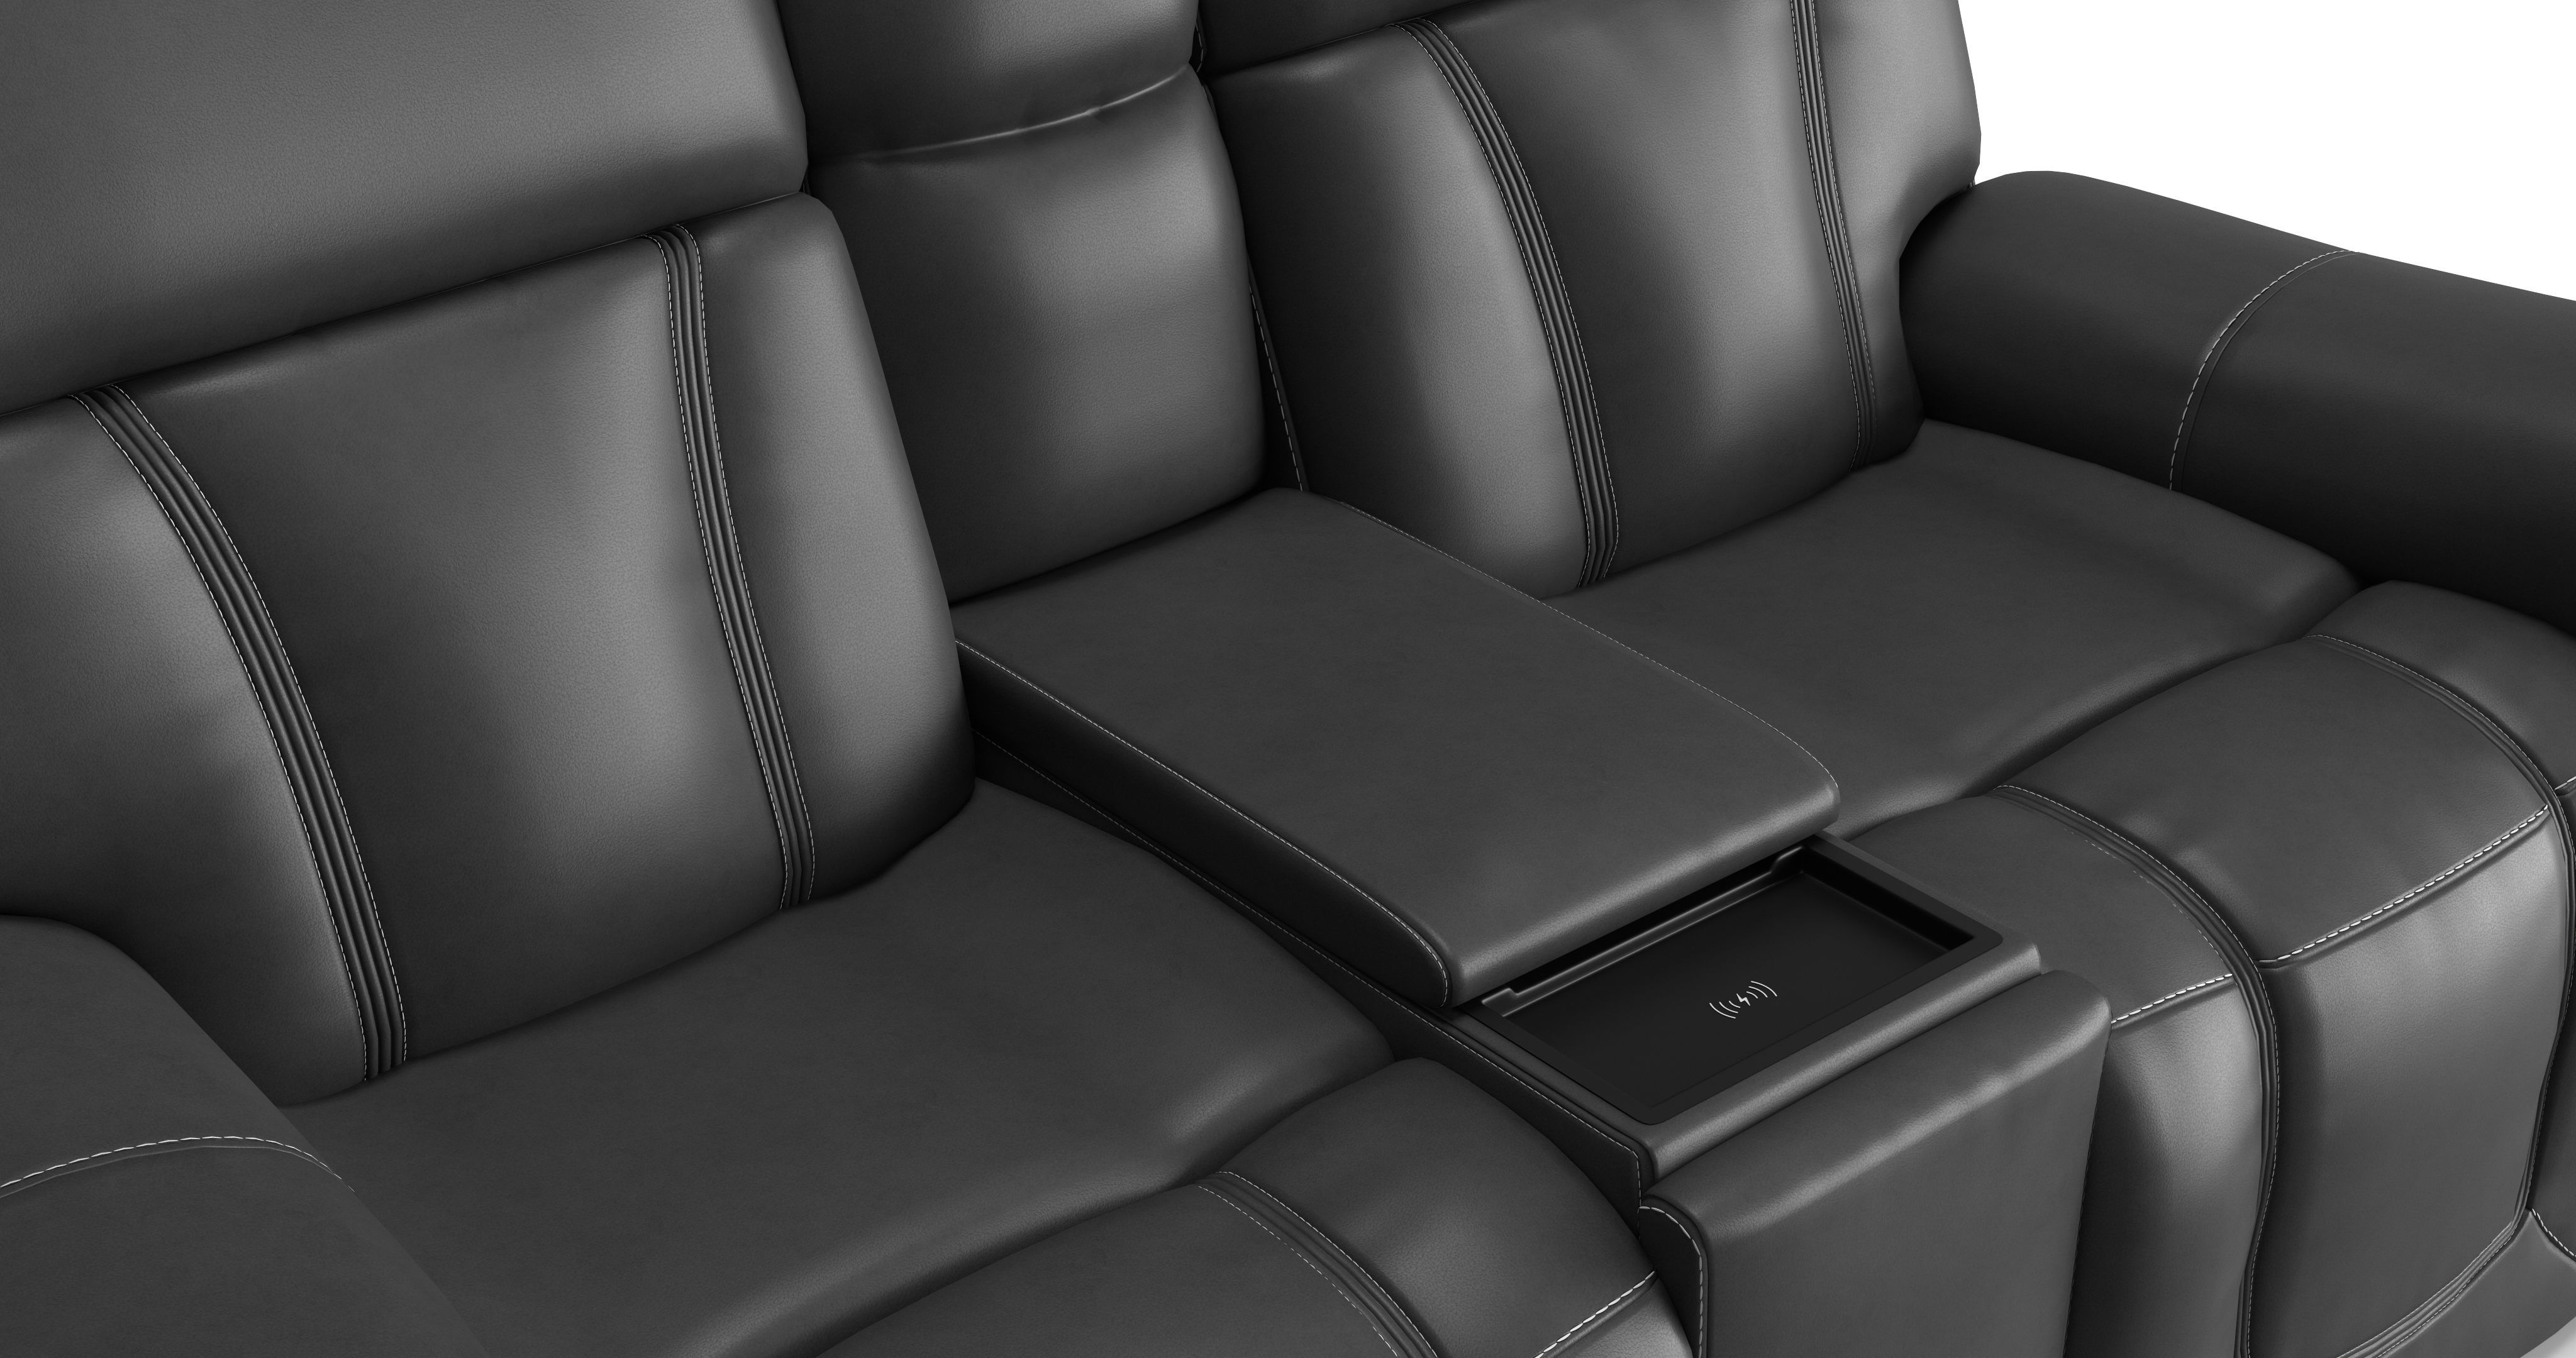
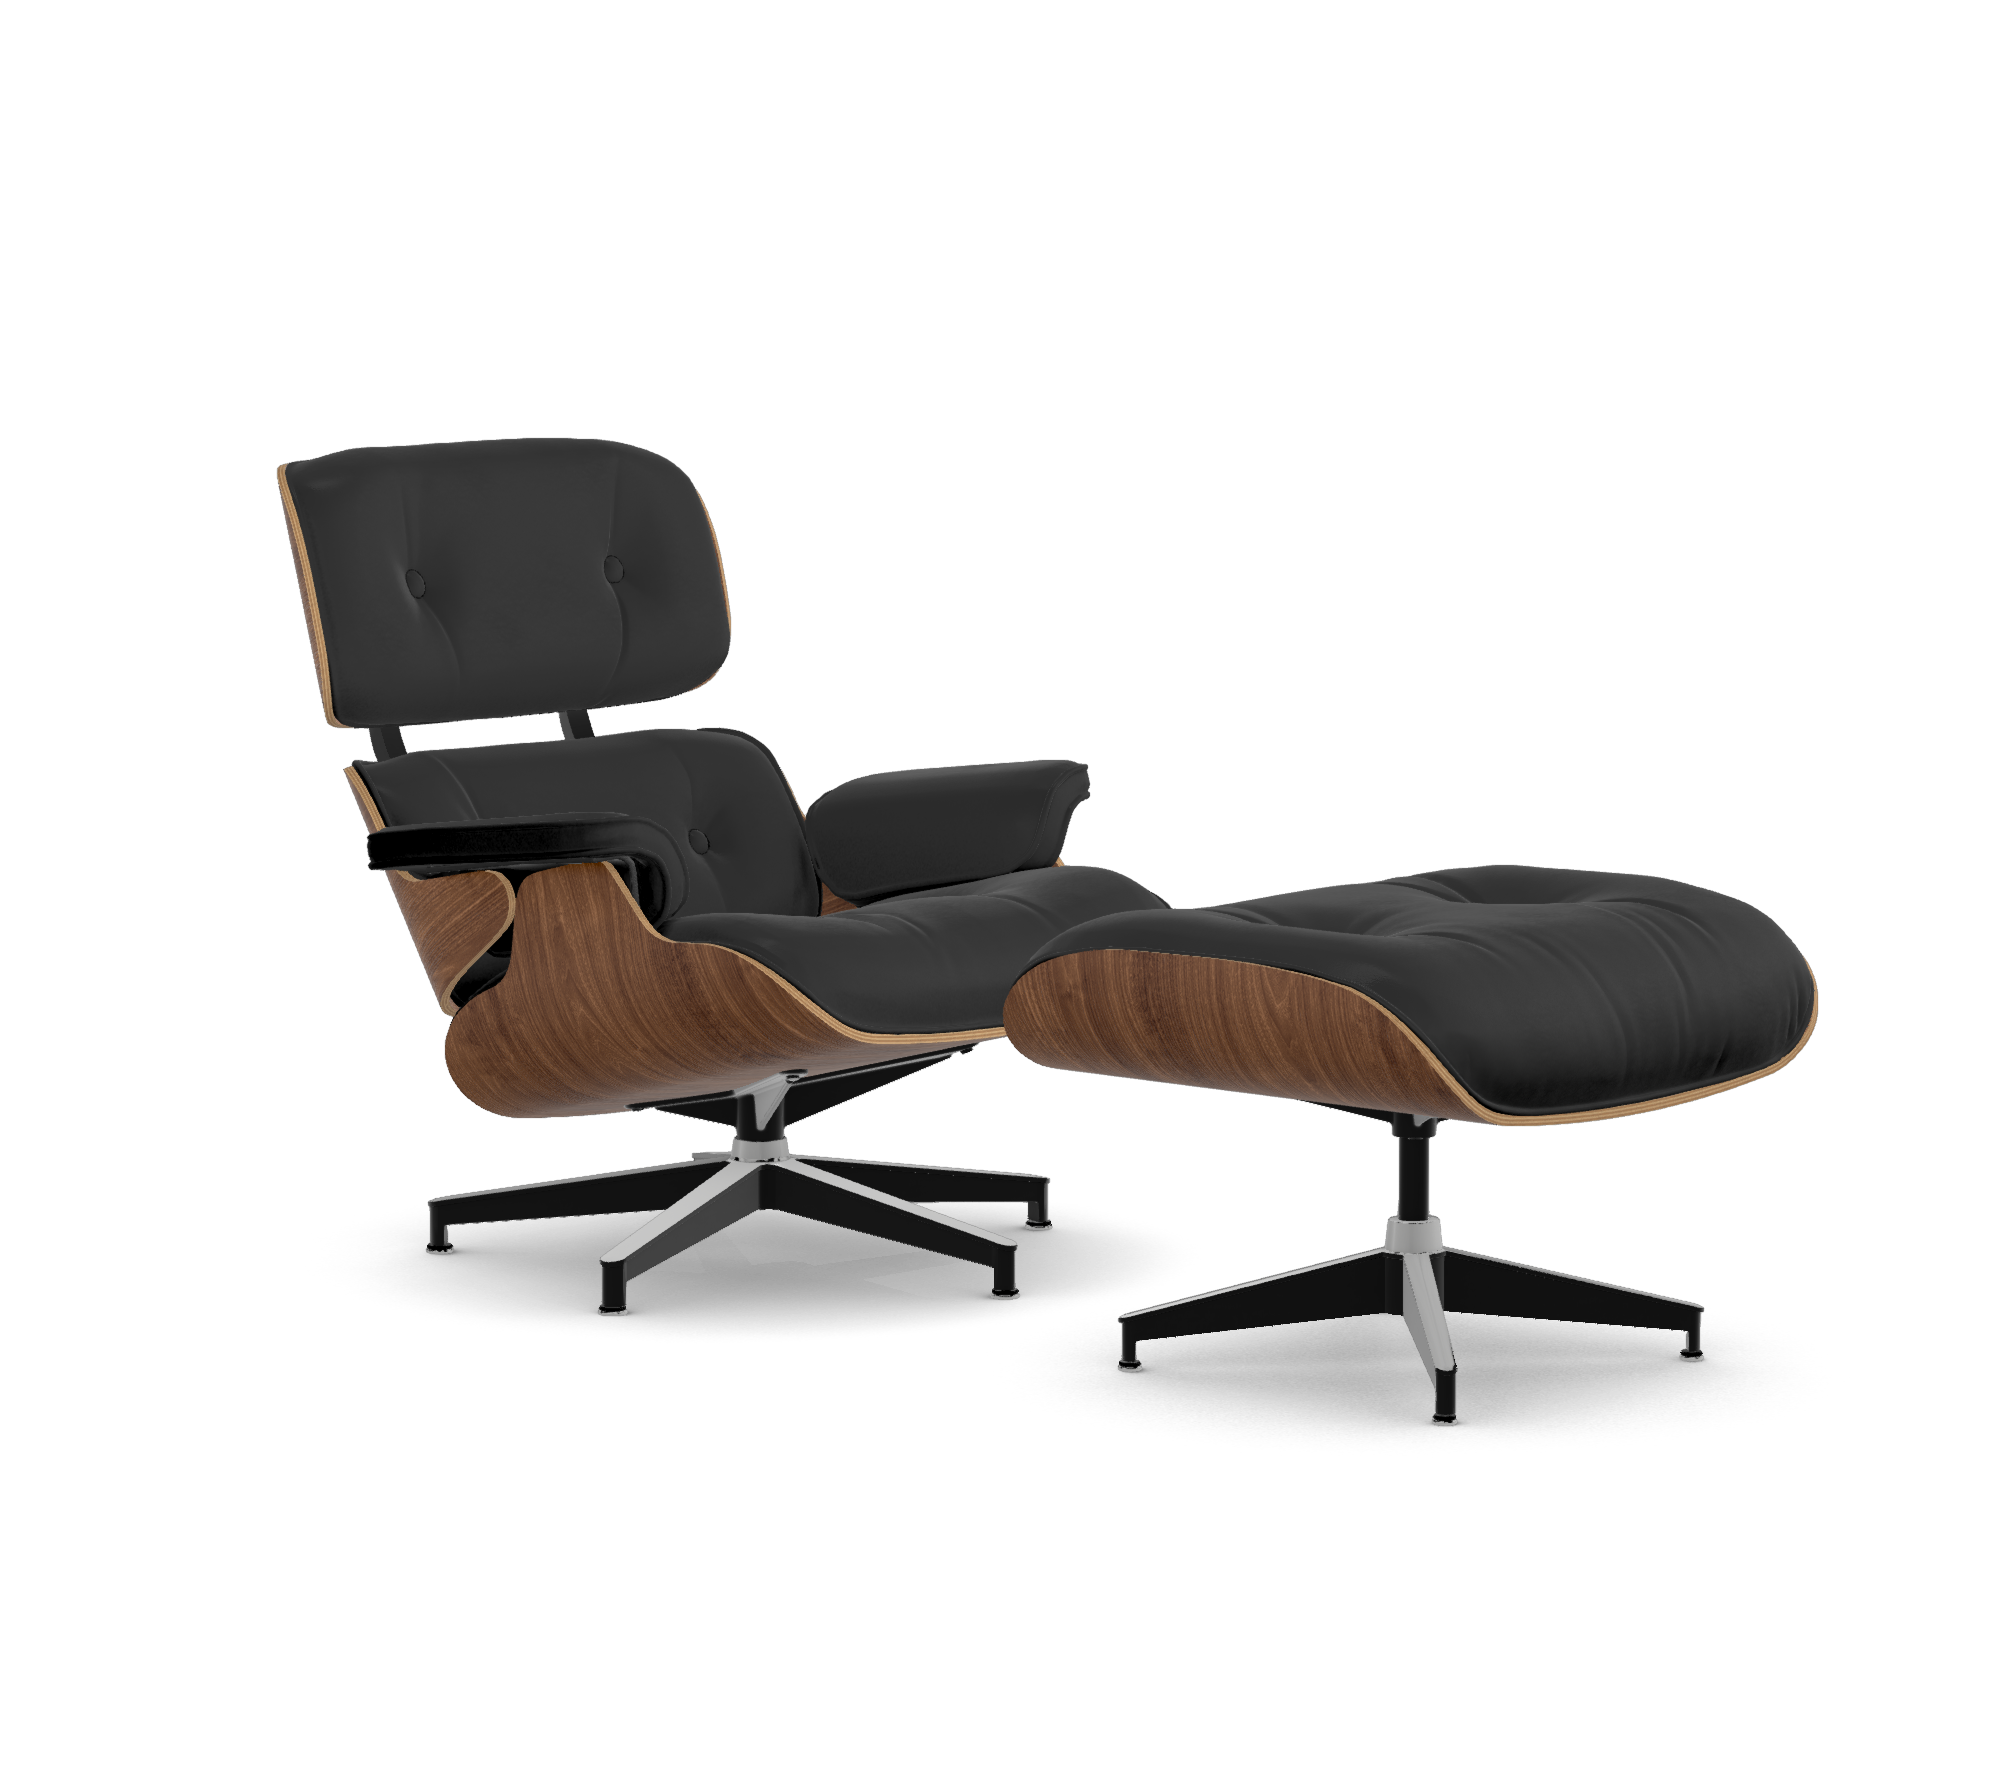
A few sample HD Renders are shown below.
|
|
|
|


.png)
About the Product Rendering Engine
The 3D Cloud AMS Photo Rendering process uses the Cycles rendering engine—a sophisticated, open-source and license-free path tracing renderer which achieves great realism by simulating how light interacts with surfaces and bounces around a 3D scene. The combination of 3D mesh geometry, 3D material properties, camera position and lighting result in product images that can replace photography for Product pages, marketing, catalogs, etc.
The Product Renders feature takes advantage of our real-time 3D player to preview virtual camera positioning, while applying lighting, HDRI and various other rendering controls to achieve photo-realistic final results.
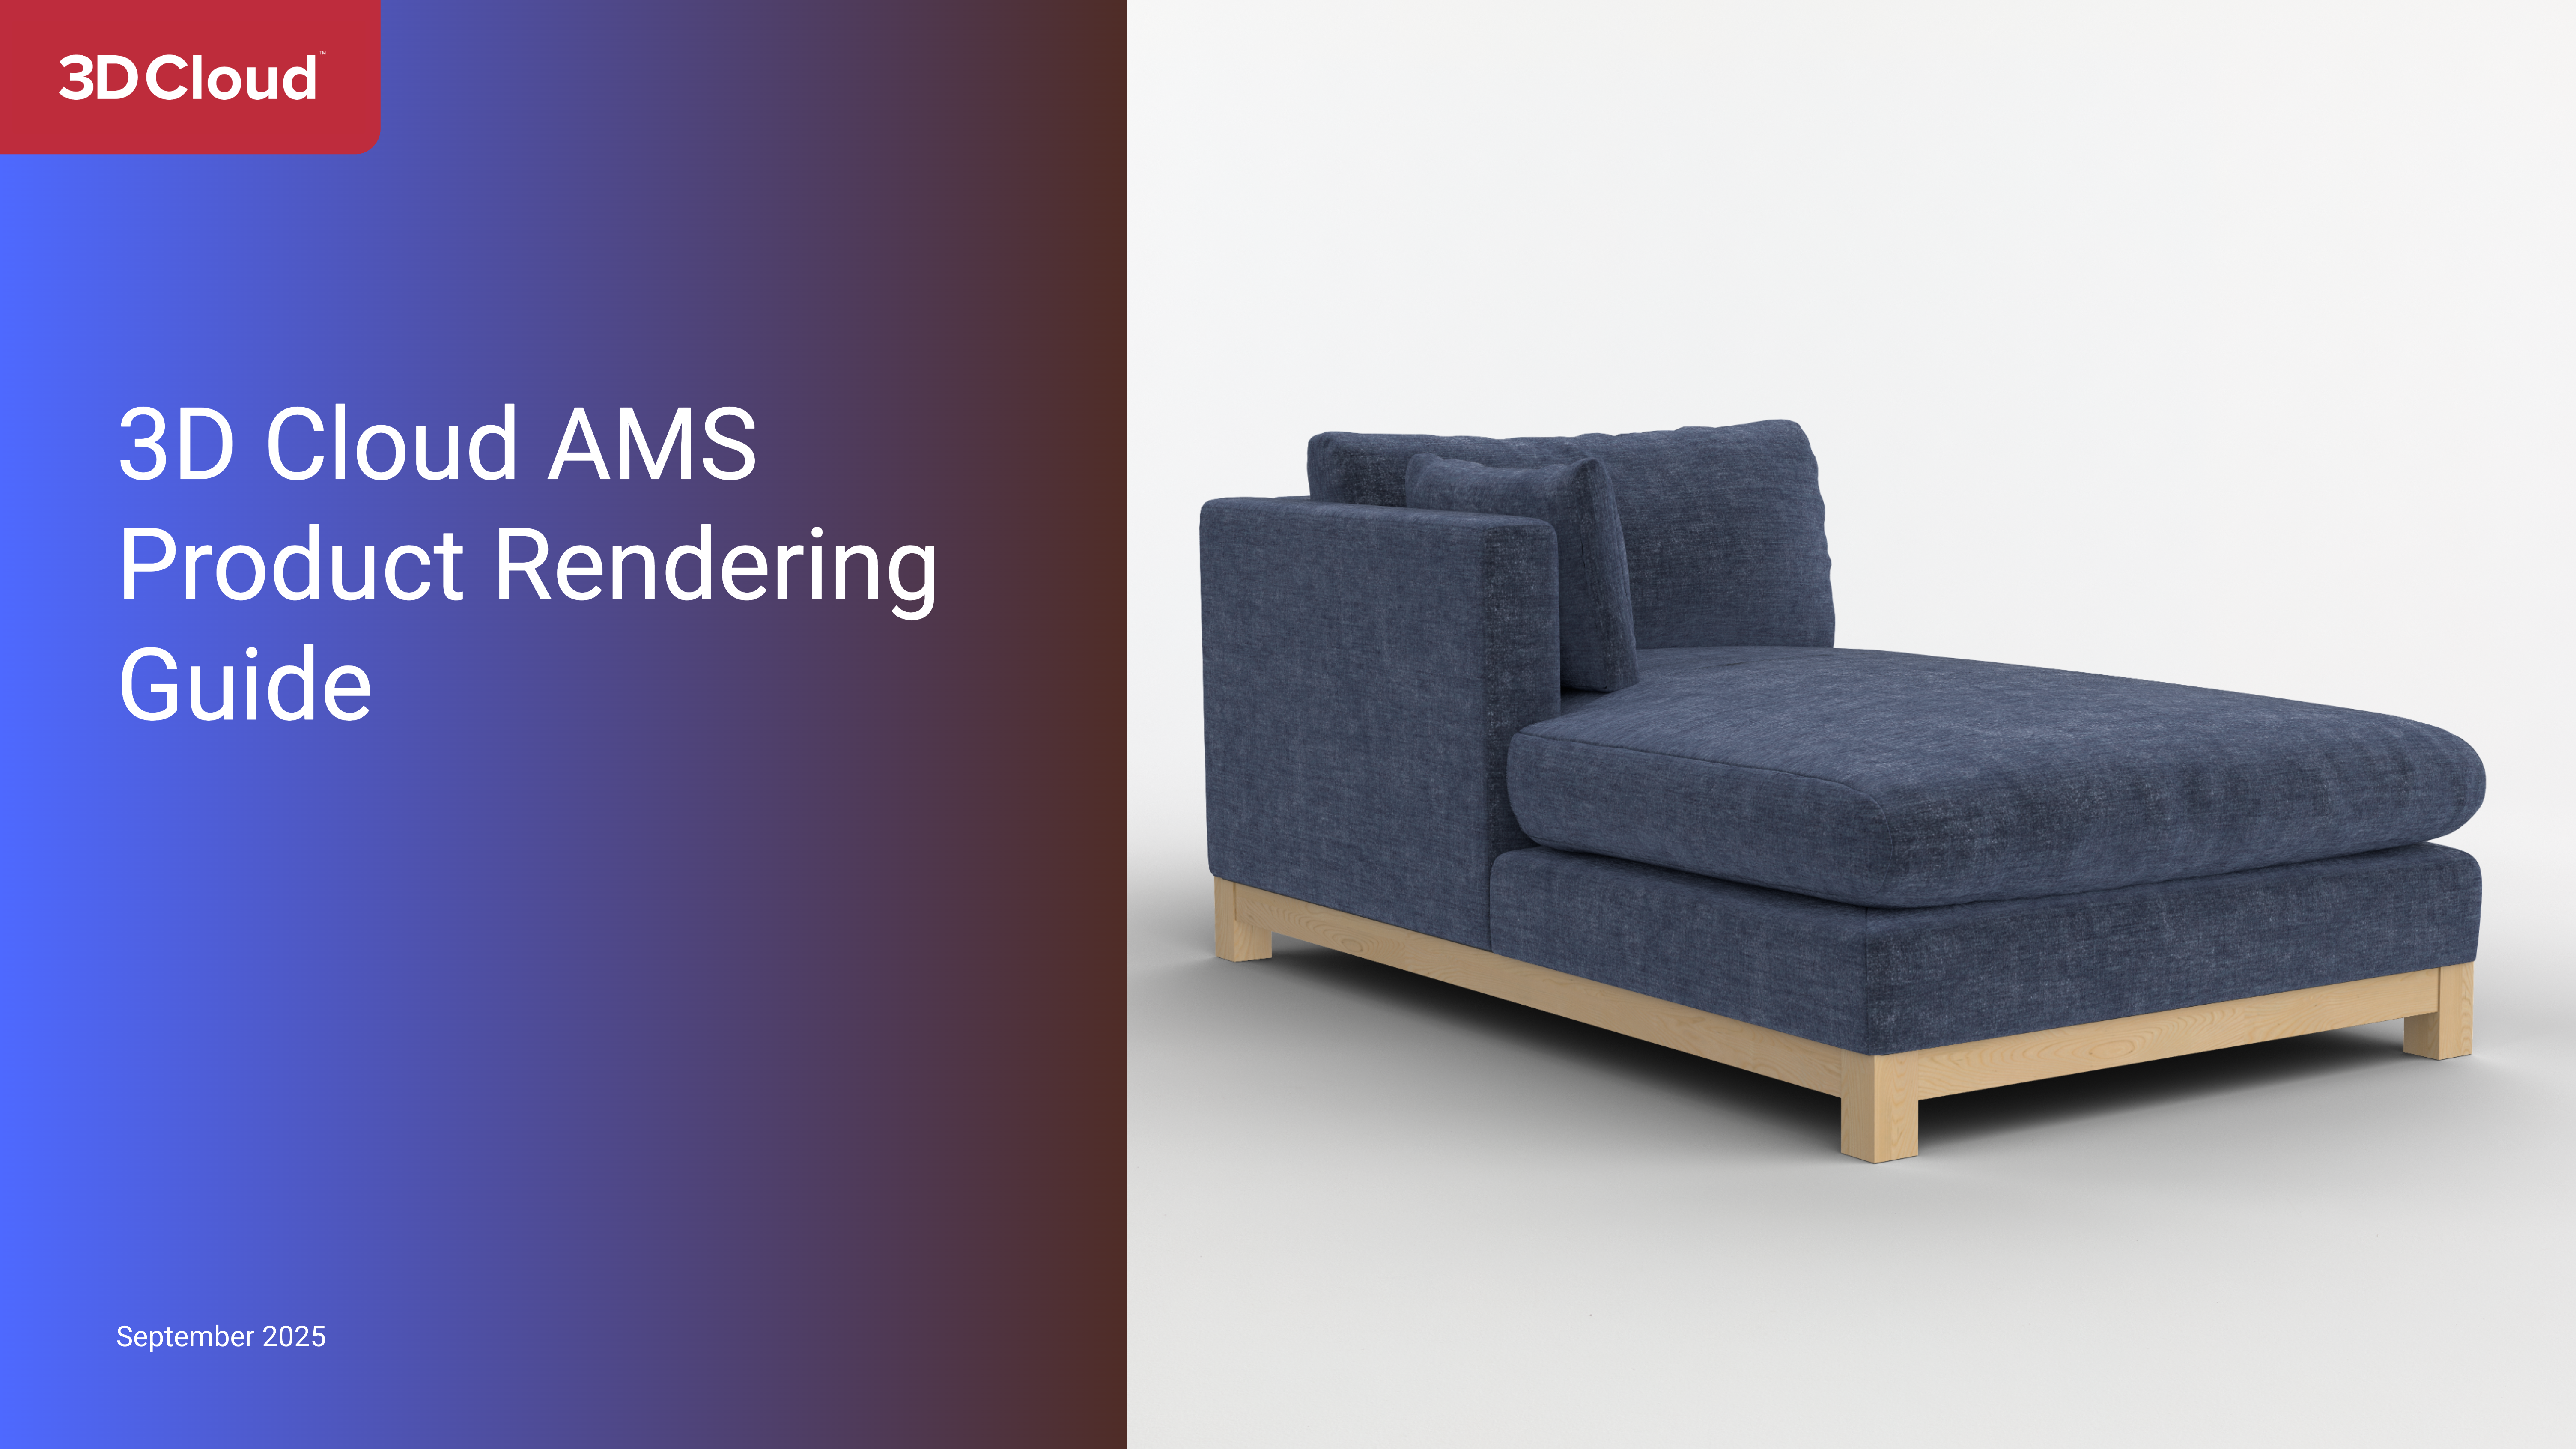
3D Cloud AMS Product Rendering Guide
A separate Product Rendering Guide has been created to provide visual examples of the various Advanced Options settings being applied, and the rendered results. This guide is useful in the planning of Custom Presets, Bulk Render Jobs, Dimension Renders and more. The guide can be viewed as a Google Slides presentation here:
https://docs.google.com/presentation/d/1R053_mW-2FArjVzqDQLc8j6QbYdbMDPW4JTIBCTiHDw/edit?usp=sharin
Accessing HD Renders
The product rendering feature can be accessed in a number of ways:
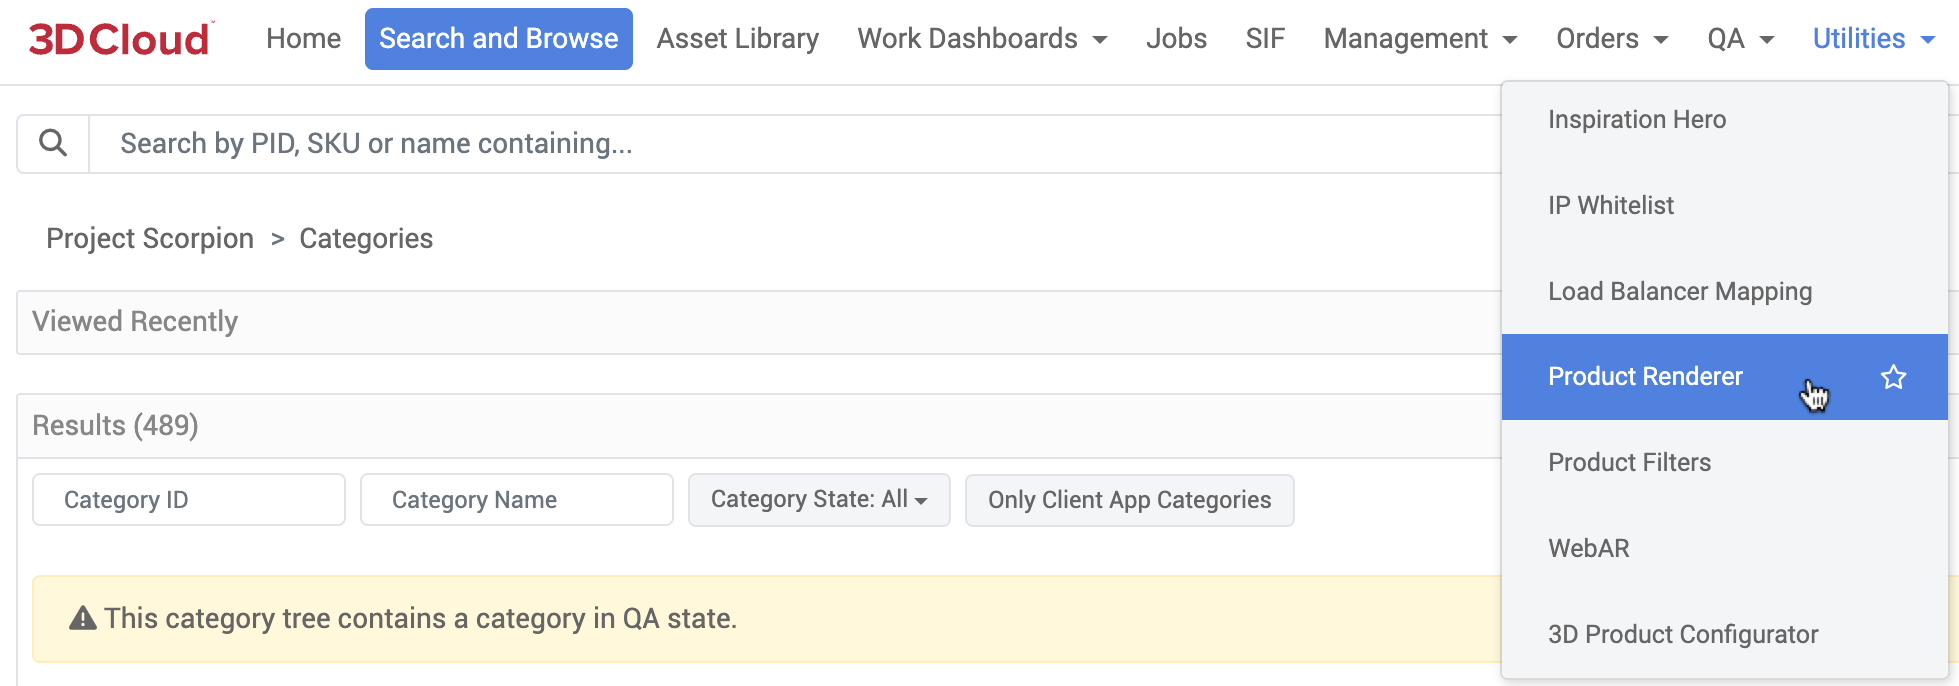
Via the Utilities → Product Renderer section;
By selecting the HD Renders button while on any single product description page;
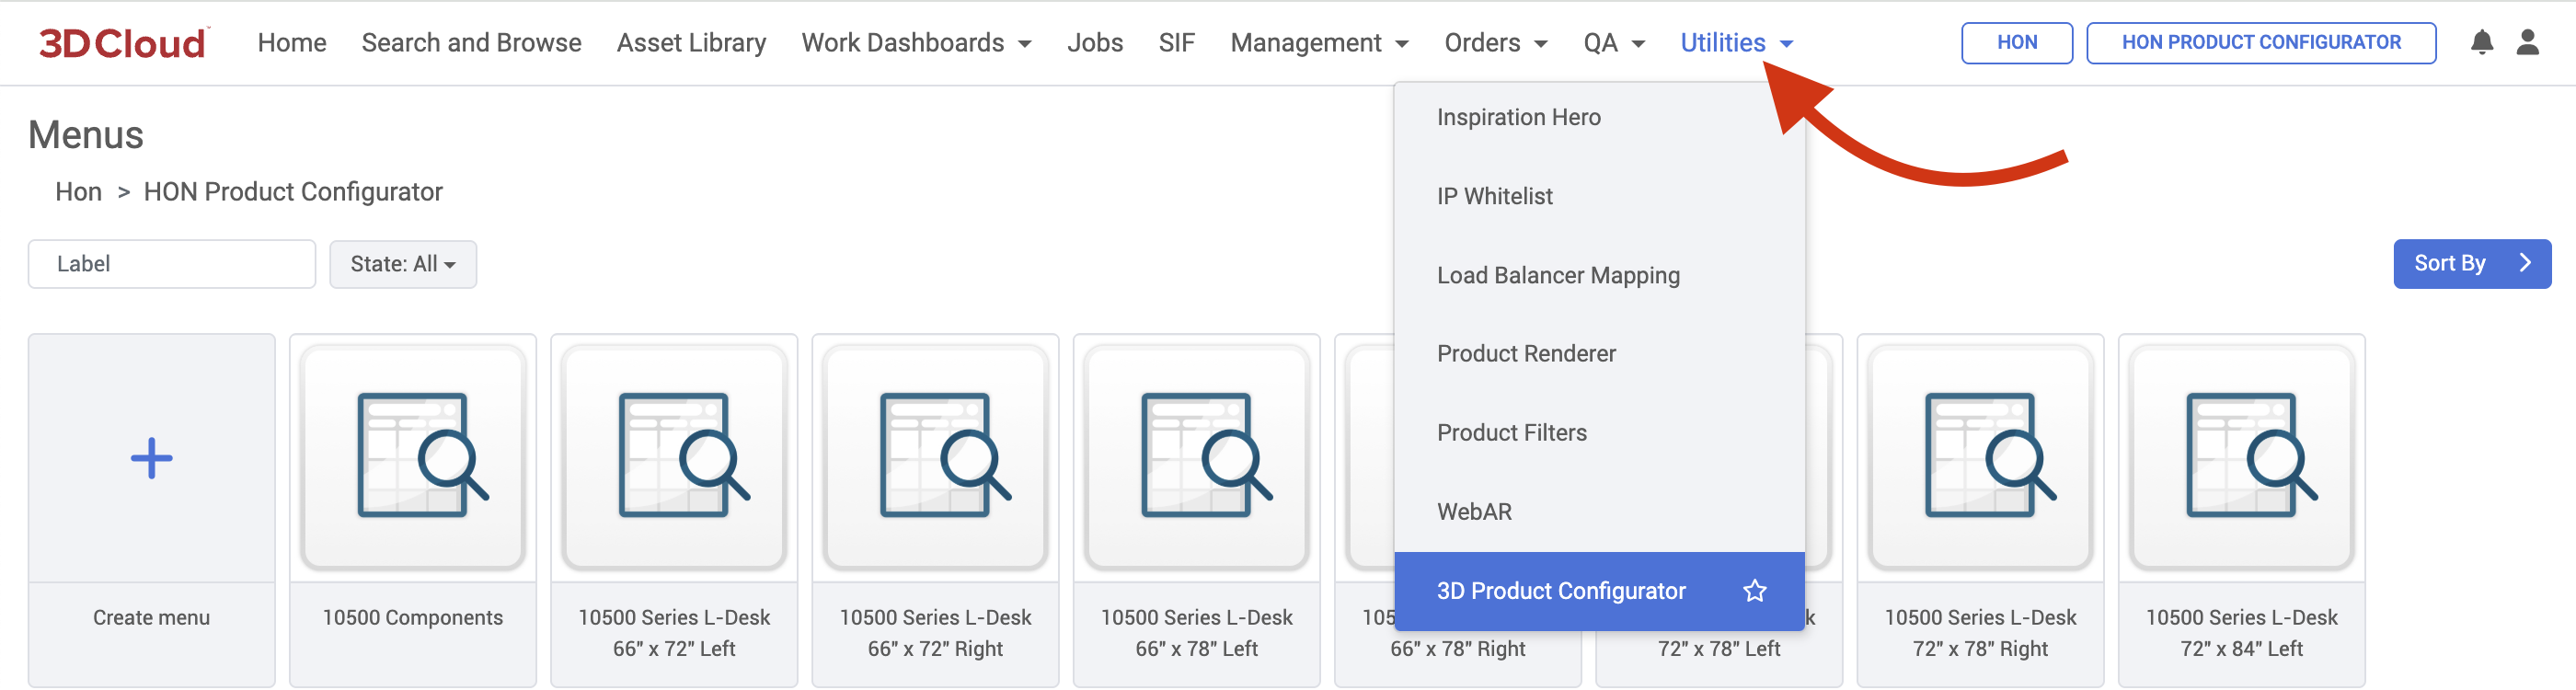
Navigating to Utilities → Product Configurator within the AMS;
Initiating a product render from a public-facing product configurator.
Use Cases
There are multiple use cases where Product Rendering can be used. The following table describes the different options a user may choose to create one or many renderings of 3D products.
Product Rendering Type | Accessed via… | Source of Renderings | Angle Options | Description |
|---|---|---|---|---|
Single Product HD Render | AMS Product Detail Page or Utilities → Product Renderer page | ProductID | Unlimited | Single 2D image request produced from a single product (up to 8K) |
Single Product Bulk HD Renders | AMS Product Detail Page HD Render → Bulk Request tab | Bulk Order Sheet (.xlsx) with list of ProductIDs | Unlimited | Multiple 2D images produced in a single bulk order request |
Single Product Spin Render | AMS Product Renderer | ProductID | 32 preset spin angles + top view | 33 total images (“spin set”) produced in a single request |
Product Configurator HD Render | AMS Product Renderer | Single SKU in Configurator | Unlimited | Single 2D image request of a specific configuration at a specific angle |
Product Configurator Bulk HD Renders | AMS Product Renderer | Comma-separated list of SKUs in bulk input form | Unlimited | Multiple 2D images produced of multiple configurations at a specific angle, in a single bulk order request |
Product Configurator Spin Render | AMS Product Renderer | SKUs in Configurator | 32 preset spin angles + top view | 33 total images (“spin set”) of a specific configuration produced in a single request |
Product Configurator Rendering On Demand | Public-facing configurator | Specific configuration | Preset: Front 45°, Front, Back, Left, Right, Back 45° | Download HD Renders feature
|
Modular Configurator | Not yet supported | Not yet supported | Not yet supported | Not yet supported |
Room Planner | Public-facing | Room scene | Unlimited (camera positioning in Room Planner) |
Key Rendering Terminology
Render
The 2D image output that is produced by a 3D computer-generated image process, from a 3D model, applied virtual materials, camera positioning and lighting settings.
Resolution
The rendered image pixel size, in width x height. Resolution can be set anywhere from small thumbnails (e.g. 720 px x 720px) up to 8000 px x 8000px or more. When you hear the terms “2K, 4K, 8K” this typically means resolutions of 2000 px × 2000 px, 4000 px × 4000 px, 8000 px × 8000 px respectively (or close to these).
HDRI
An HDRI ((High Dynamic Range Image, also known as a “Skybox”) is a virtual, projected lighting environment that is used to control lighting and color tones on an image. Think of it as a virtual “studio setting” that is used in the rendering process to achieve photorealism similar to shooting a photo in a specific photo studio environment.
HDRI images are typically in a spherical panoramic format, which 3D Cloud converts to cube maps (six square faces) for optimal GPU performance and accurate image-based lighting in our 3D rendering workflow. The cube map wraps around 3D models like an invisible sphere, projecting realistic lighting from all directions.
.png)
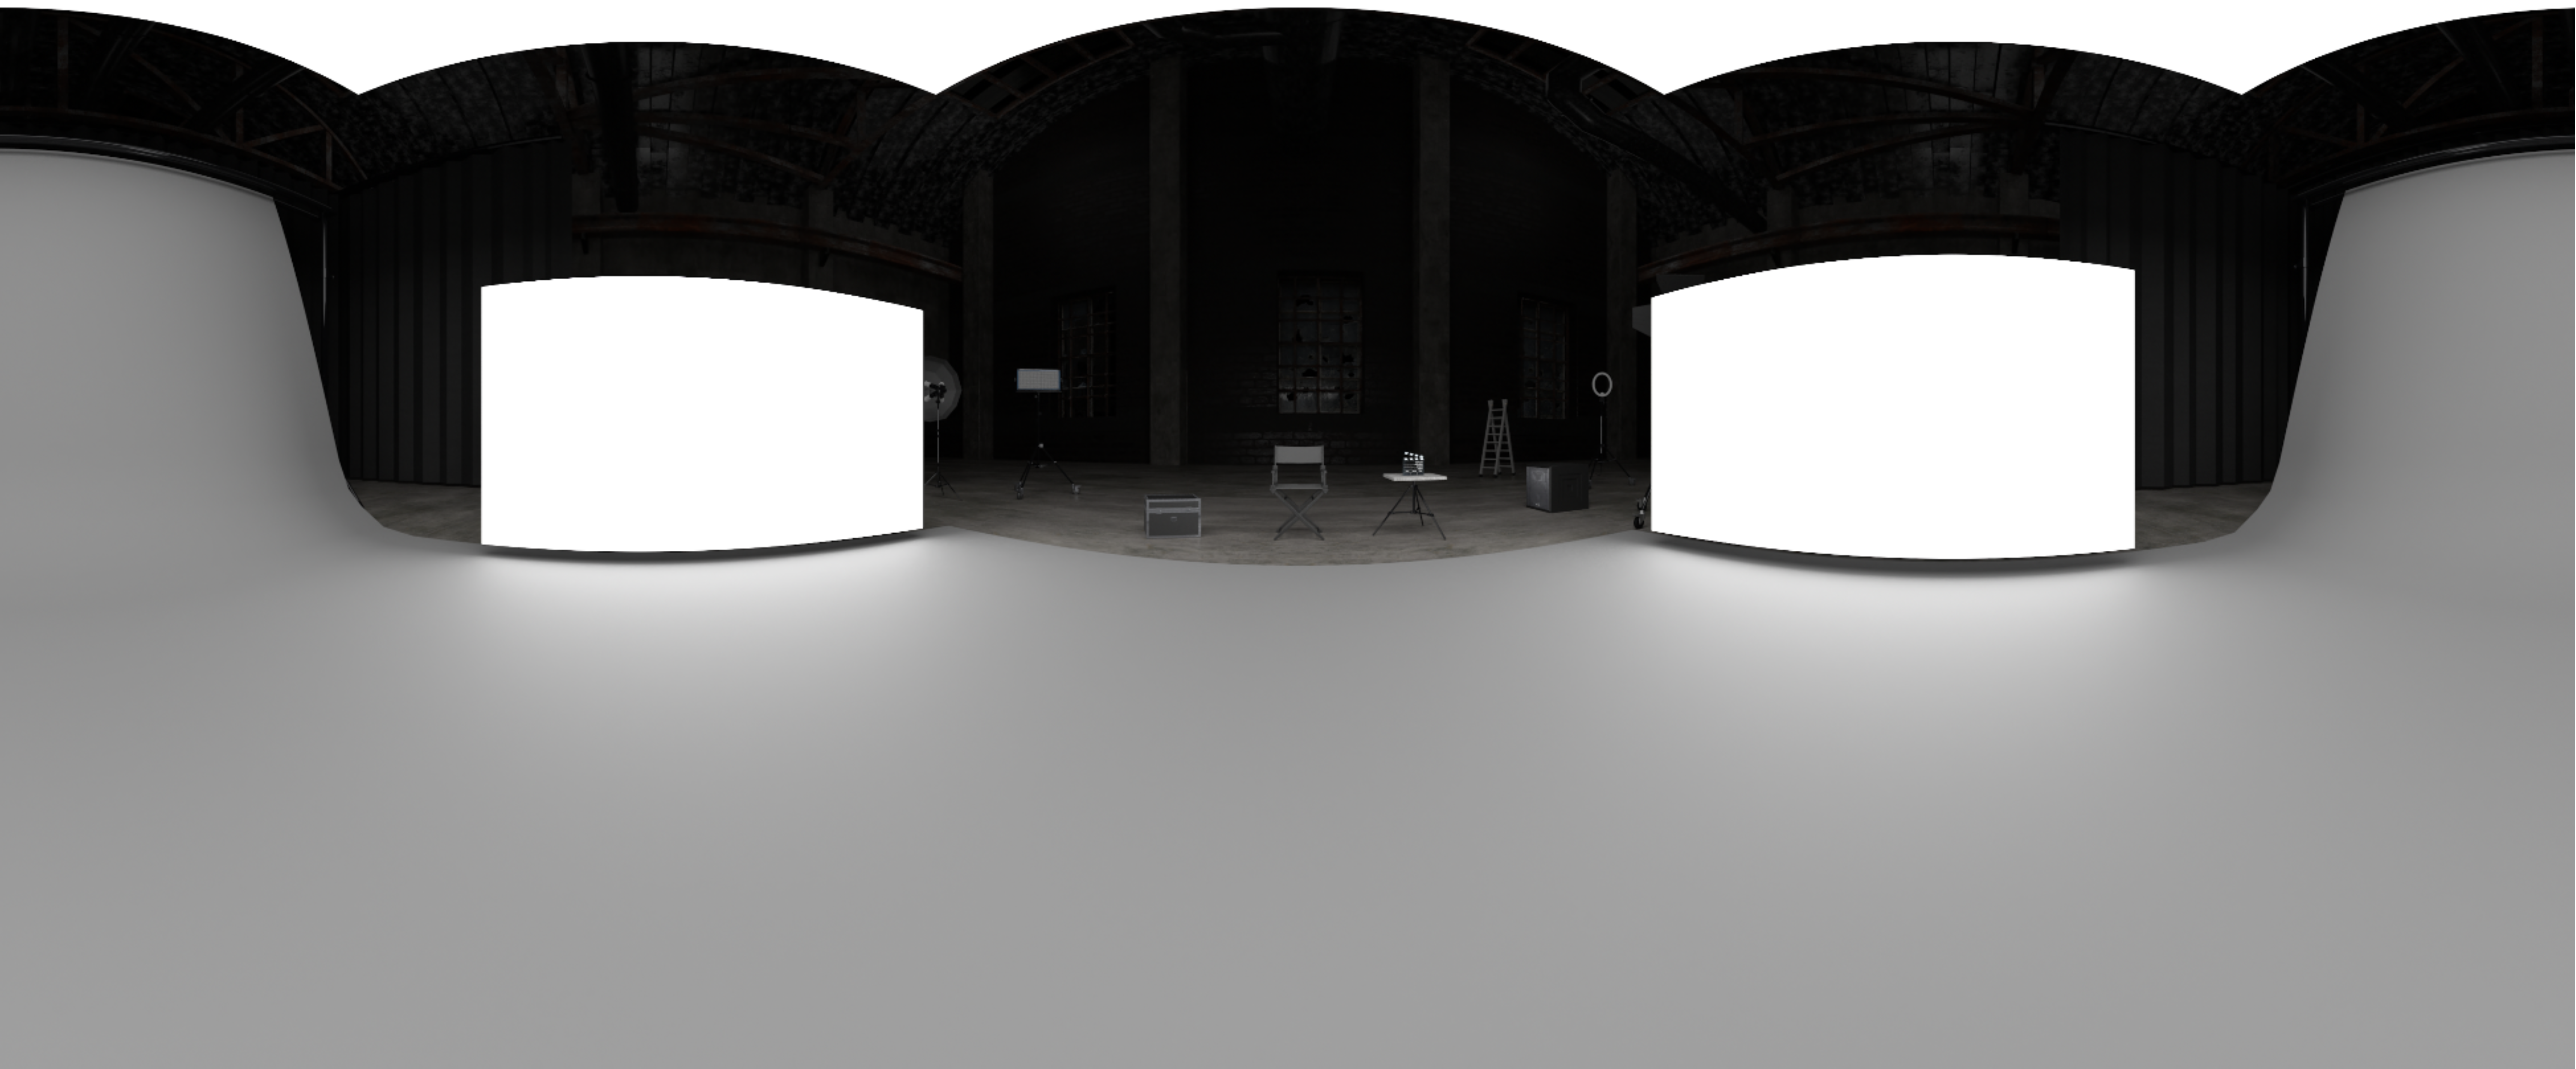
Example HDRI used for 360° Spin Renders
Presets
In the 3D Cloud AMS, a Preset is specific set of stored camera position, camera settings, lighting settings, and other Advanced Options parameters that are saved for use on one or more render jobs. These “Presets” are used to create templated cropping and lighting scenarios that can be used across products and product categories, in single or bulk render jobs.
The main reason to use a Preset is to save time setting up your desired render configuration before submitting a render job.
When a Product is loaded into the Product Renders 3D preview window, clicking on a saved Custom Preset “snaps” the camera into position and applies all of the preset resolution, camera and lighting settings.

Custom Presets
Every Preset has a unique Preset ID which can be viewed when you click on the “expand arrows” icon when you hover on the upper right of the Preset thumbnail image.
|  Viewing a Preset ID |
|---|
If you ever need to copy the current Preset ID (for use in a Bulk Render Request sheet, for example) you can click on the “Copy” icon in the lower right of the 3D product preview window and then select “Copy Selected Preset ID”.
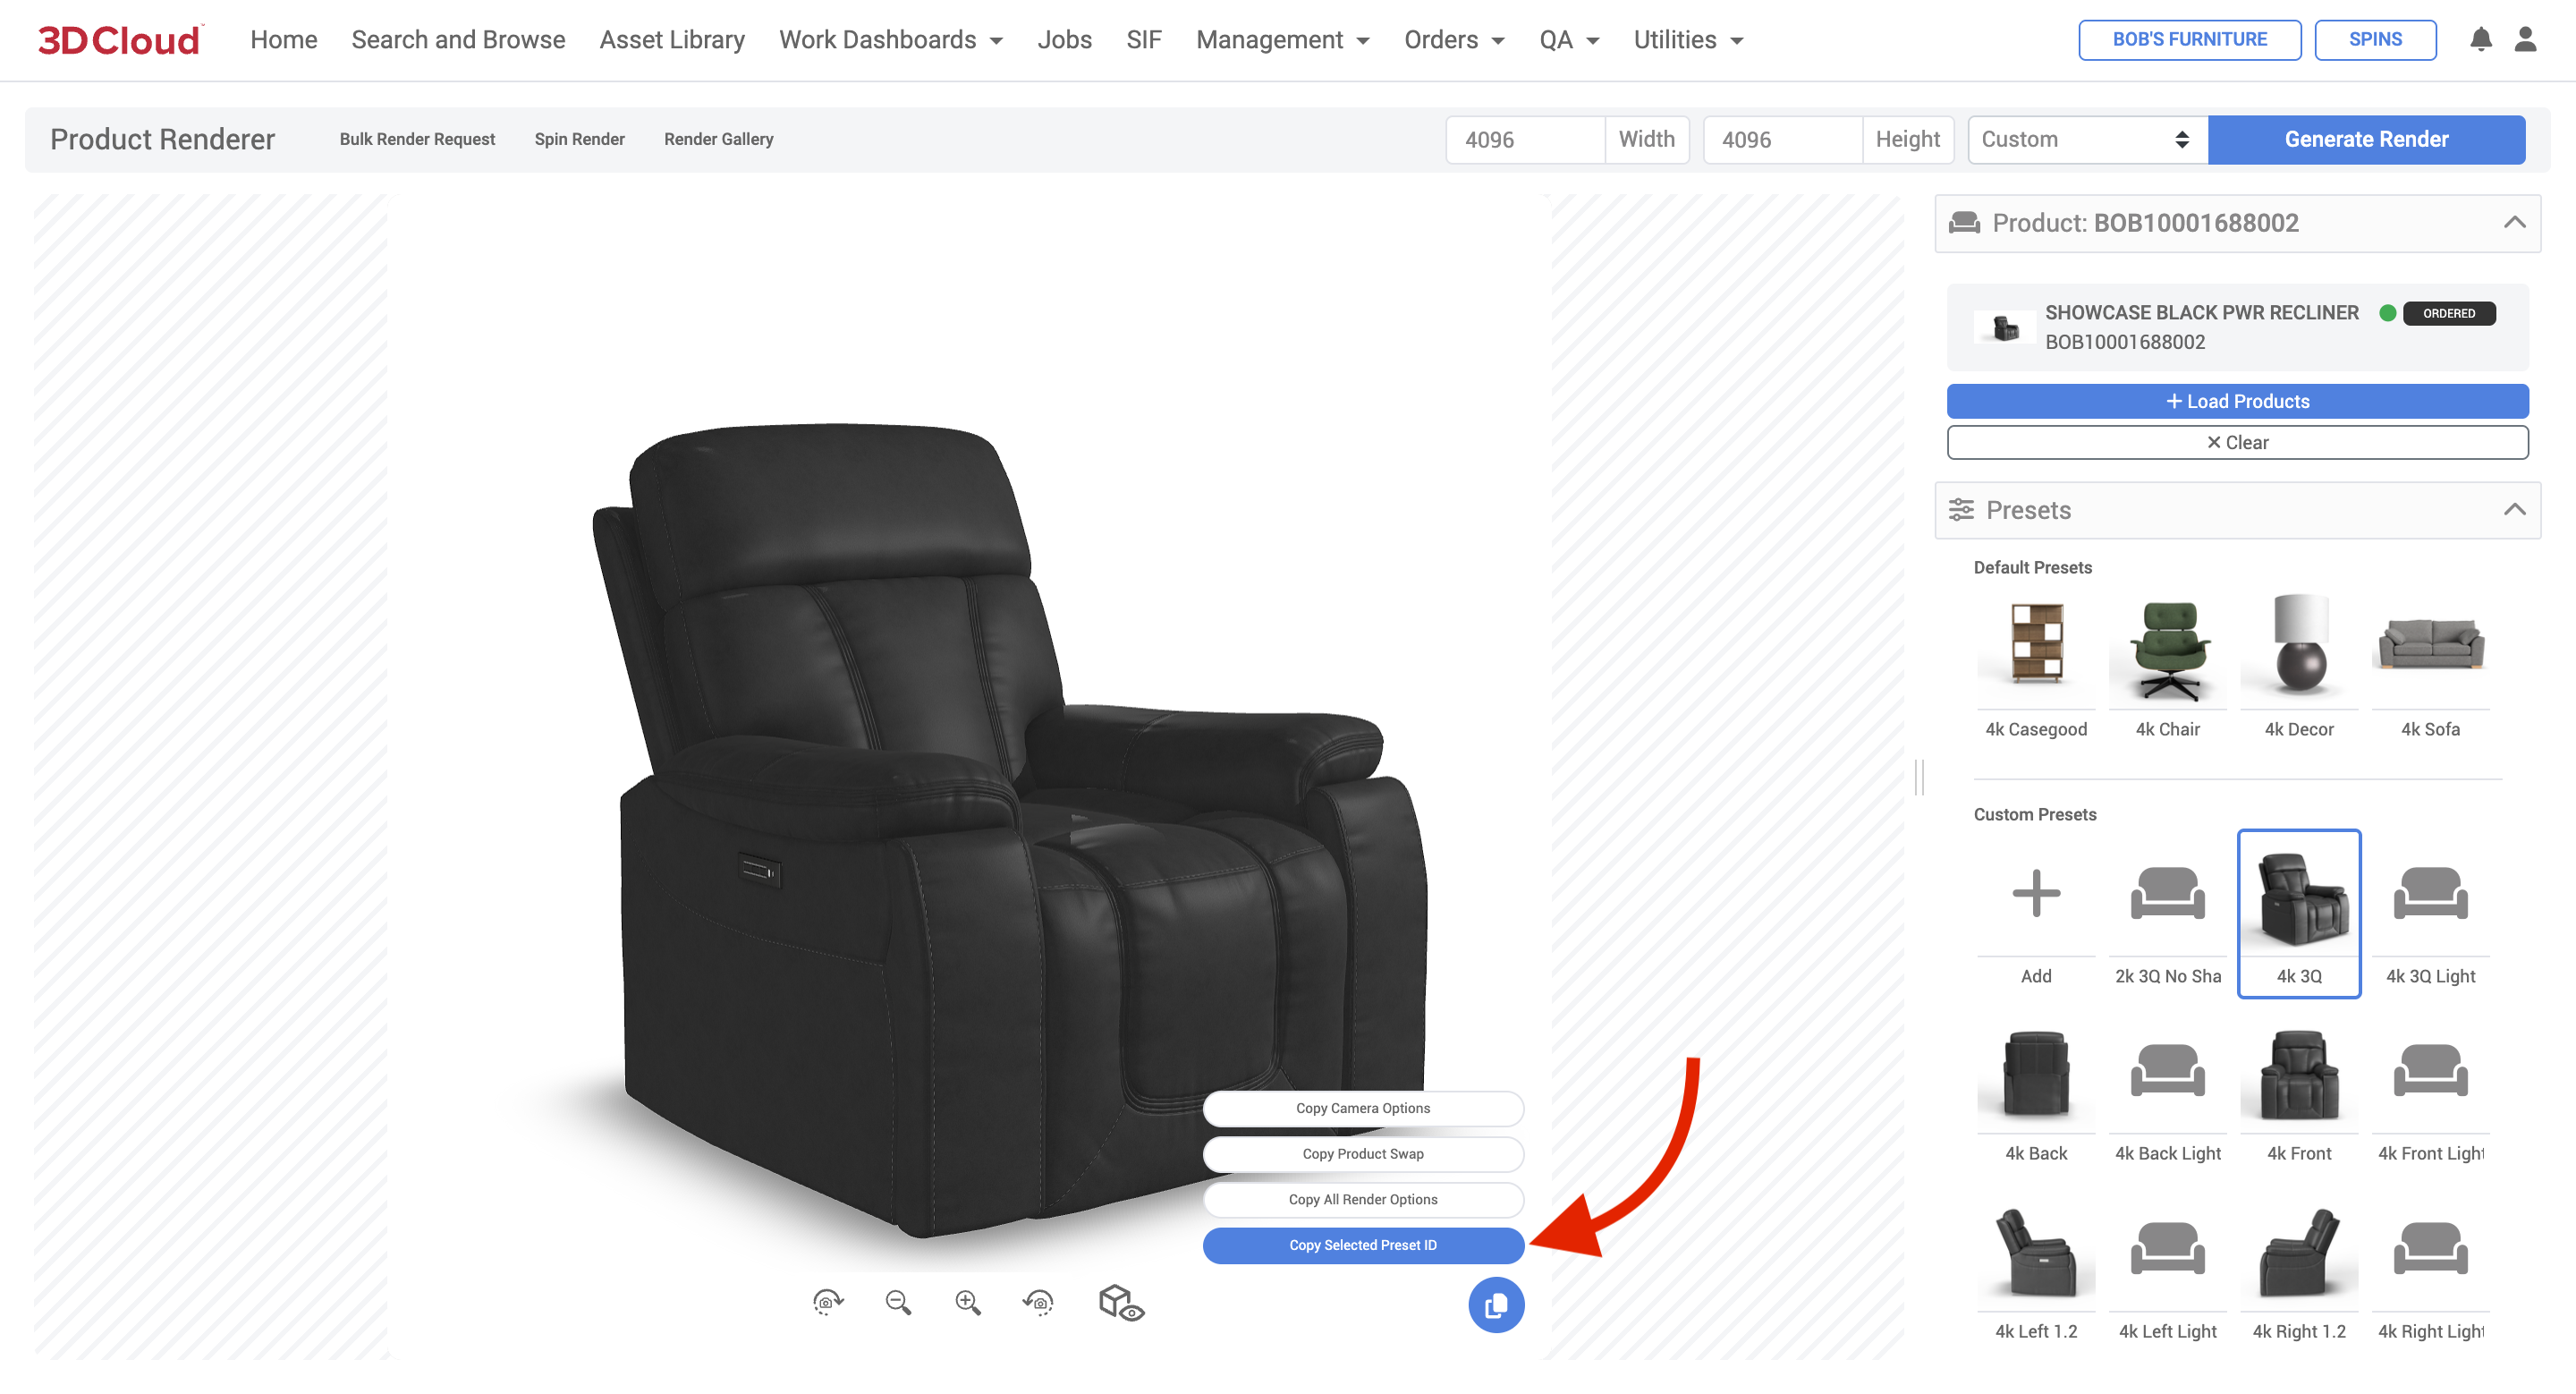
Copy Selected Preset ID button
How to Create a Custom Preset
Go to the Product Renders section and load a product.
On the Product Render view, you can select an existing preset (as a starting point for a new preset).
Currently, presets can only be created, but not edited.Set your desired camera and lighting settings under “Advanced Options”.
Note: The 3D preview window will dynamically show the Camera Position and Scene settings, but will not provide a real-time preview of the Lighting settings or the exact angle of the rendered shadow.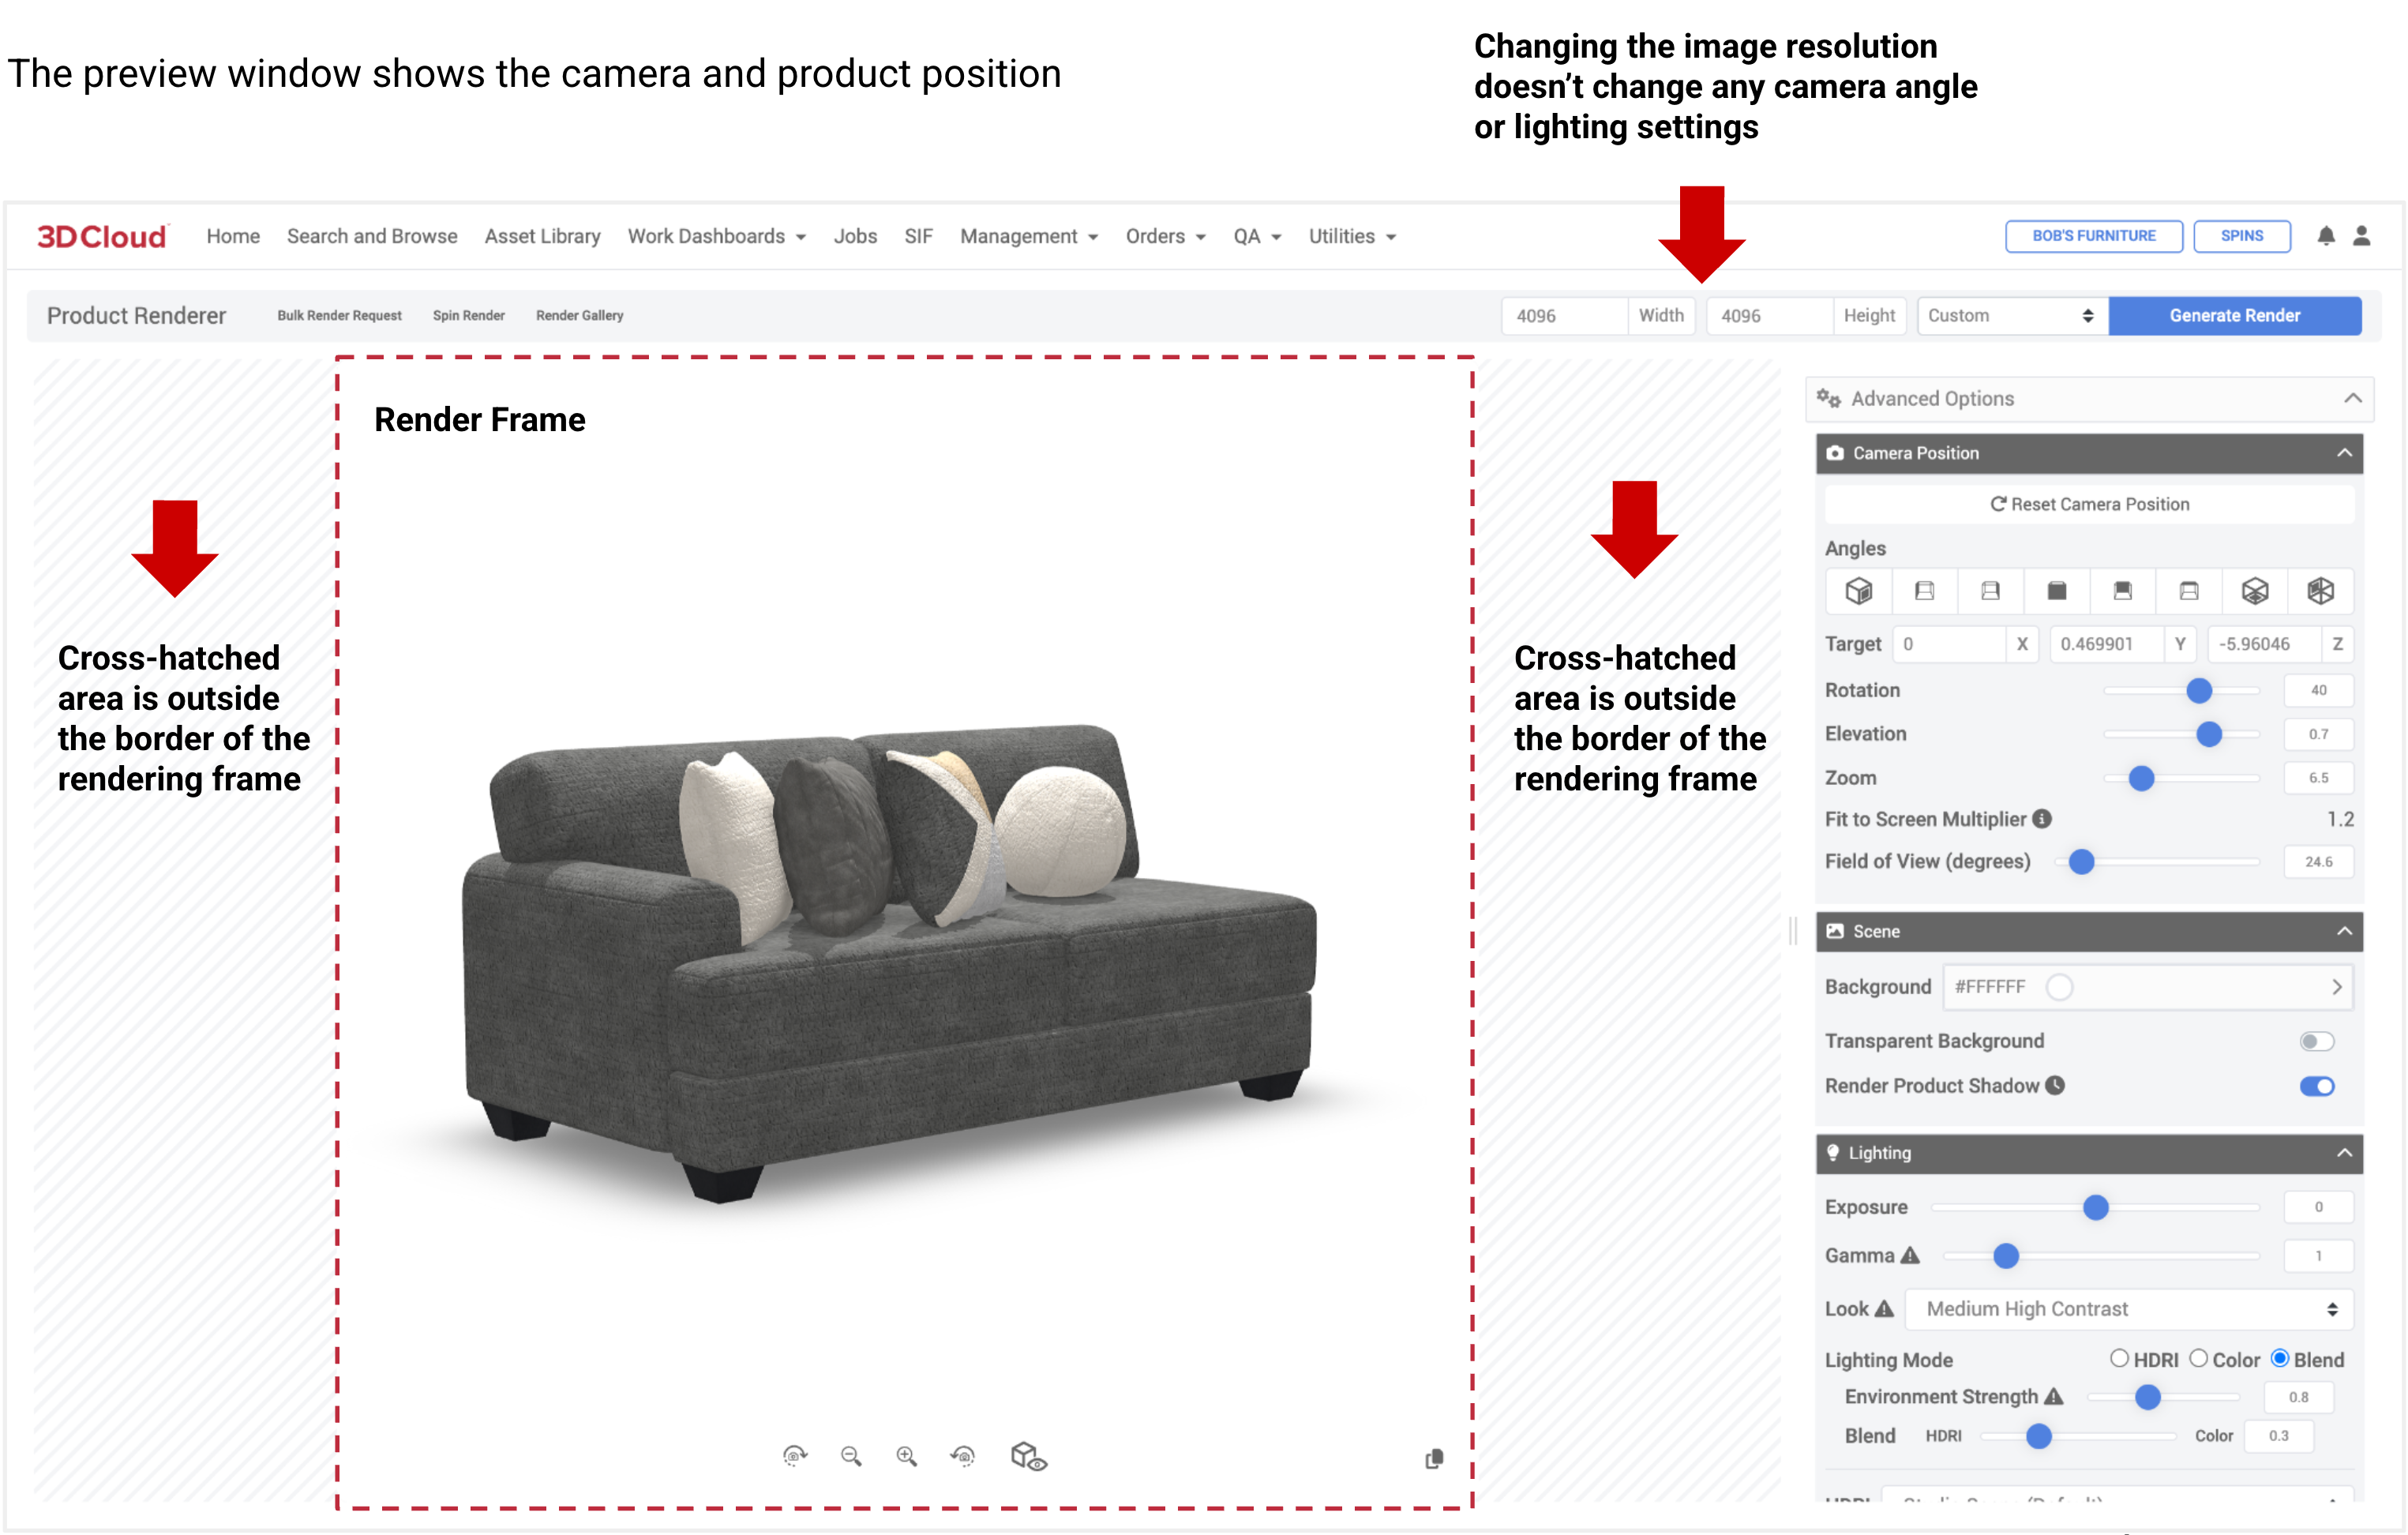
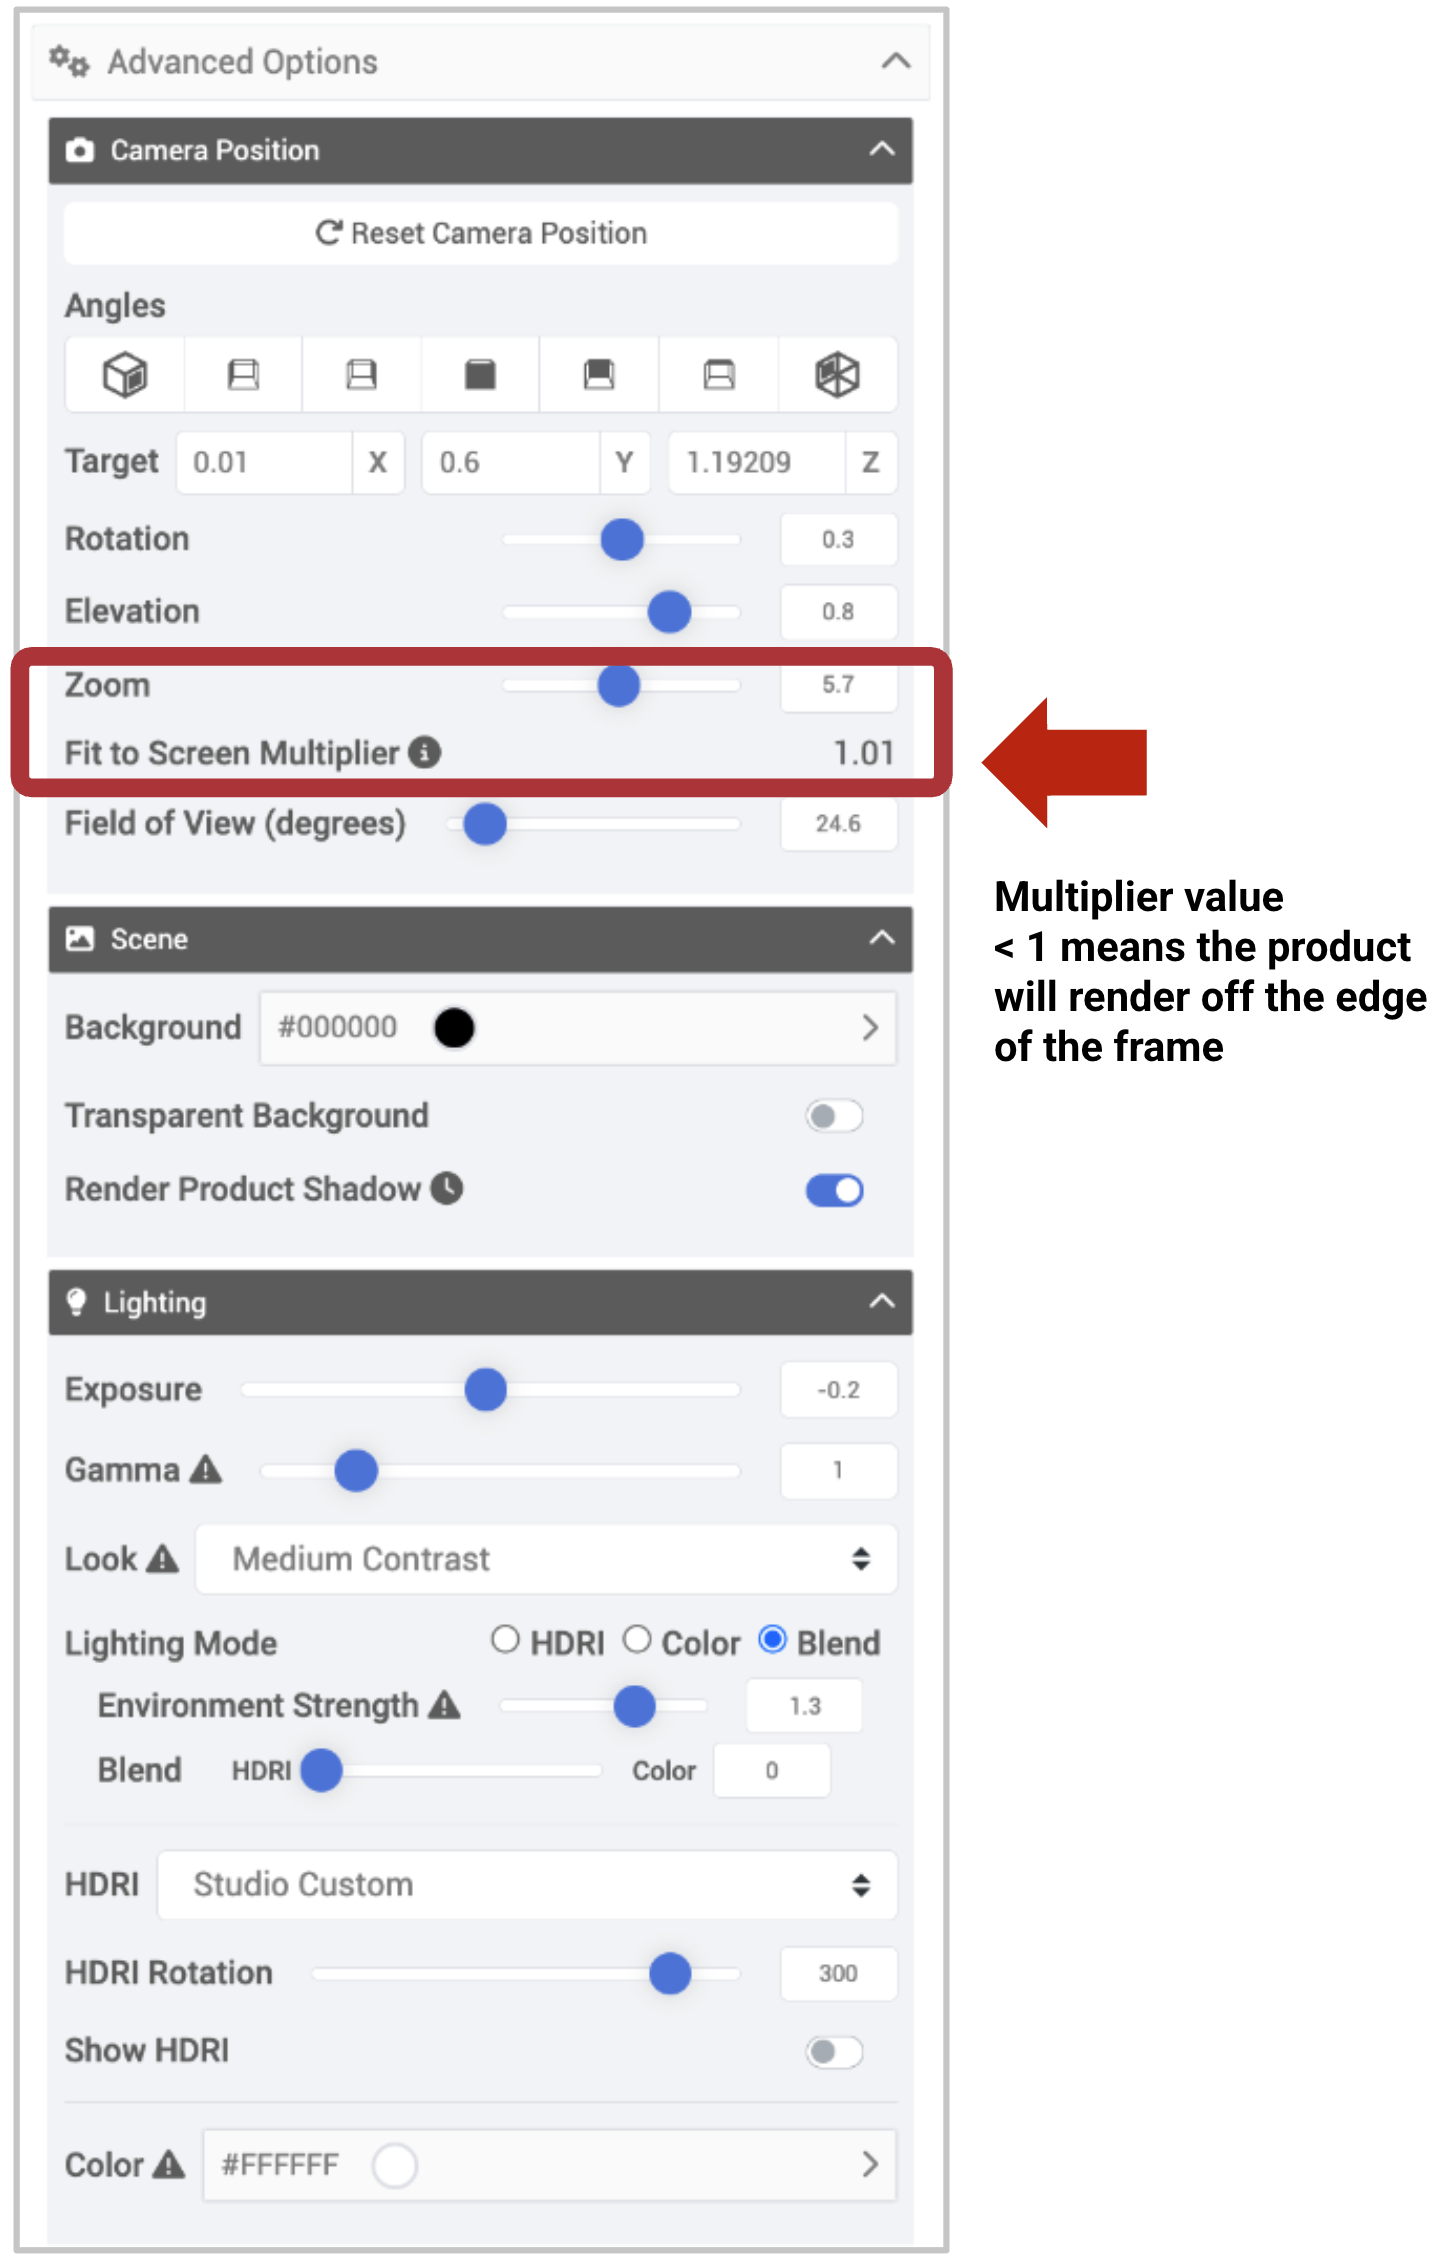
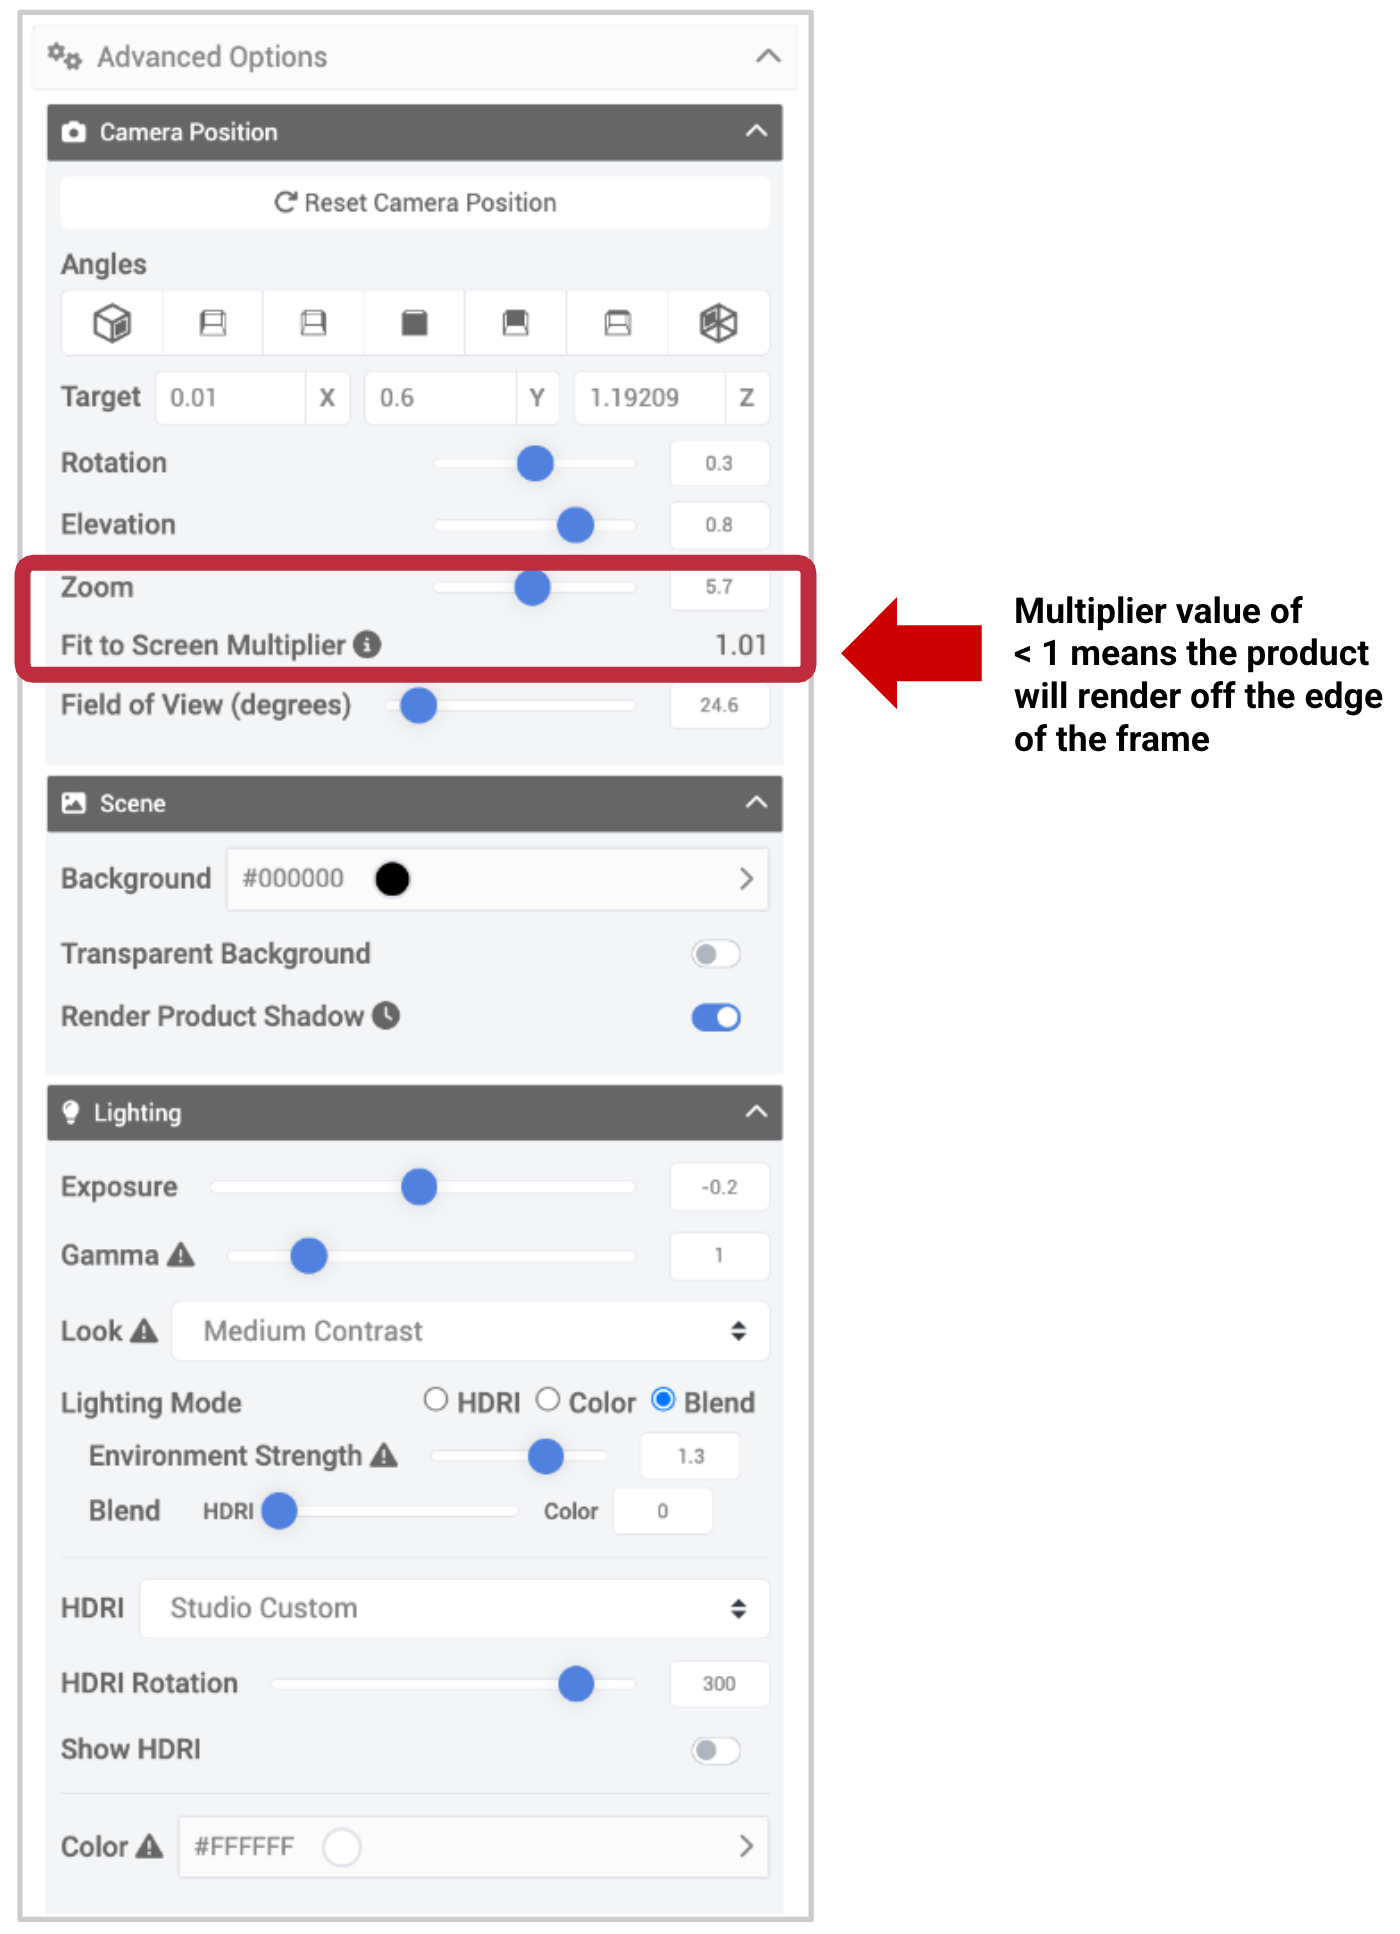
When setting presets, take note of the Fit-to-Screen Multiplier value. If it is less than 1.0 the product may render too large for the image canvas. The “sweet spot” Fit-to-Screen Multiplier value is around 1.2.
When you are done with settings, click the “Create New Preset” button at the bottom of the right hand panel.
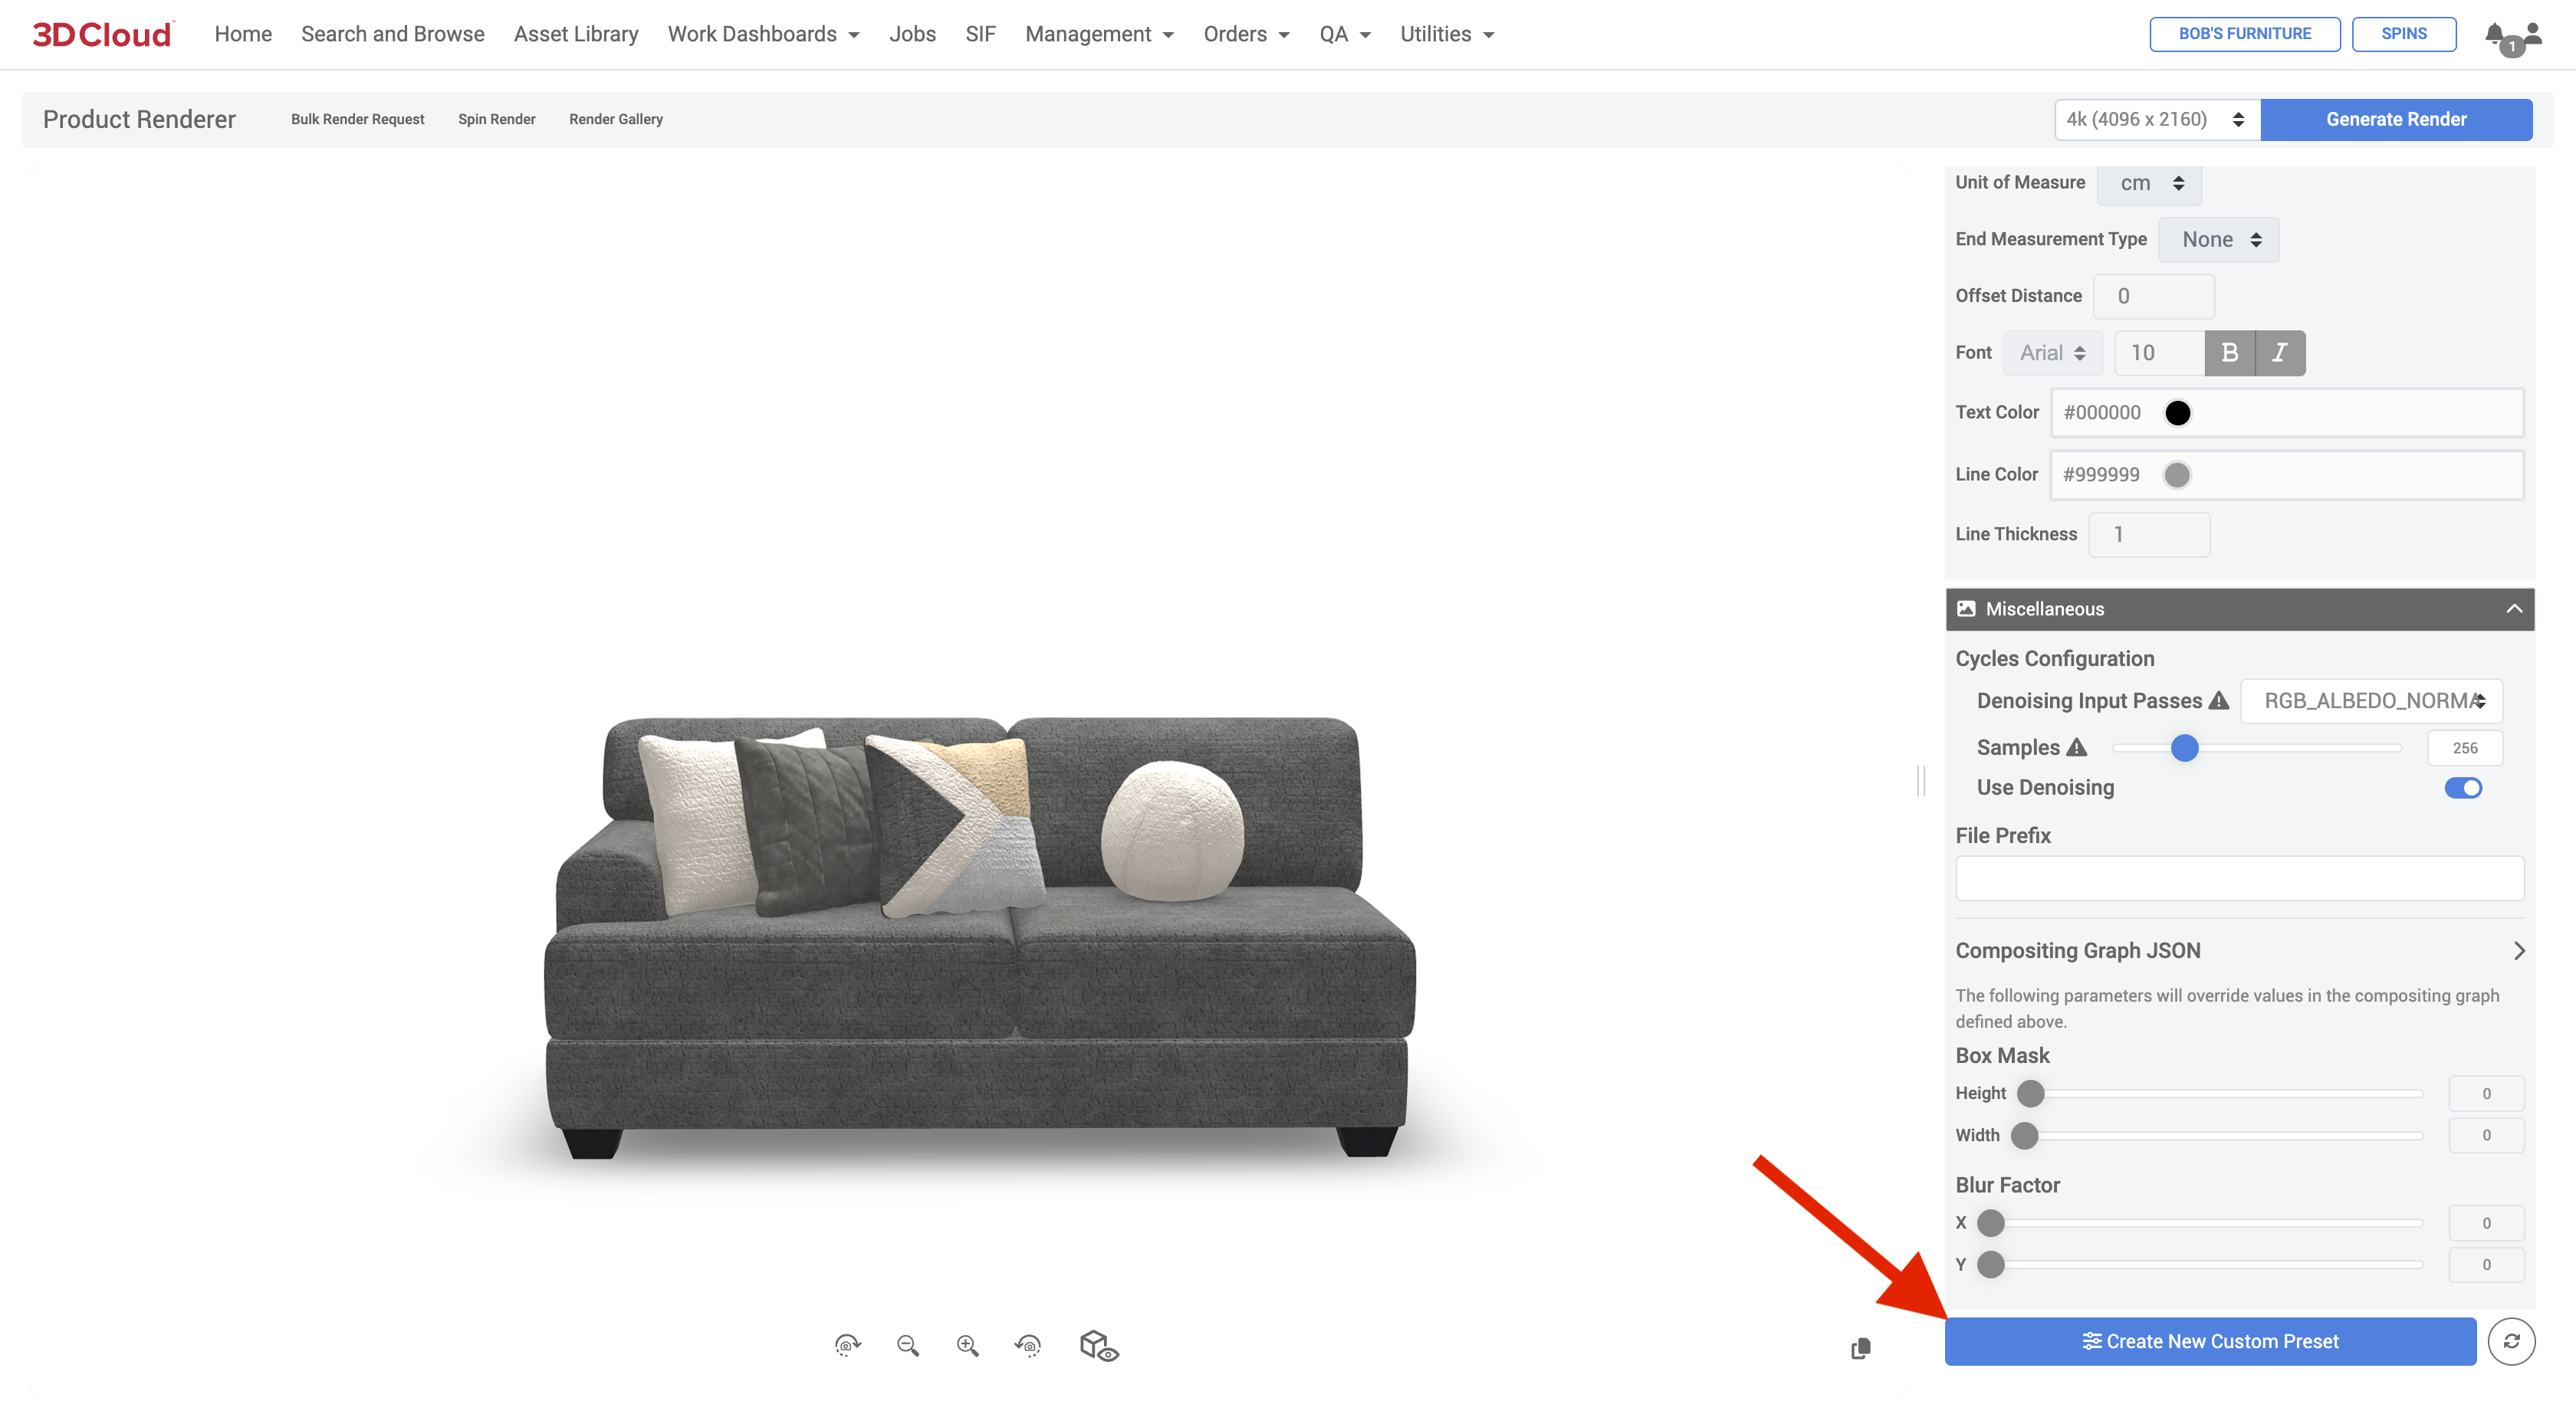
After creating the new custom preset, the copy icon in the lower-right of the 3D preview window can be used to Copy the Selected Preset ID, Camera Options, Product Swap, or All Render Options for use in a bulk render sheet.
.png)
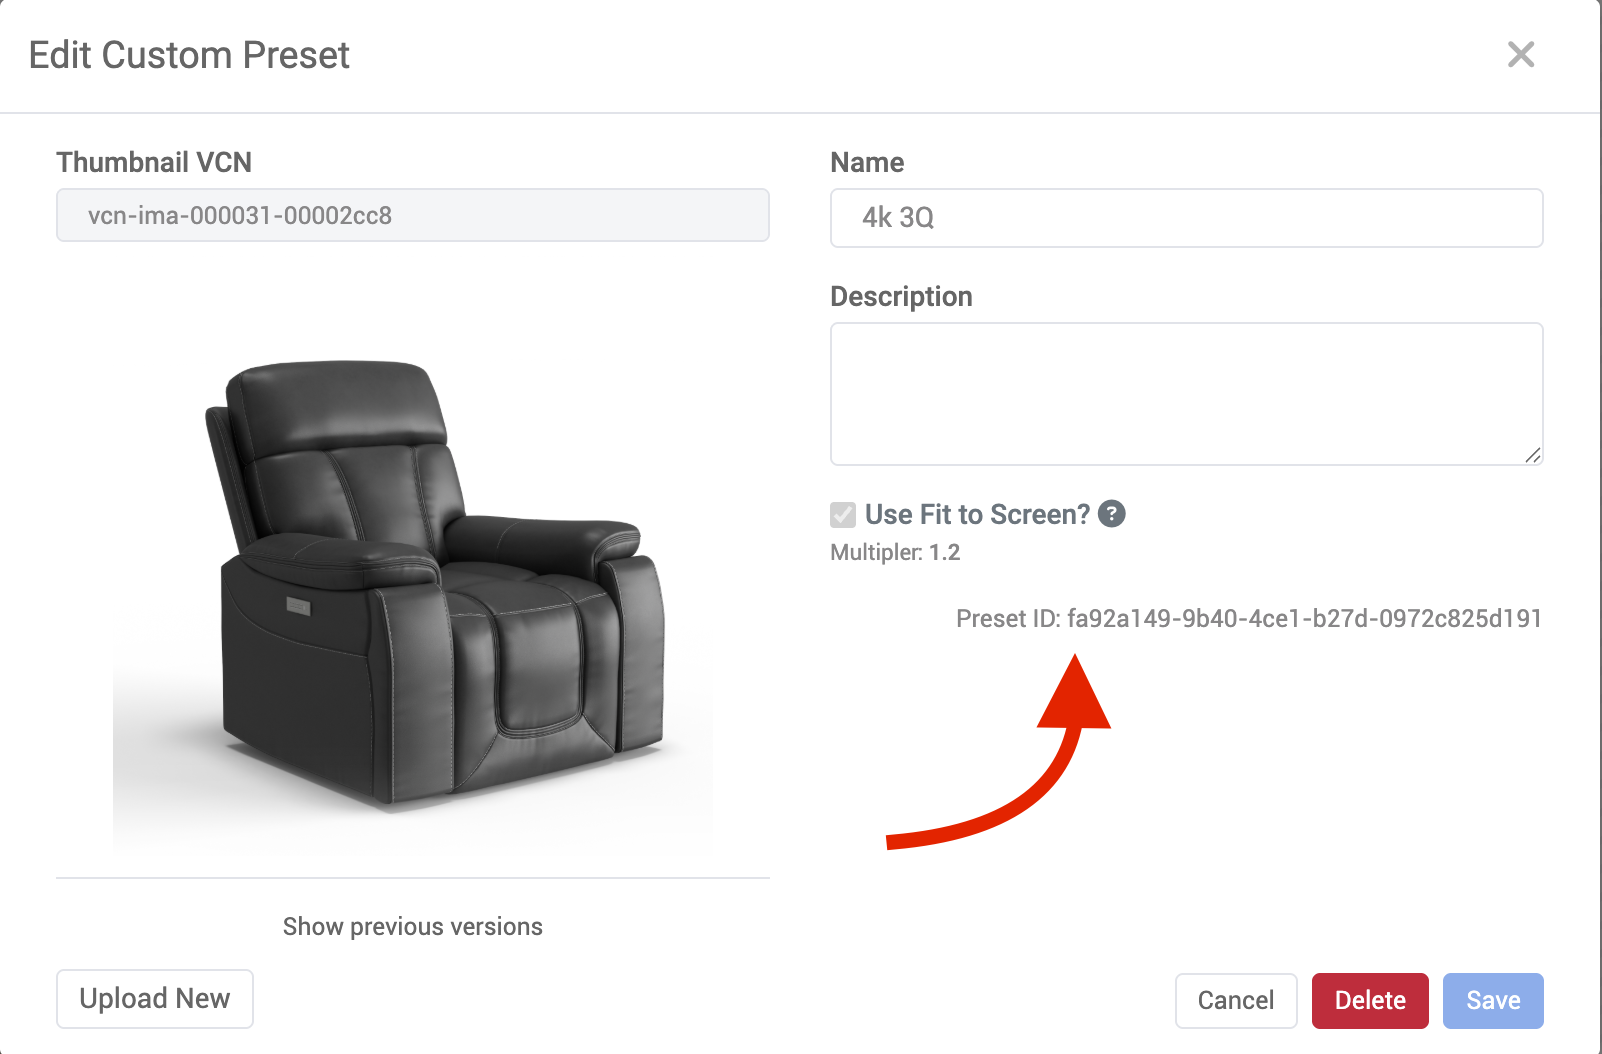
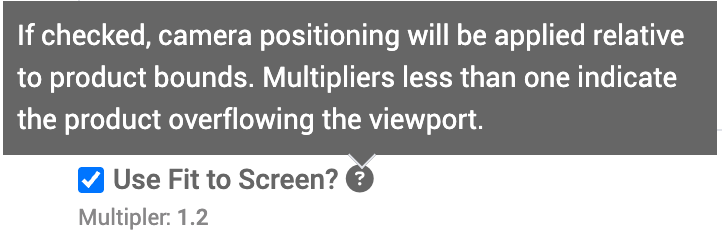
You will be prompted for a Preset Name (required), Description (optional) and whether or not you want to use the Fit to Screen multiplier value.
If you check the “Use Fit to Screen” check box, any product rendered with this preset, regardless of size, will be scaled on the canvas to approximate the same amount of white space around the product.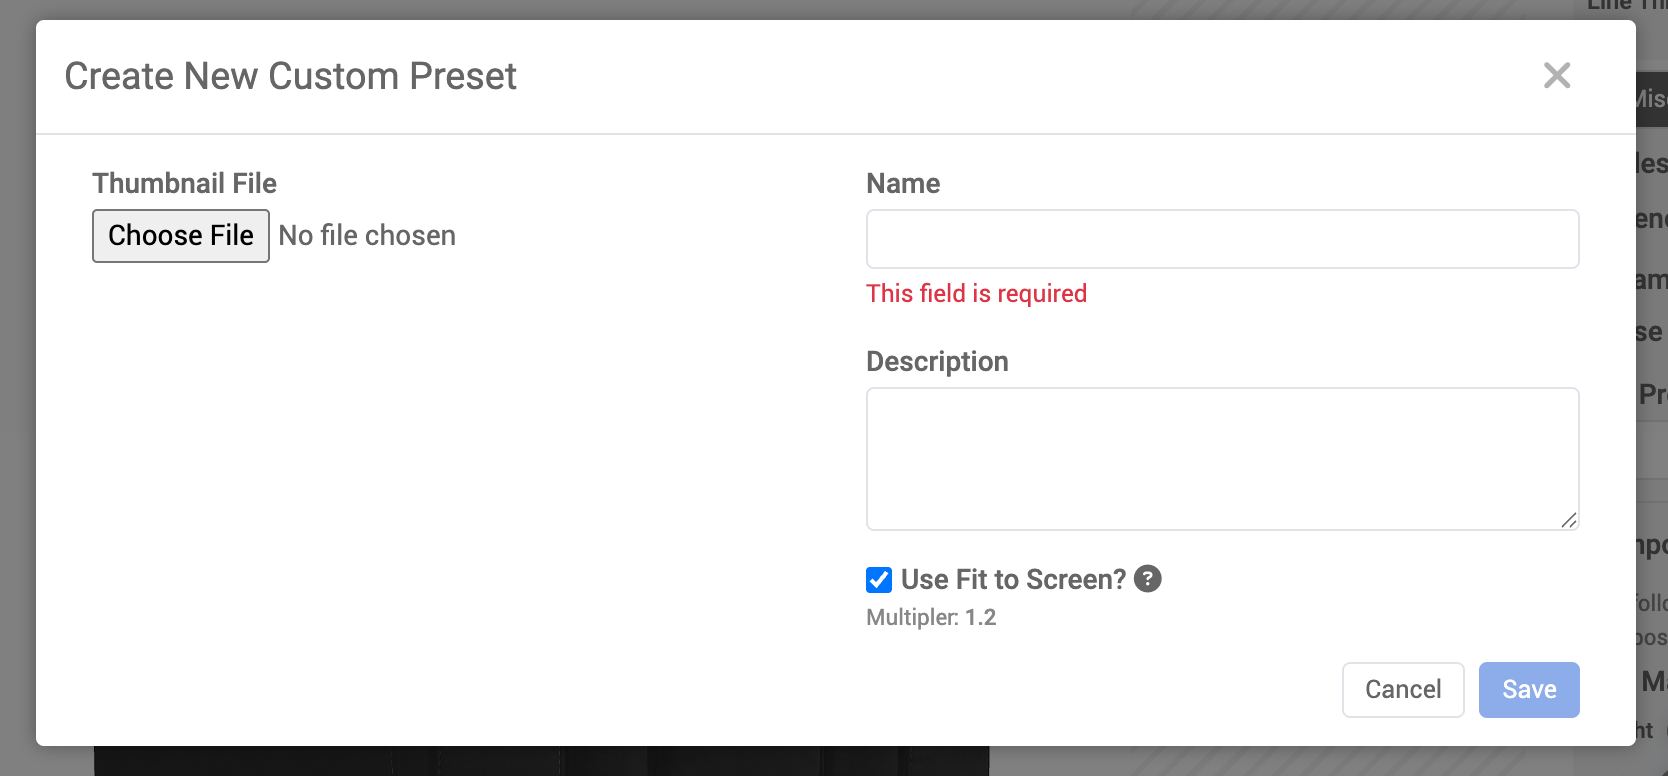
You can also choose to upload a square thumbnail image to be used as the Preset icon.
Click the “Save” button or “Cancel” to exit without saving.The Preset is now available for use in the Custom Presets area.
Note: In order to create Presets, your user permissions must have the PRODUCT_RENDER_PRESET_MANAGER feature set.
A Custom Preset can also be generated from an existing render in the Render Gallery of a particular product. Just select an image from the Render Gallery so the Render Info panel is displayed, and click the “Create Preset” link in the Render Info area.
.png)
Creating a Preset from an Image in the Render Gallery
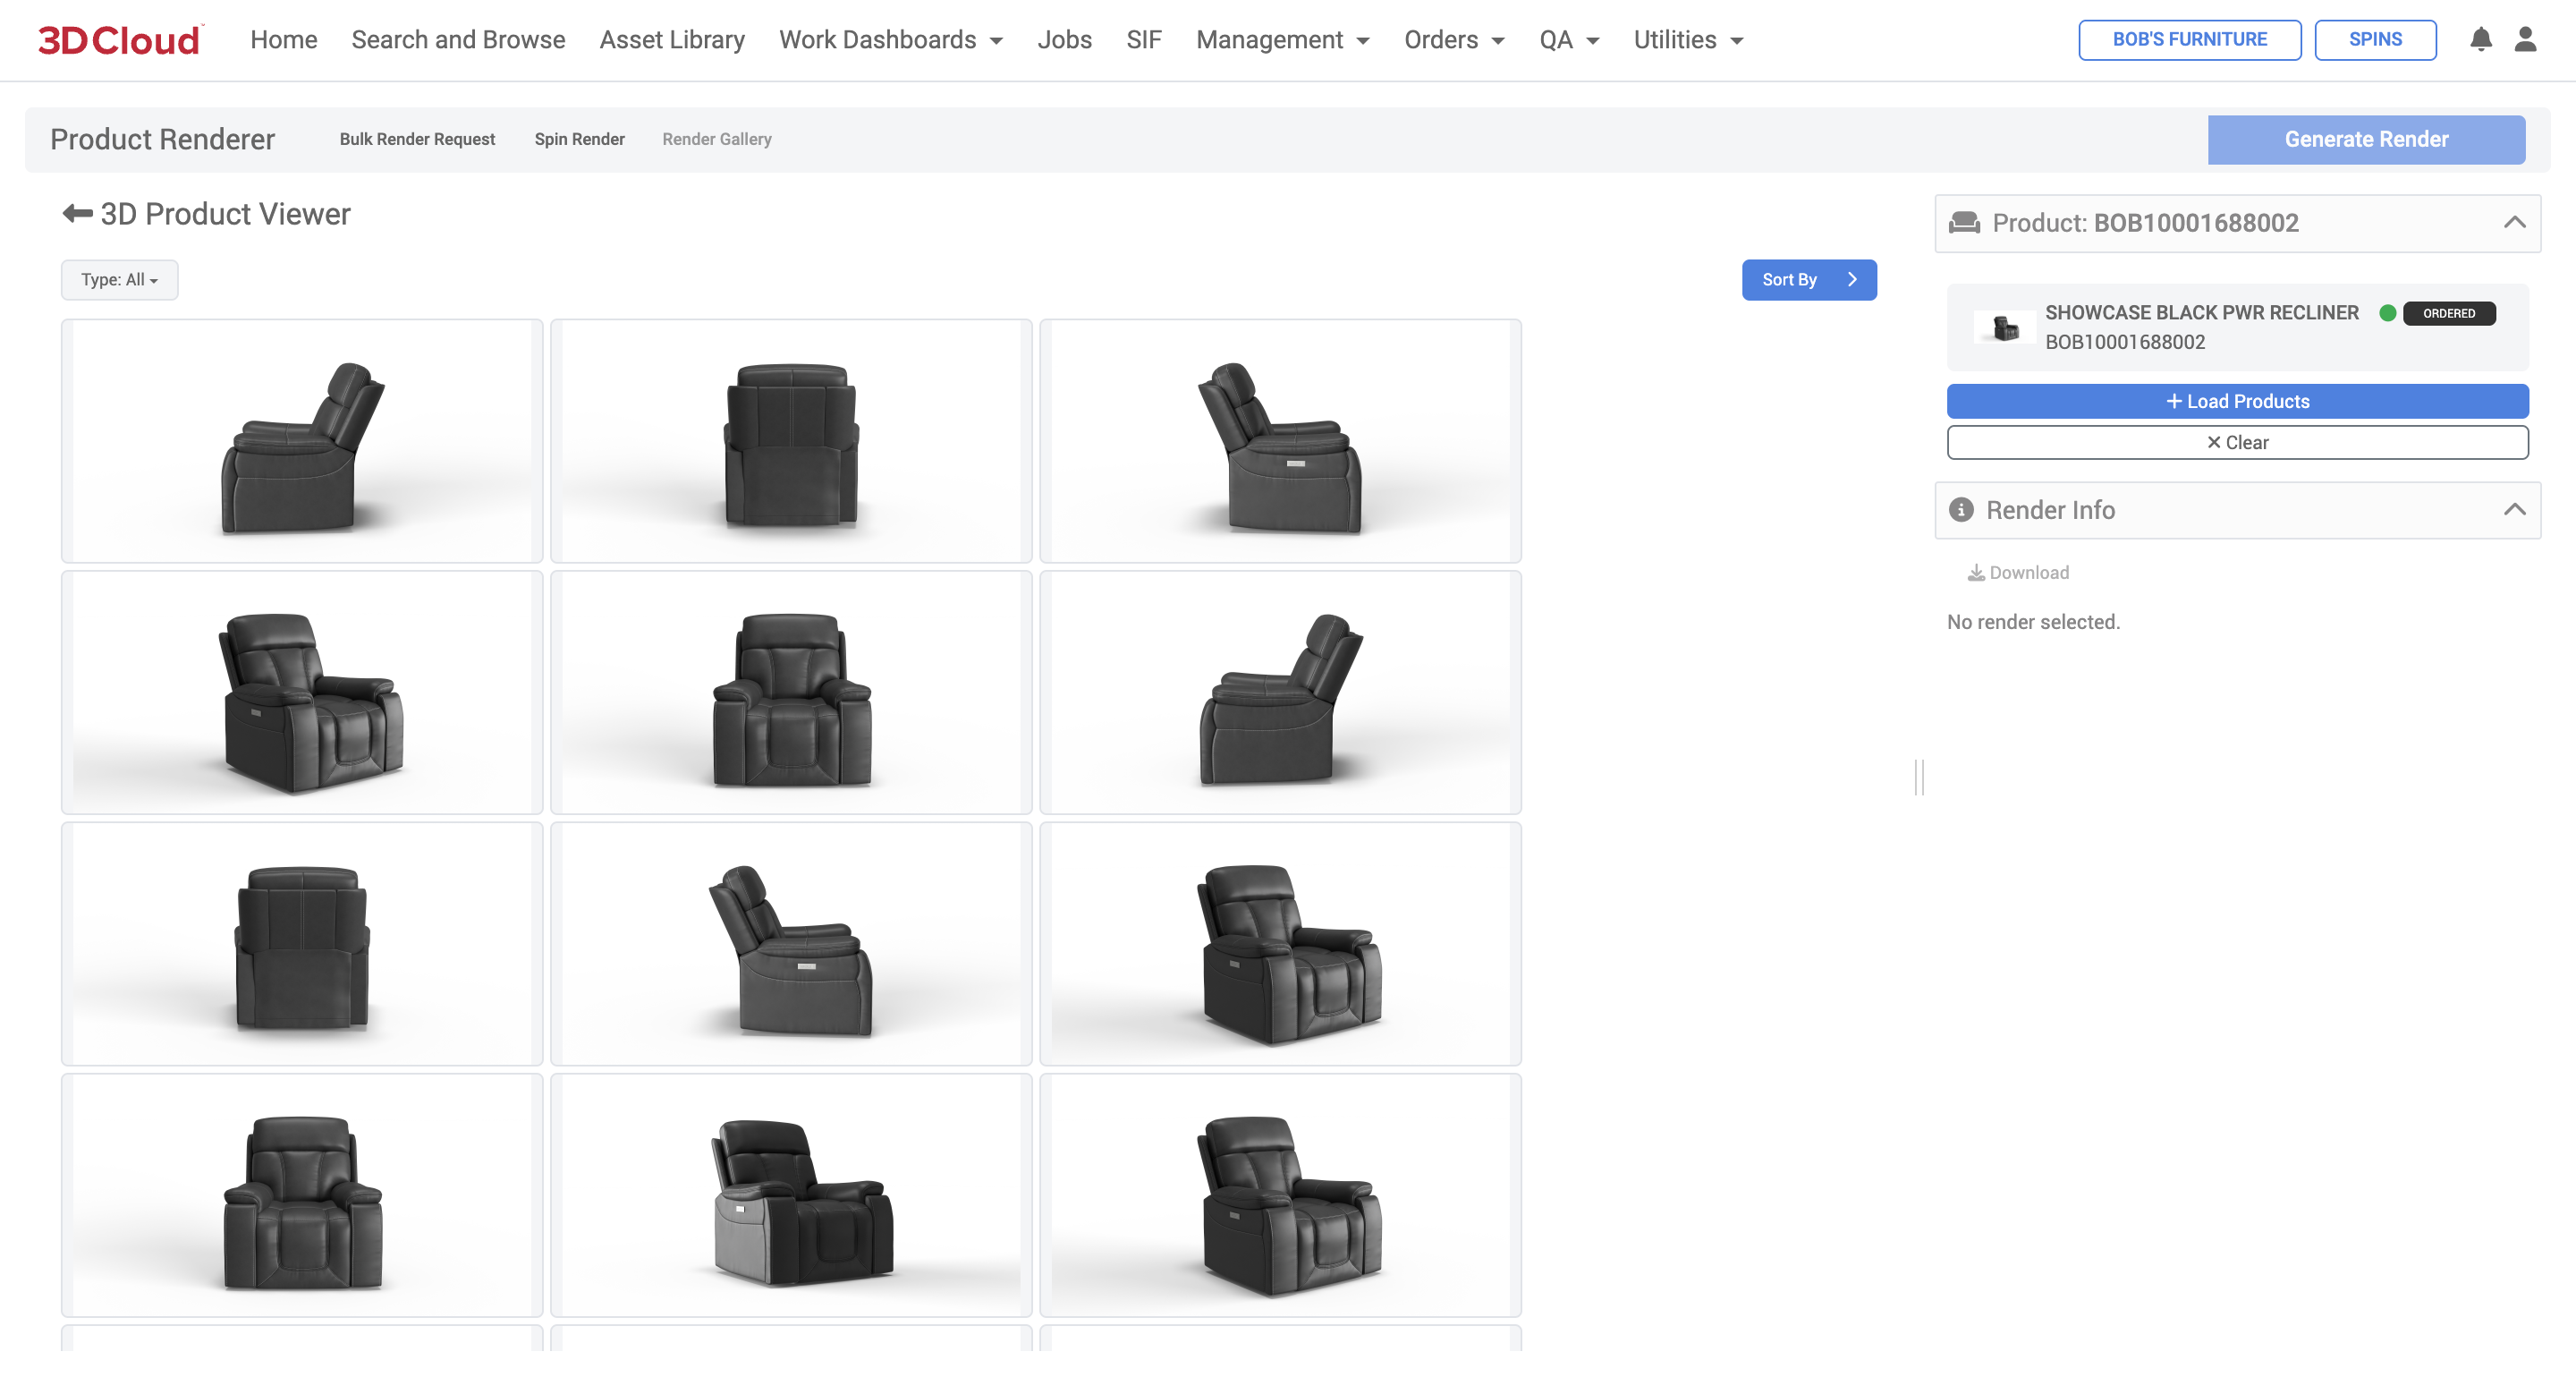
Single Product Renders
Single Product Renders is the term given to the process of generating a rendered image of a single particular product at a particular camera angle. Each render “job” is submitted one-at-a-time, rather than in a batch job—typically requiring individual camera positioning and lighting adjustments.
Initiating a Product Render
A product render can be initiated on the Utilities → Product Renderer page, or from any individual Product Description Page.
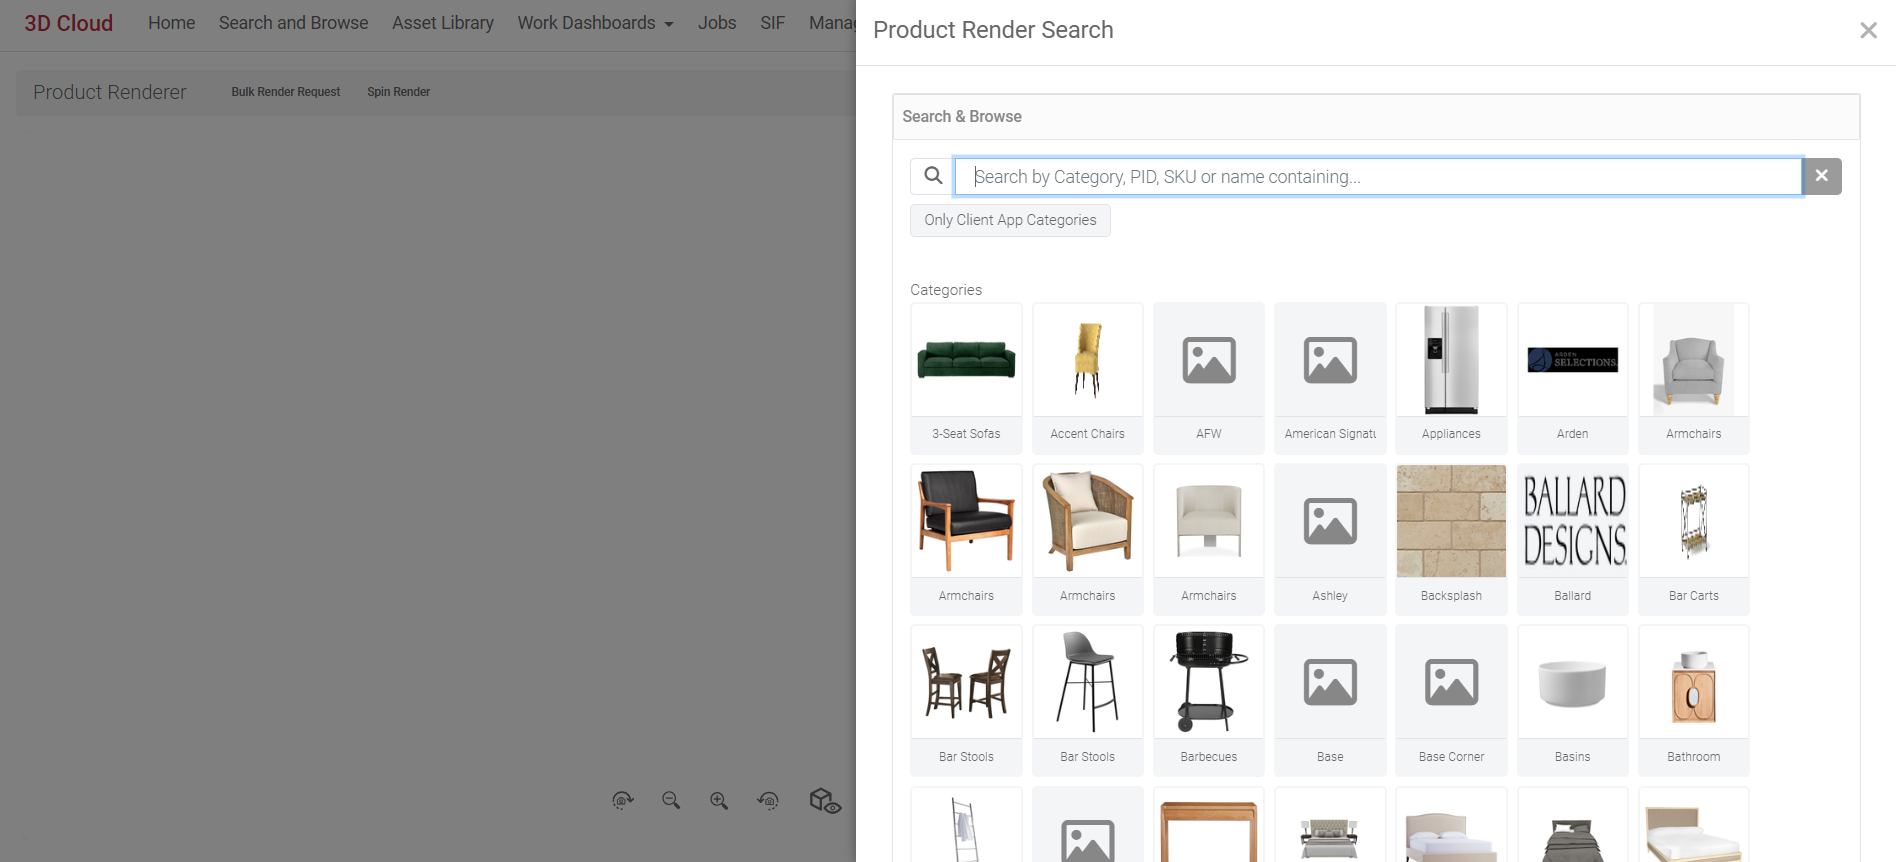
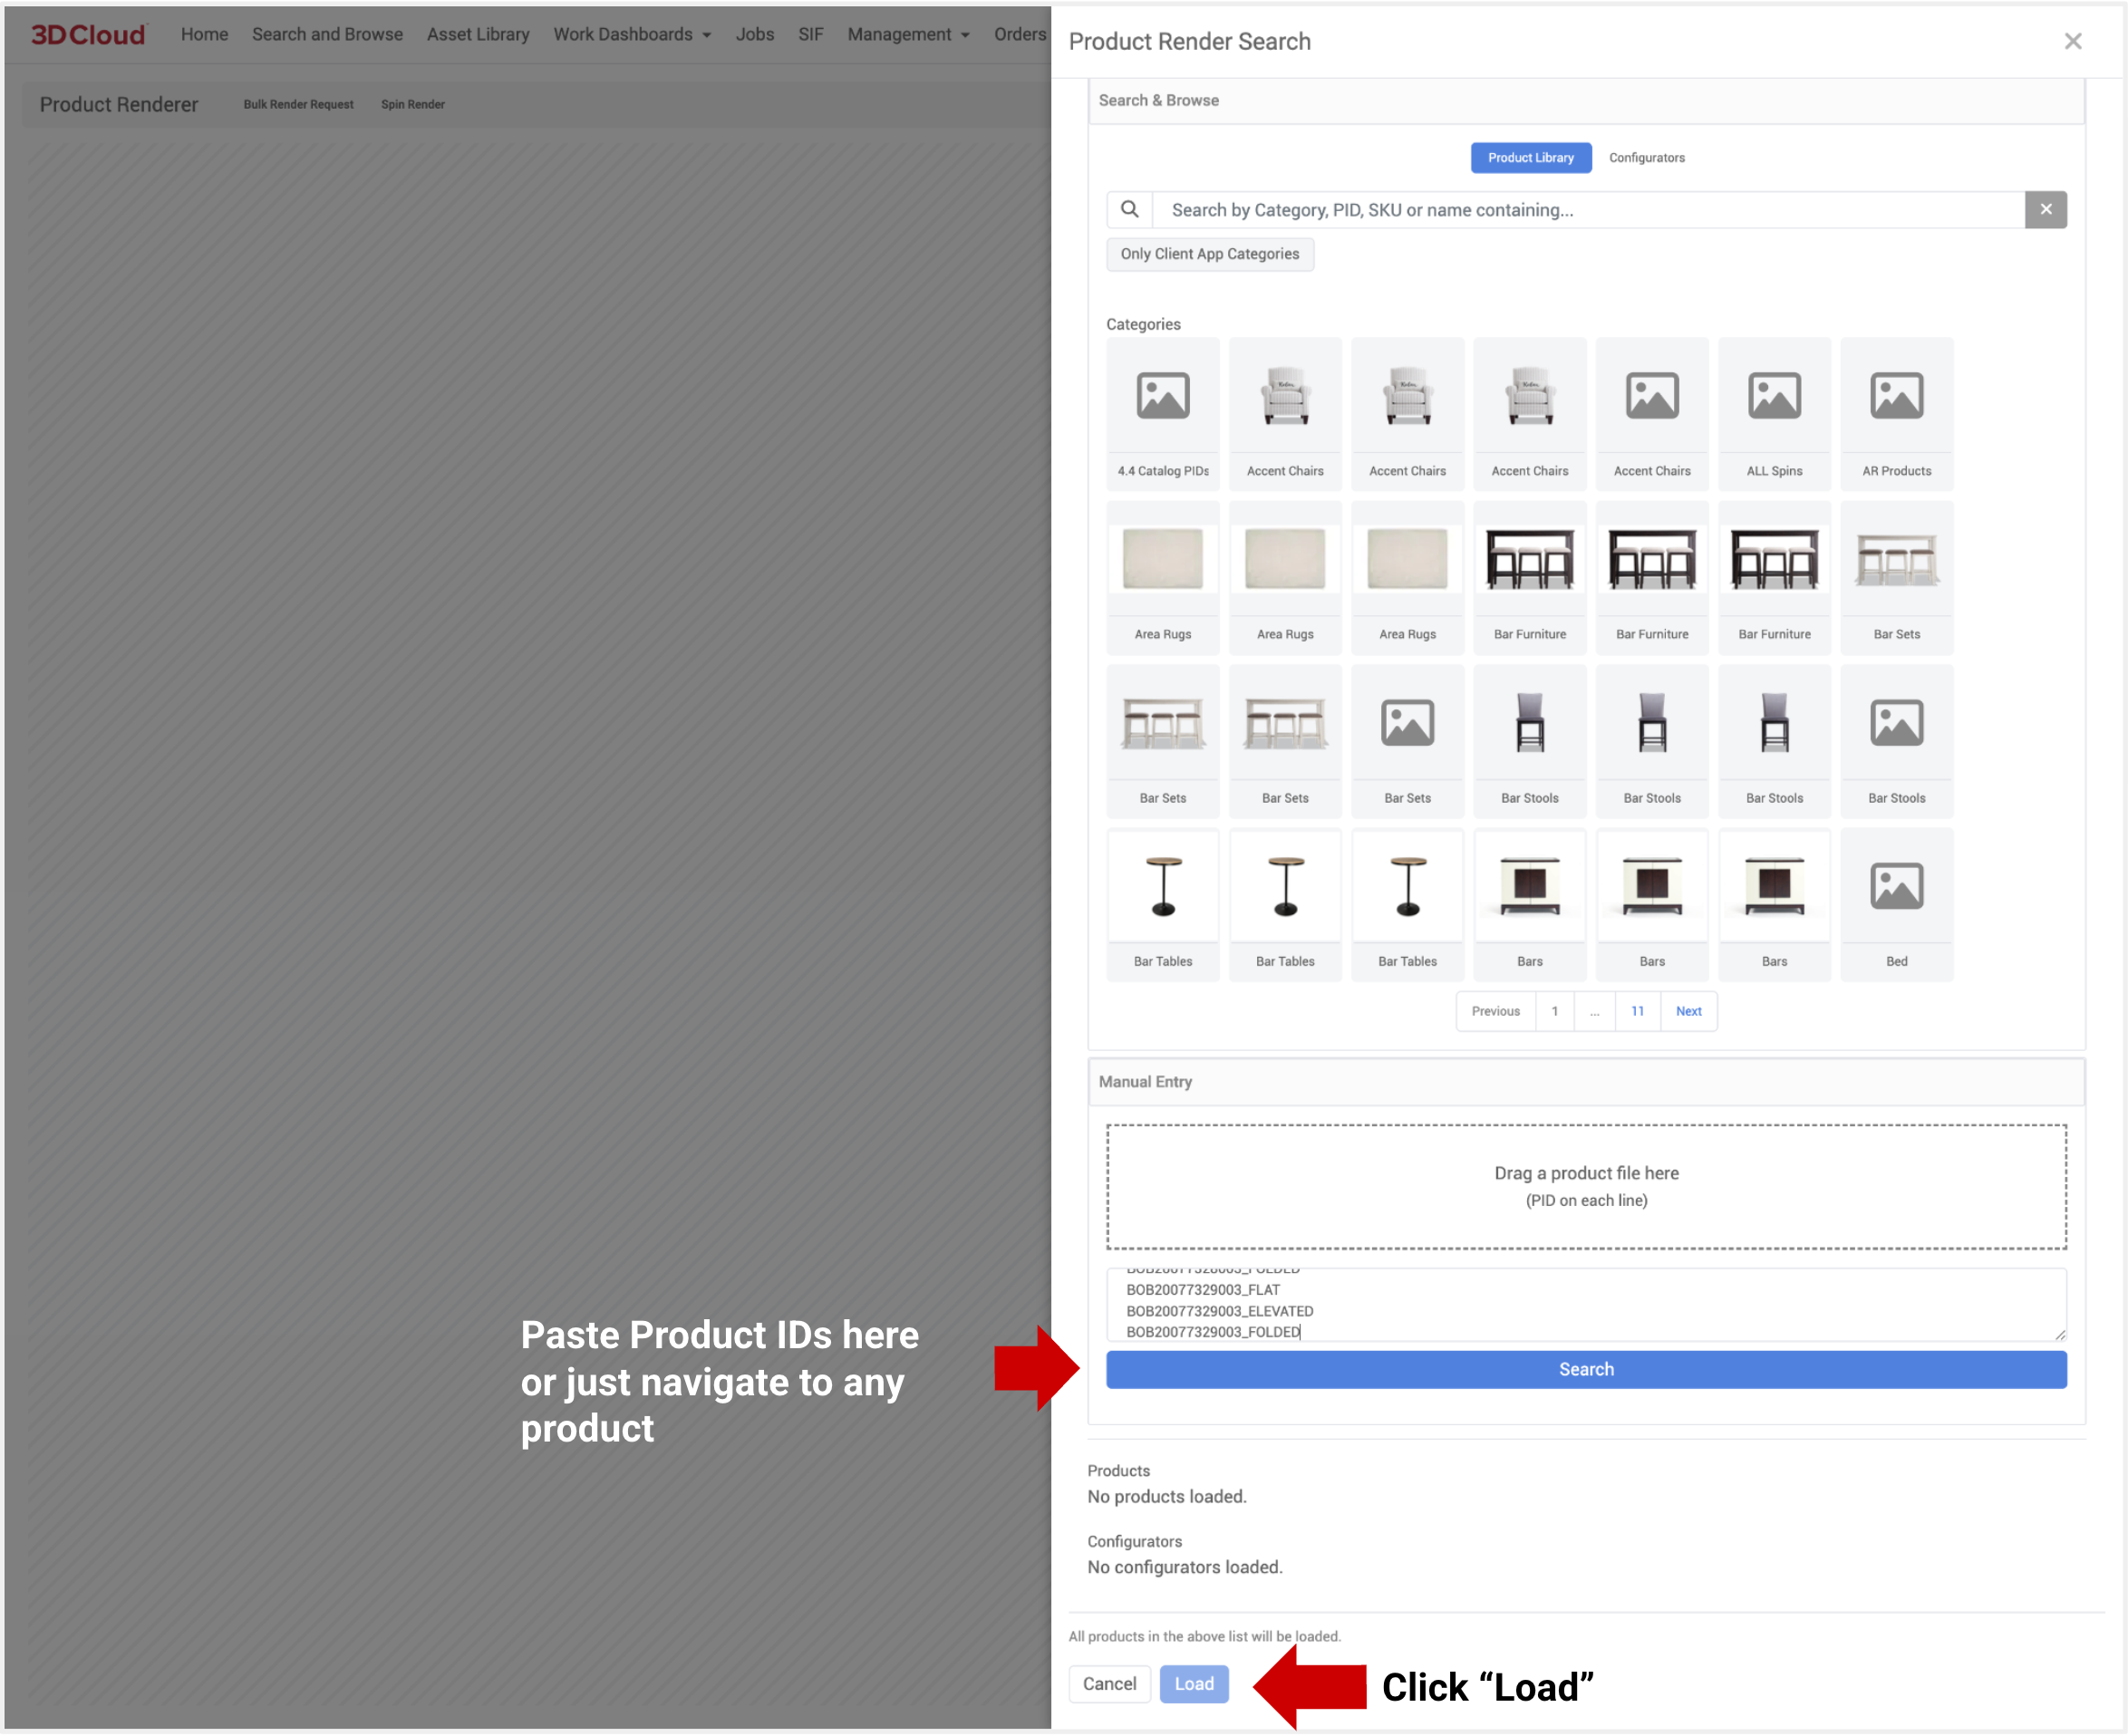
Product Render Search
When loading the Product Renderer tool, the Product Render Search panel will slide out from the right automatically with the ability to search by category, PID, SKU or name. You can then multi-select the products desired to render, and click the “Load” button at the bottom of the page.
After loading your desired product(s), the Product Renderer Search page will automatically close and the user will be brought to the main Product Renderer WebGL viewer with the first producdt loaded. An options panel on the right-hand side is displayed with Customize, Presets and Advanced Options accordion-style drawers.
Rendering Resolution
The desired image resolution (in pixel width x height) can be entered at the top of the page next to the “Generate Render” button. The dropdown menu allows selection of standard resolutions:
Proof (1280×720)
2k (2048×1024)
4k (4096×2160)
8k (7680×4320)
Custom width and height entry (Note: The smallest allowable resolution is 256×256)
.png)
Customize
The Customize menu is displayed when the Product ID loaded is part of a configurable assembly. The swappable assembly options are displayed in accordion-type menus. The Customize menu will not be visible if your Product does not have an Assembly for Swapping.
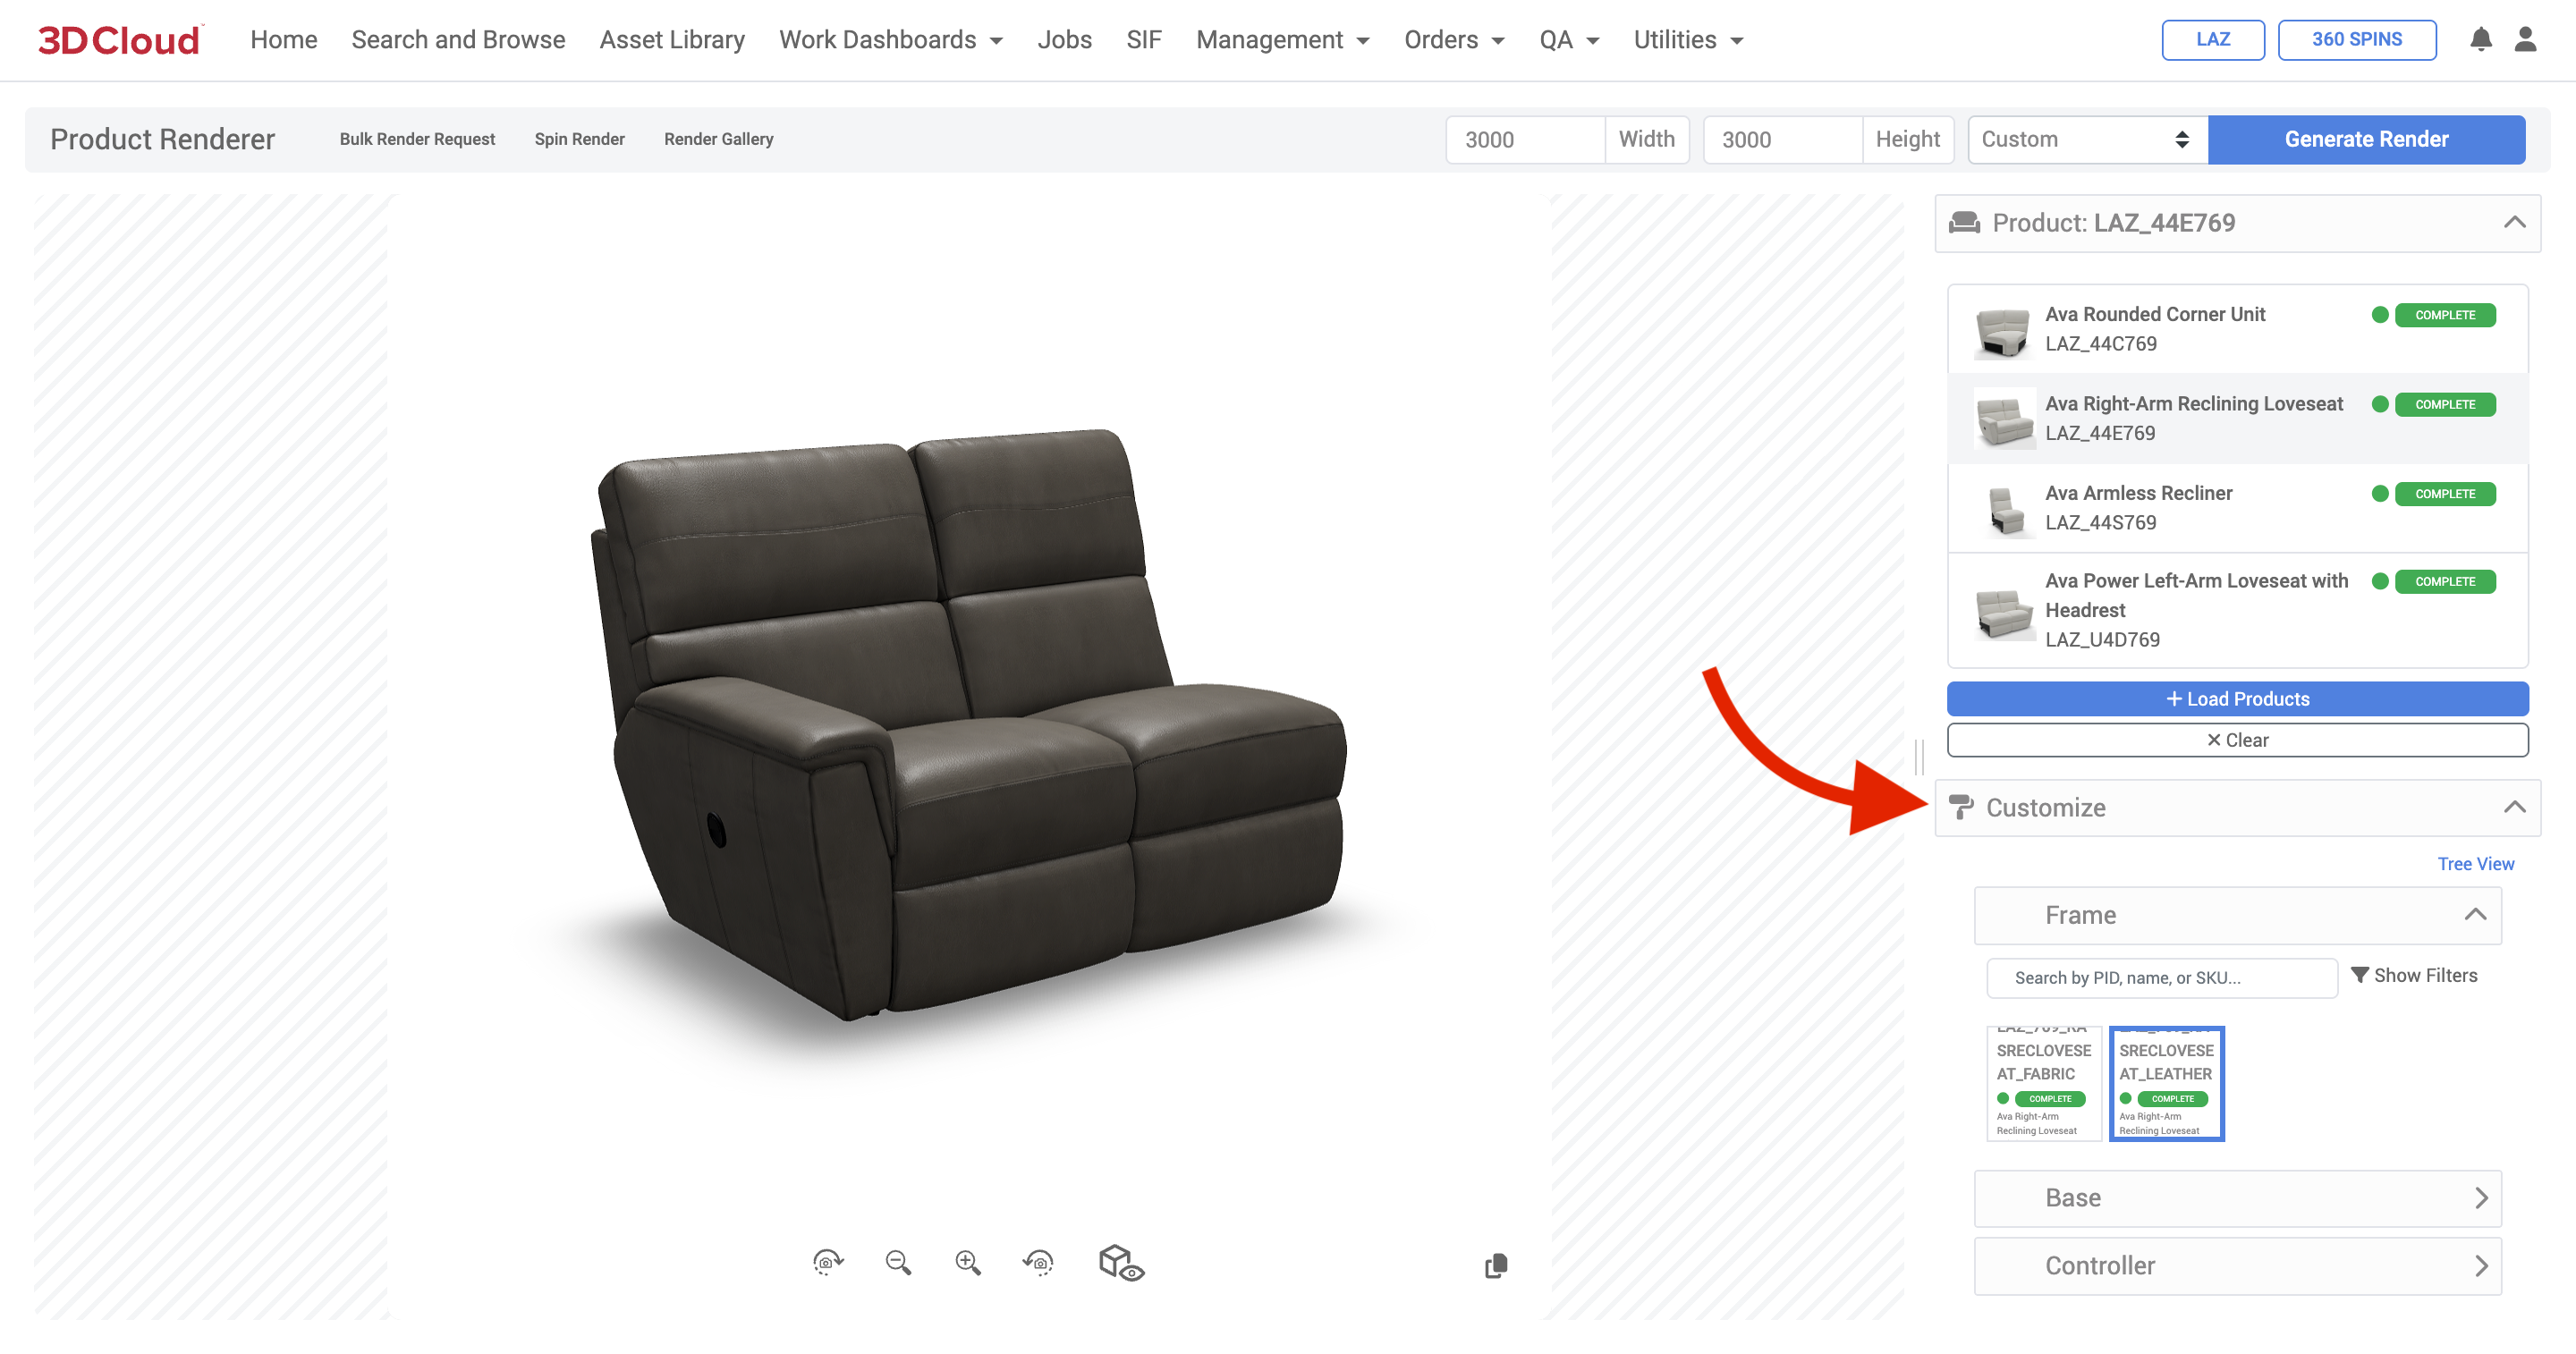
Product with Assembly Swappable Options: Customize Panel – List View (Default)
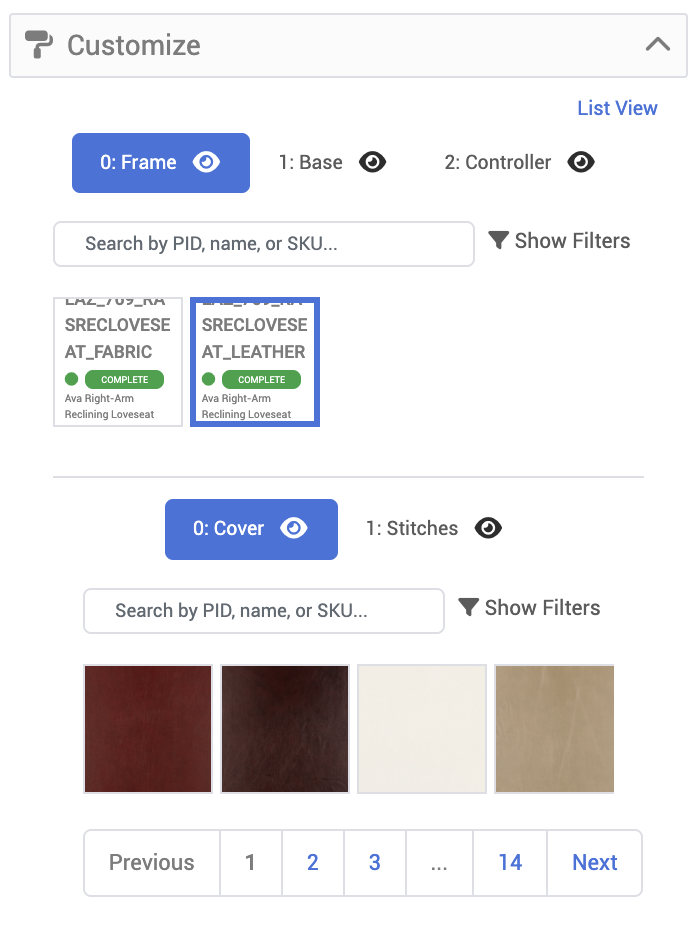
Customize Panel (Tree View)
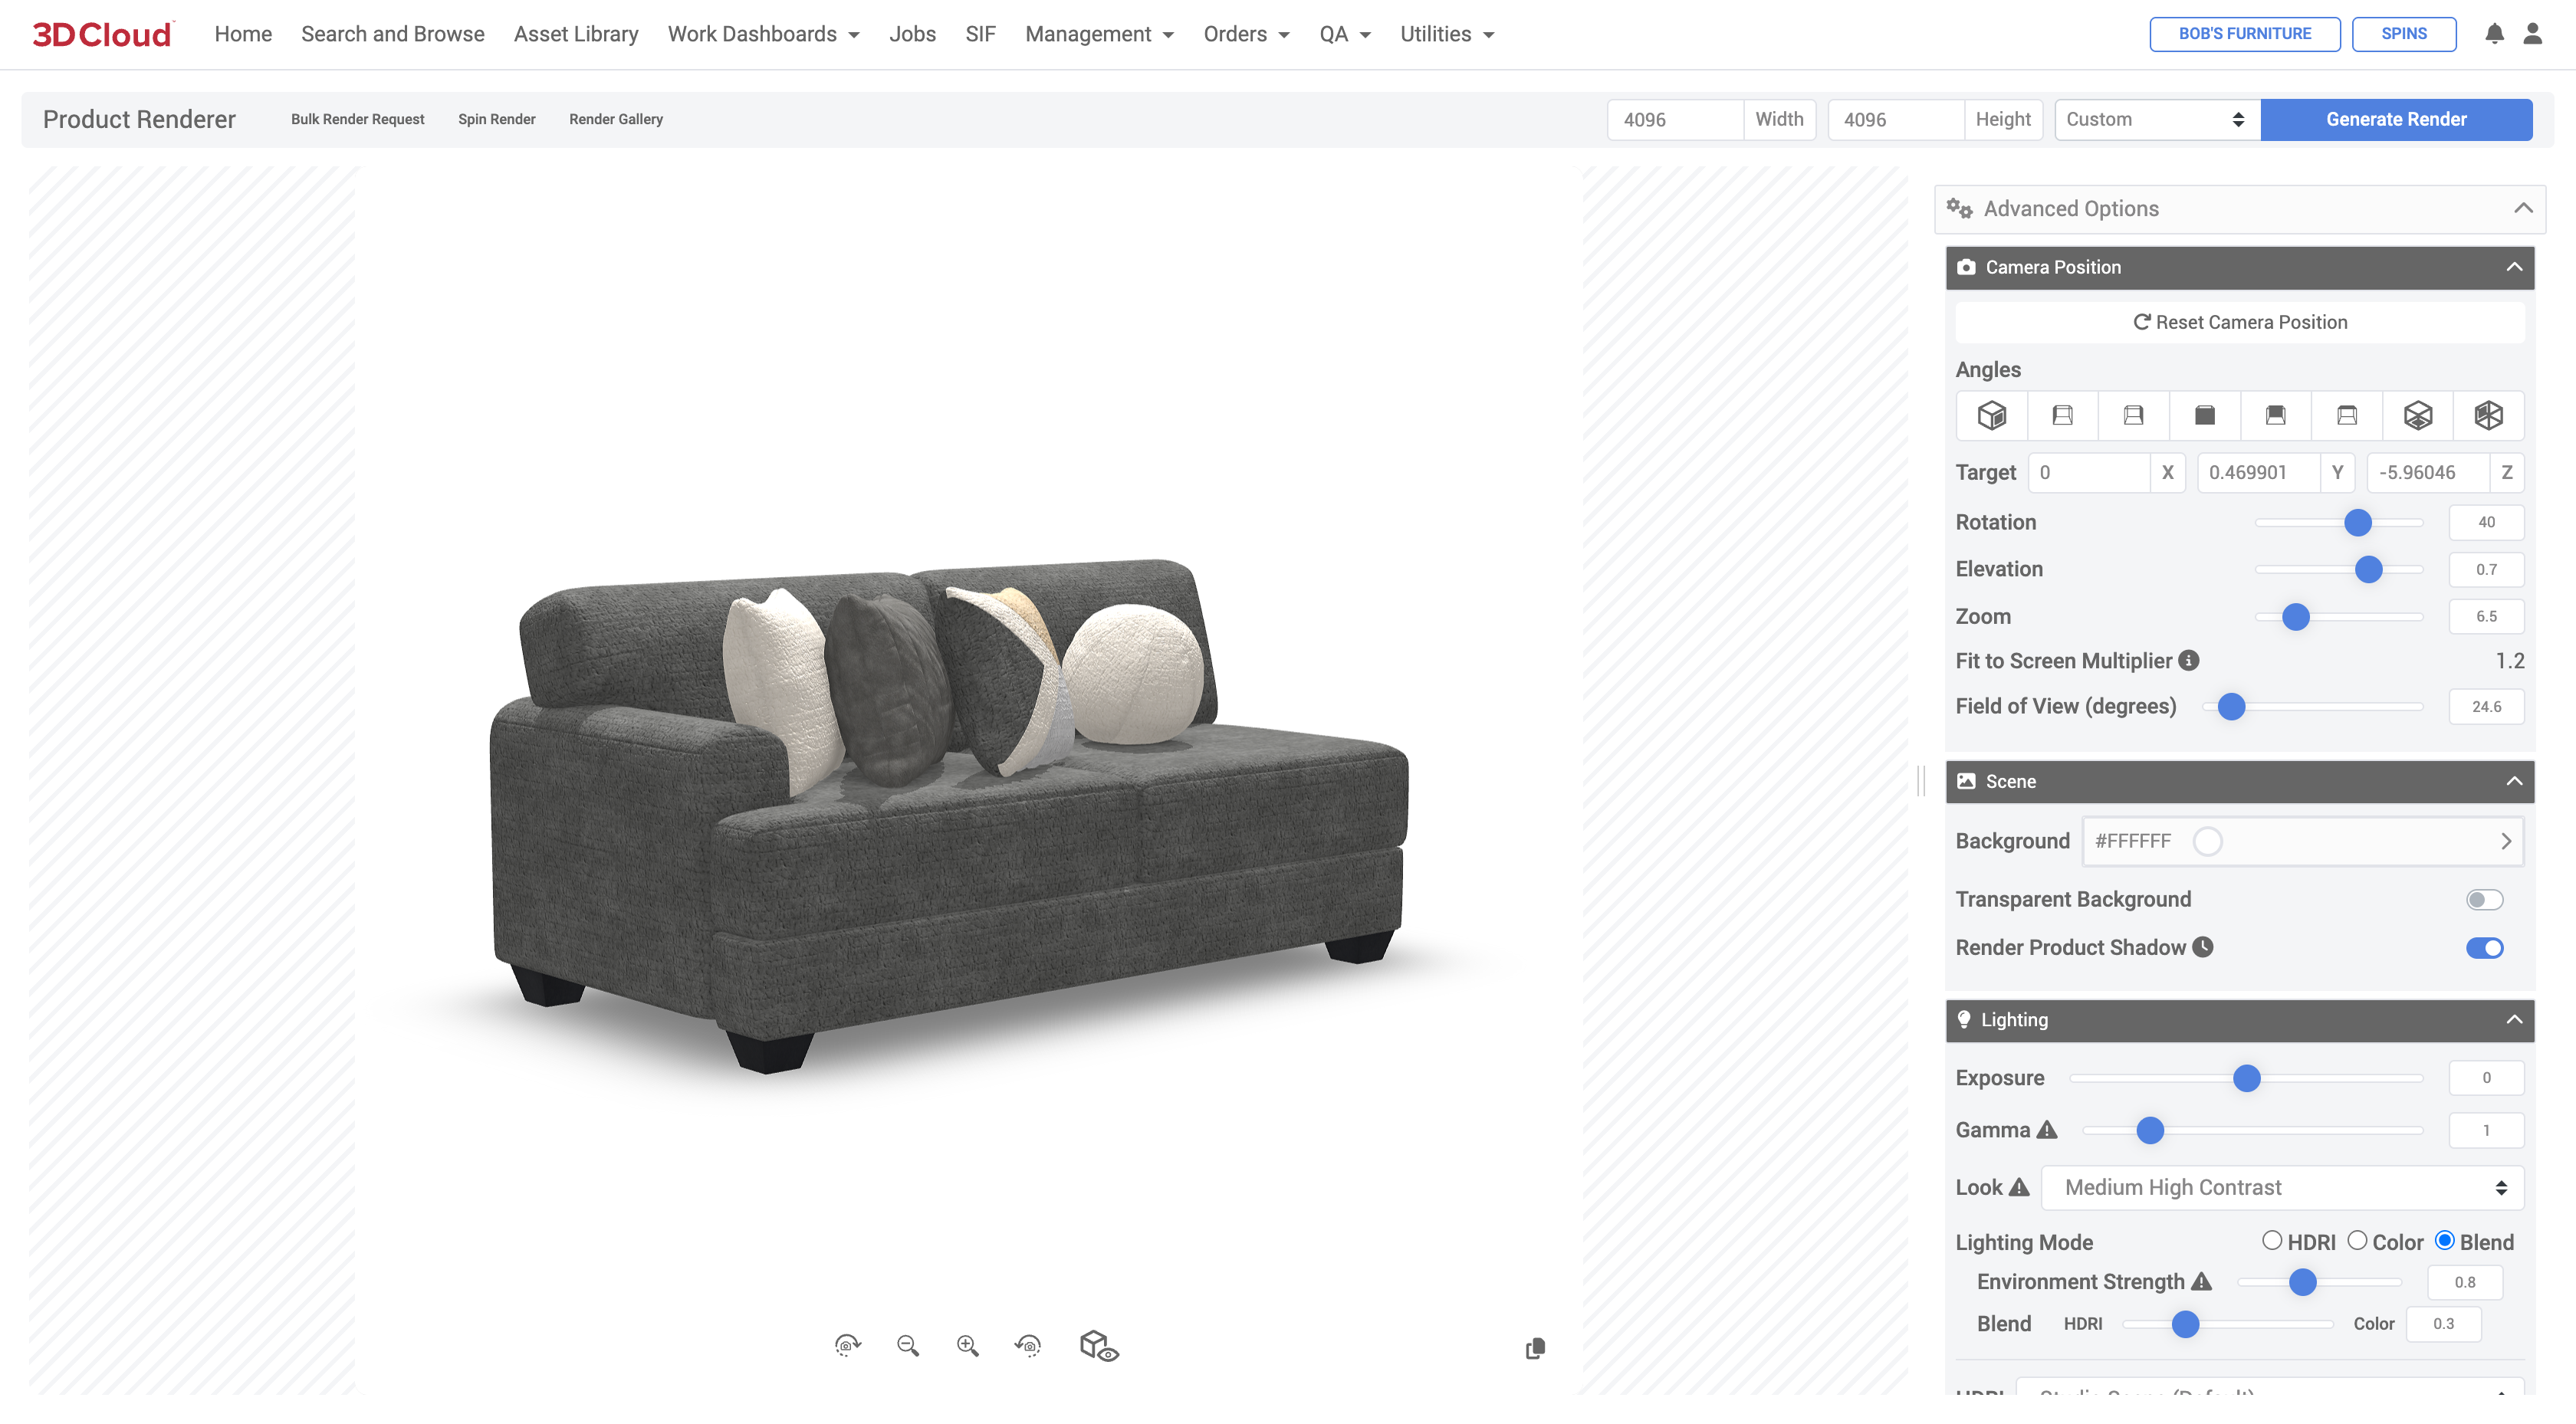
Advanced Options Panel
The Advanced options panel provides multiple ways to adjust the Camera, Scene and Lighting controls that will affect the final render.

A summary of Advanced Options settings are provided below.
Visual examples of the effects of these settings are provided in our Product Rendering Guide.
Advanced Option Category | Setting | Description |
|---|---|---|
Camera Position | Reset Camera Position | Resets the camera position to Front view (0° camera rotation) |
For rendering, the platform supports the rotation, elevation, zoom level and field of view of the camera around the product. | Angles | Jump links to preset angles (Front 45°, Left, Right, Front, Back, Top, Back 45°) |
Target (X, Y, Z) | X Y Z Float values with input field or arrow selectors to increment values. | |
Rotation | Rotates the camera around the product. 0 to +180° is clockwise from front 0 to –180° is counter-clockwise from front | |
Elevation | The elevation (height position) of the camera relative to the pivot point (generally the floor) 0 = Camera on floor –2 = Camera angle approx. 30° below floor 2 = Camera angle approx. 45° above floor | |
Zoom | Camera zoom level (0.1 to 10.9), default is 3.0 Affects Fit-to Screen Multiplier, can affect the perceived shape of the product due to perspective change. | |
Fit to Screen Multiplier | An indicator of how much of the product is visible in the viewport (canvas). Values less than 1.0 indicate that the product is overflowing the viewport. A recommended value for keeping ample white space around the product is 1.2. | |
Field of View (degrees) | Controls the field of visible camera capture. 0° to 180°, default is approx. 30° Does not skew the shape of the product. | |
Scene | Background | The background color behind the product (Hex value); can be set with color picker and includes opacity level as well (0 to 1, where 1=Opaque) |
Controls for the background and product shadow | Transparent Background | Toggle button to render with or without a background. Note: Turning on Transparent Background will disable the HDRI Skybox |
Render Product Shadow | Toggle button to render with or without a product cast shadow Rendering with shadows will increase your render time. | |
Lighting | Exposure | Used to control the general brightness of an image. -10 to +10 default is 1.0 (typical ranges are –2 to +2; usually tweaked in 0.1 increments to dial in exposure) |
Lighting controls for exposure, contrast and environment. | Gamma | Used to control how smoothly black transitions to white in an image Not previewable: Changing this option will only be reflected in the final render. |
Look | Dropdown menu with None, Very Low Contrast, Low Contrast, Medium Low Contrast, Medium Contrast, Medium High Contrast, High Contrast, Very High Contrast. | |
Lighting Mode | HDRI = Uses the HDRI texture as the environment map in Blender Cycles when rendering environment lighting Color = Uses an RGB color specified by the user (default is #FFFFFF white) when rendering environment lighting Blend = Uses a mix node that blends both the HDRI and the Color option together using the value of the Blend property as a percentage (0 to 1) Example 1: Setting the lighting mode to Blend and using Environment strength of 0.7 (70%) and Blend value of 0.3 (30%) would:
| |
Environment Strength | The relative effect of the HDRI or Color environment on the product lighting. | |
Blend | The relative percentage (0 to 1) effective between the HDRI environment vs. the Color environment on the product lighting. 1 = 100% Color environment | |
HDRI | HDRIs (High Dynamic Range Image) that can be selected for use as an environment lighting scene. Currently seven (7) HDRIs are available to use. Custom HDRIs are possible to be set up per client. | |
HDRI Rotation | The rotation value of the HDRI scene (0° to 359°) | |
Show HDRI | Toggle to hide or show the HDRI in the Preview window and render | |
Dimensions | Enable | Toggle to enable or disable a dimension lines and value layer (width, depth and height) on product renders |
Controls for dimension line and values overlay. | Unit of Measure | The displayed units of measure for the width, depth and height values on the dimension lines overlay. Options are: m = meters (3 decimal points) cm = centimeters (1 decimal point) mm = millimeters (no decimal points) ft/in = feet and inches (expressed as fractions to 1/16ths) in = inches (expressed as fractions to 1/16ths) |
End Measurement Type | Options are None or Arrow at the end of the dimension lines | |
Offset Distance | Sets the general offset distance of the lines from the bounding box of the product (0 to 0.2 is the typical range, can be in 0.001 increments) | |
Font | Select from 7 system fonts (Arial, Courier New, Georgia, Tahoma, Times New Roman, Trebuchet MS, Verdana) Font size, Bold or Italic | |
Text Color | Hex value color for the dimension text | |
Line Color | Hex value color for the dimension lines | |
Line Thickness | Thickness of the dimension lines, can be decimal values less than 1. Note: Arrow heads are proportional to the dimension line thickness, so the thinner the line, the smaller the arrows. | |
Miscellaneous | Cycles Configuration: Denoising Input Passes | Dropdown menu with options for reducing noise and other artifacts on textures. RGB, RGB_ALBEDO, RBG_ALBEDO_NORMAL |
Advanced controls for render engine denoising, samples, and shadow falloff. | Cycles Configuration: Samples | The number of samples used in rendering an image using Blender's Cycles rendering engine. 256 is the default sampling rate. |
Cycles Configuration: Use Denoising | Toggle to Use or Not Use Denoising | |
File Prefix | A text prefix string that you would like to have appended on to the front of the render filename | |
Compositing Graph JSON | Compositing Graph JSON is a structure used to describe a collection of Blender compositing nodes, including their socket connections and default values. This JSON is not typically created manually; instead, it is generated using the MXT Blender plugin, which allows users to create a compositing graph in Blender and export it to JSON format. This JSON can then be used to define the compositing graph in rendering configurations. If you need specific Compositing Graph JSON strings, it is recommended to reach out to 3D Cloud Technical Artist Leads for assistance. | |
Box Mask (Height, Width) | Controls the size of the product shadow’s “bounding box”. Slide with values 0 to 1 for Height and Width dimensions Note: Requires Compositing Graph JSON code to enable this feature. | |
Blur Factor (X, Y) | Controls the fuzziness/falloff of the cast product shadow. Note: Requires Compositing Graph JSON code to enable this feature. |
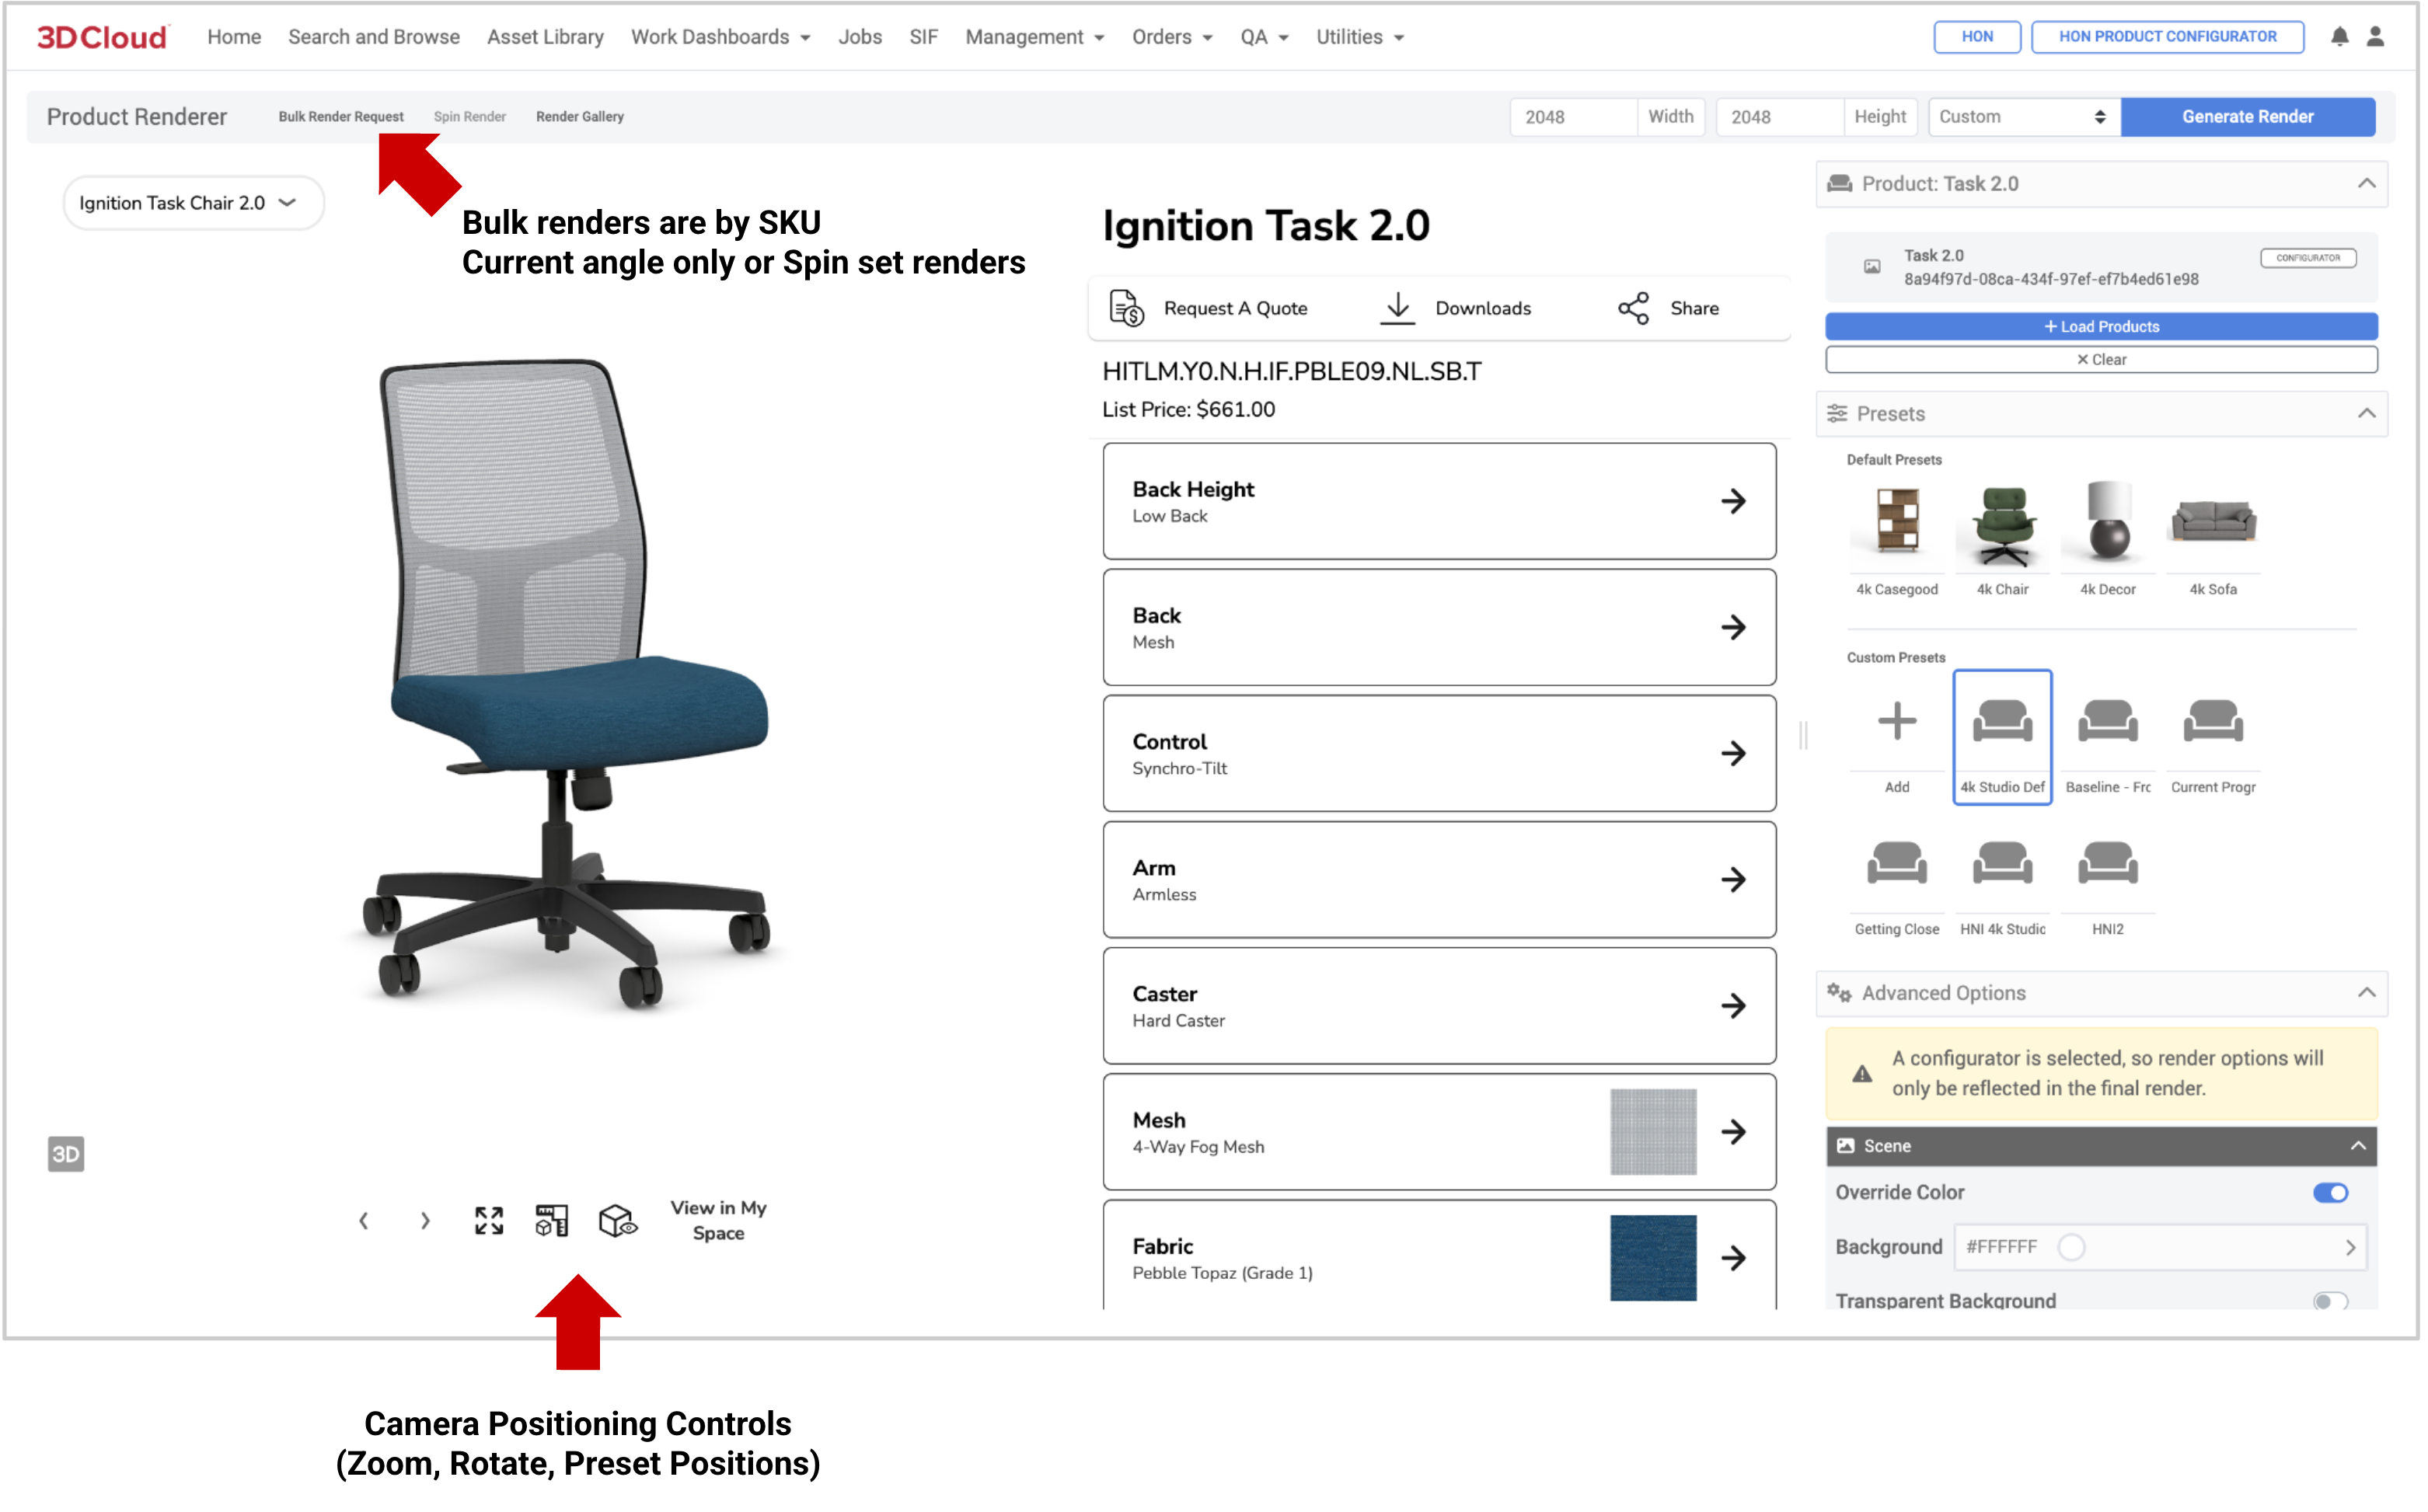
Generate Render Button
The Generate Render button will initiate the render job after all options and settings have been selected.
.png)
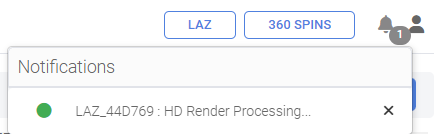
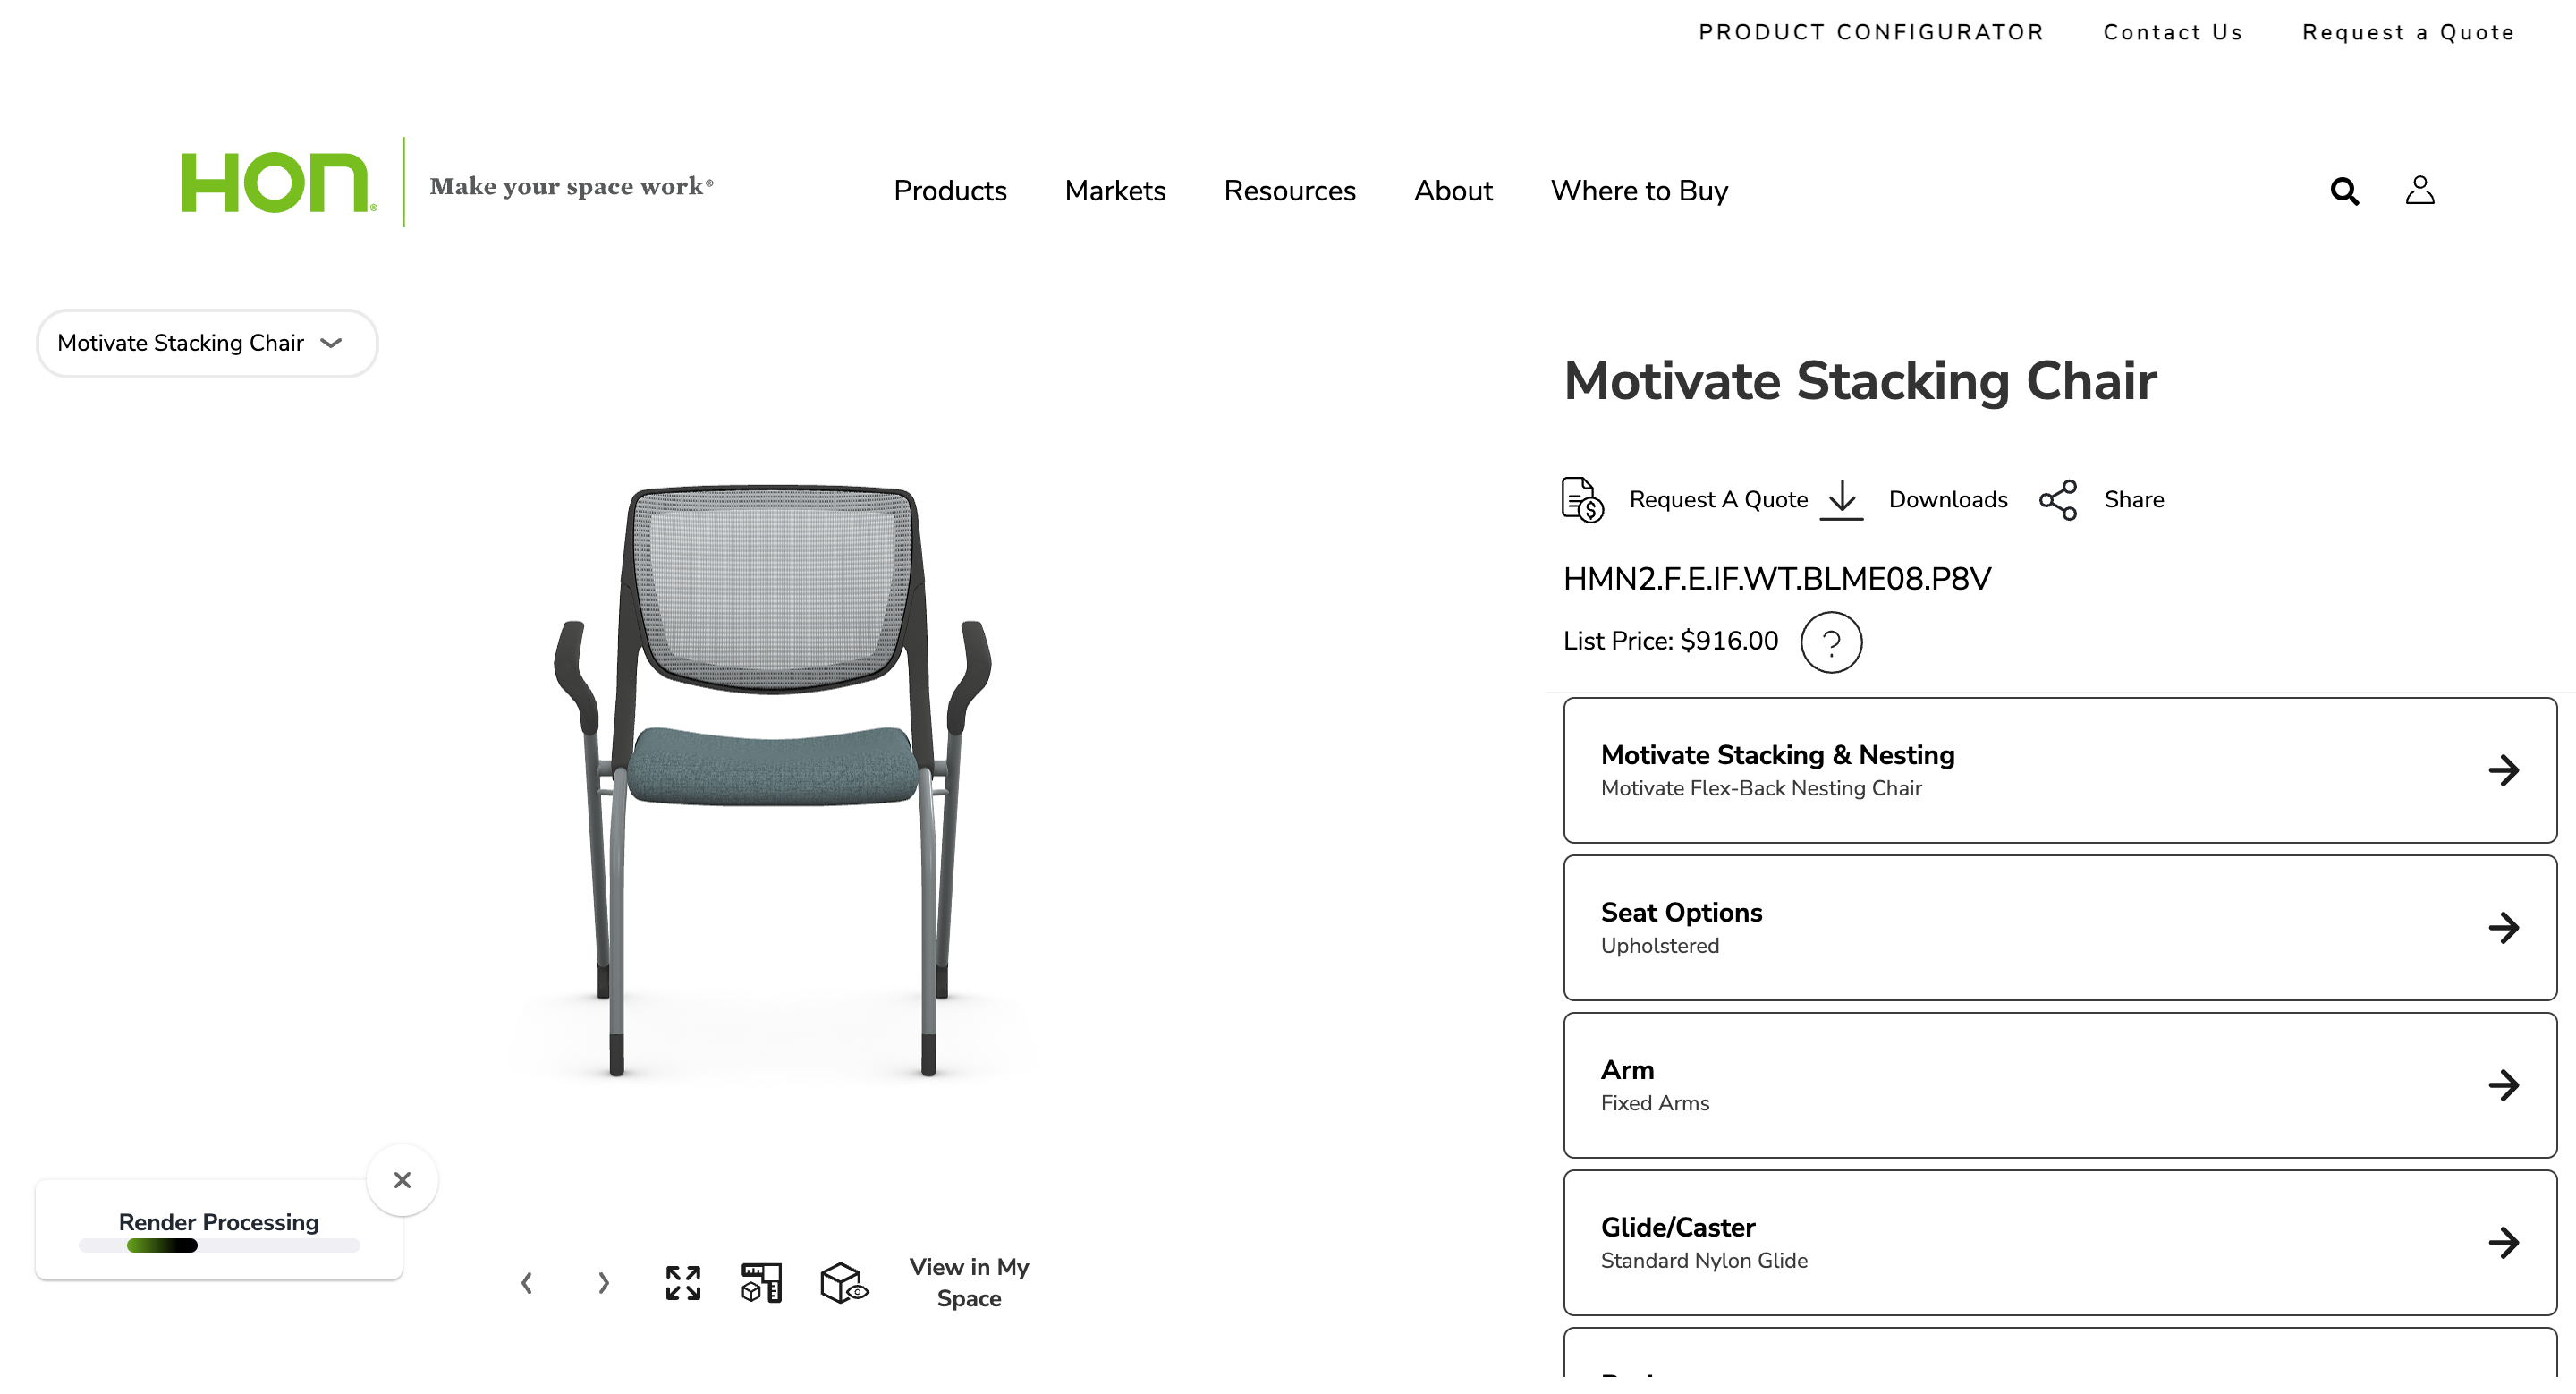
Once the render job is submitted, you will see a “toast” alert pop-up from the bottom of the screen notifying that the render is processing.
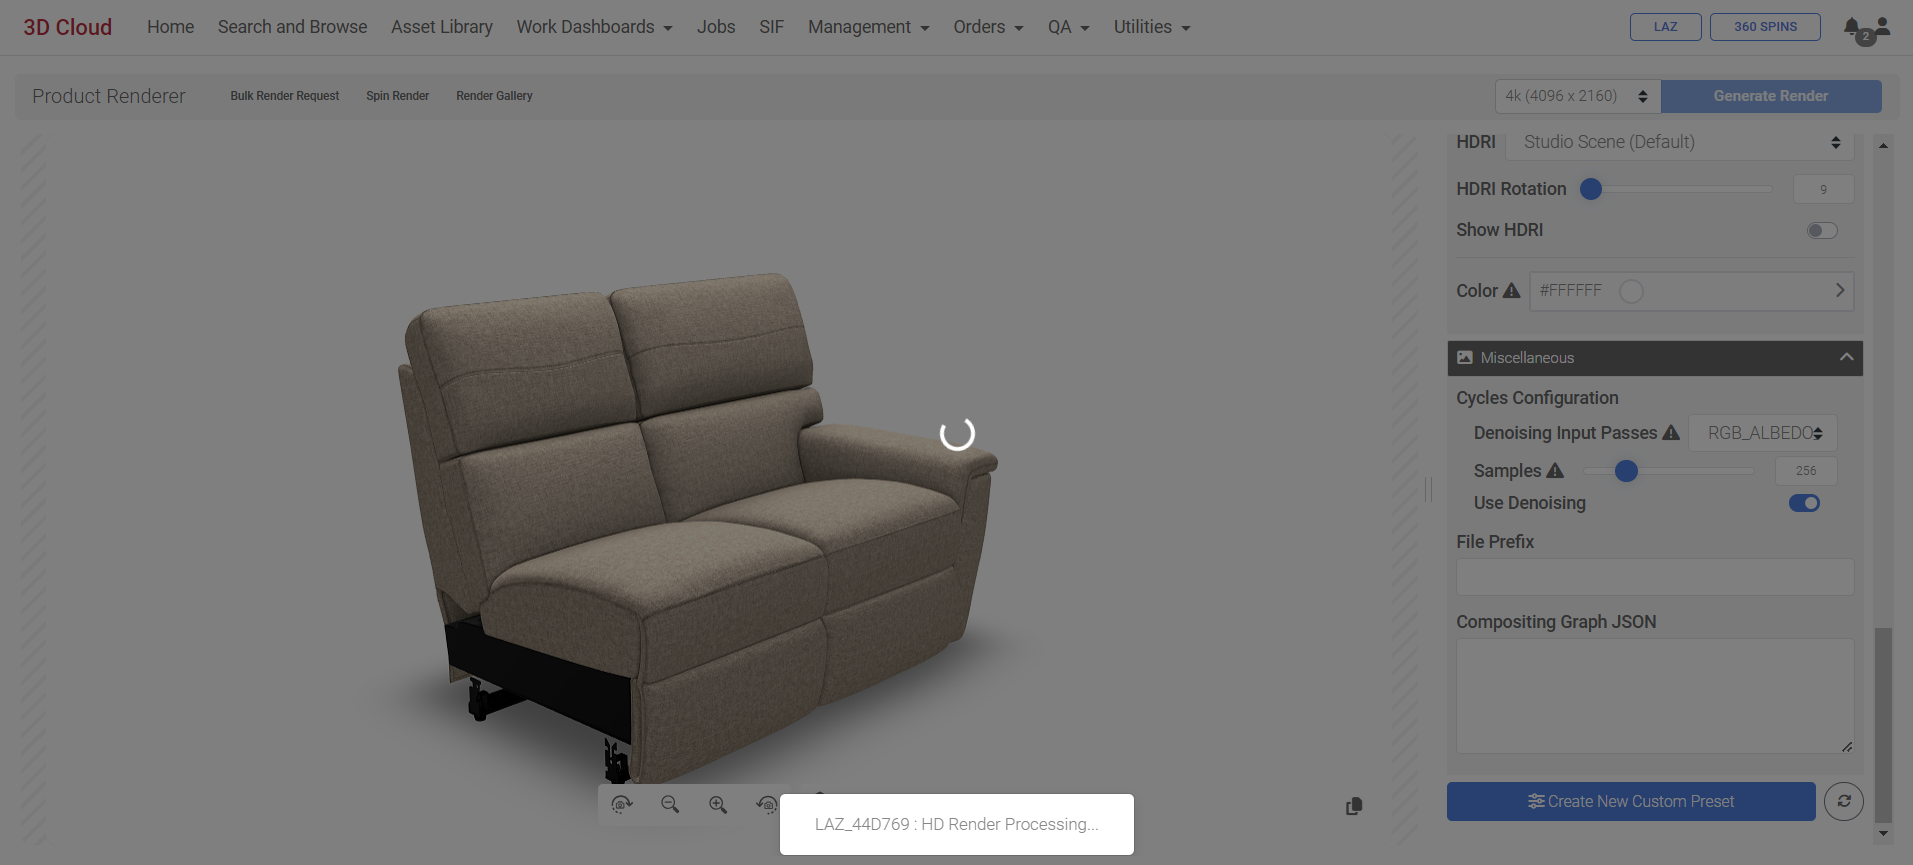
Toast alert: “HD Render Processing…”
Additionally, the notification bell area at the top right of the page will show the “Render processing…” message.
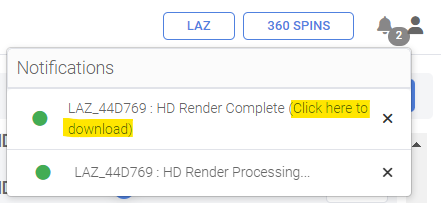
When the render is complete, the notification bell area will show a “Click to download” link.
|
|
|
|---|

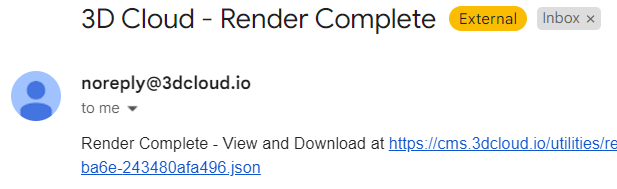
Email Notification
When you click the Generate Render button, or any bulk render job, you will receive an email notfication with the subject line “3D Cloud - Render Complete” (from the email “noreply@3dcloud.io”) when it is completed. The email will have a link to download the image(s), and the image is stored in the Render Gallery for that particular Product.
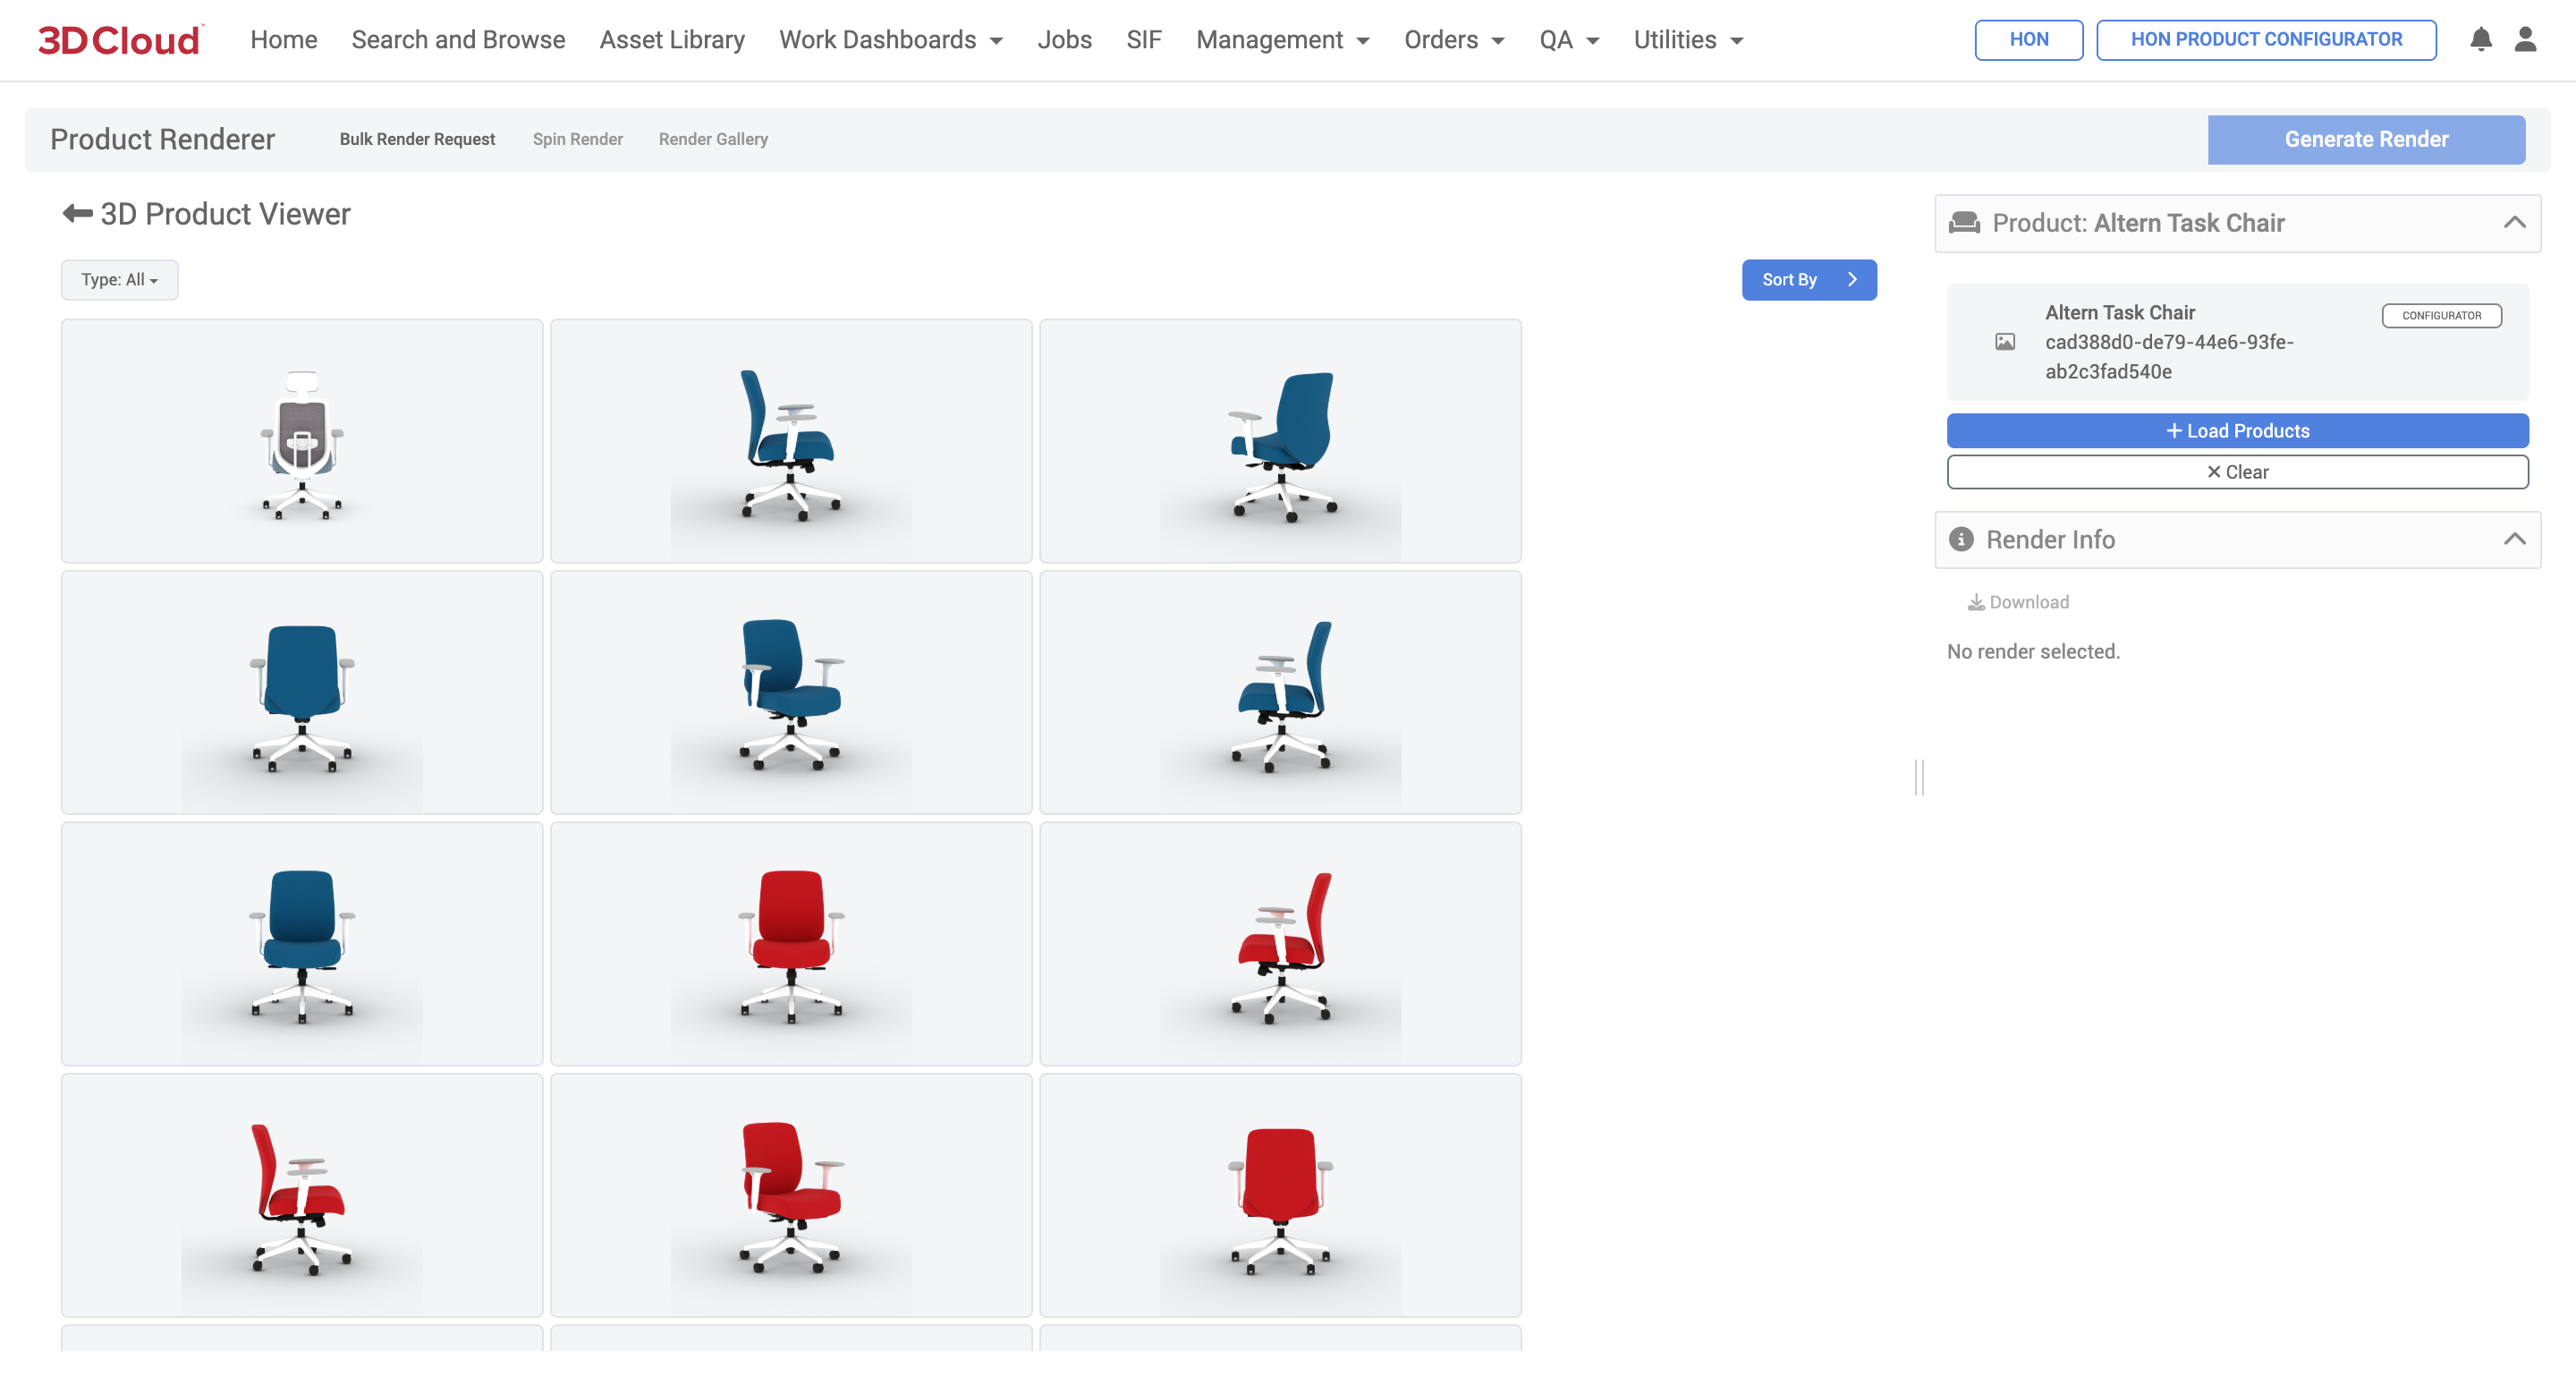
Render Gallery
All renders generated from the back-end will end up in the Render Gallery of the product. The Render Gallery is accessed via the link in the Product Renderer title bar (on any Product Detail → HD Render, or Utilities → Product Renderer page)
![]()
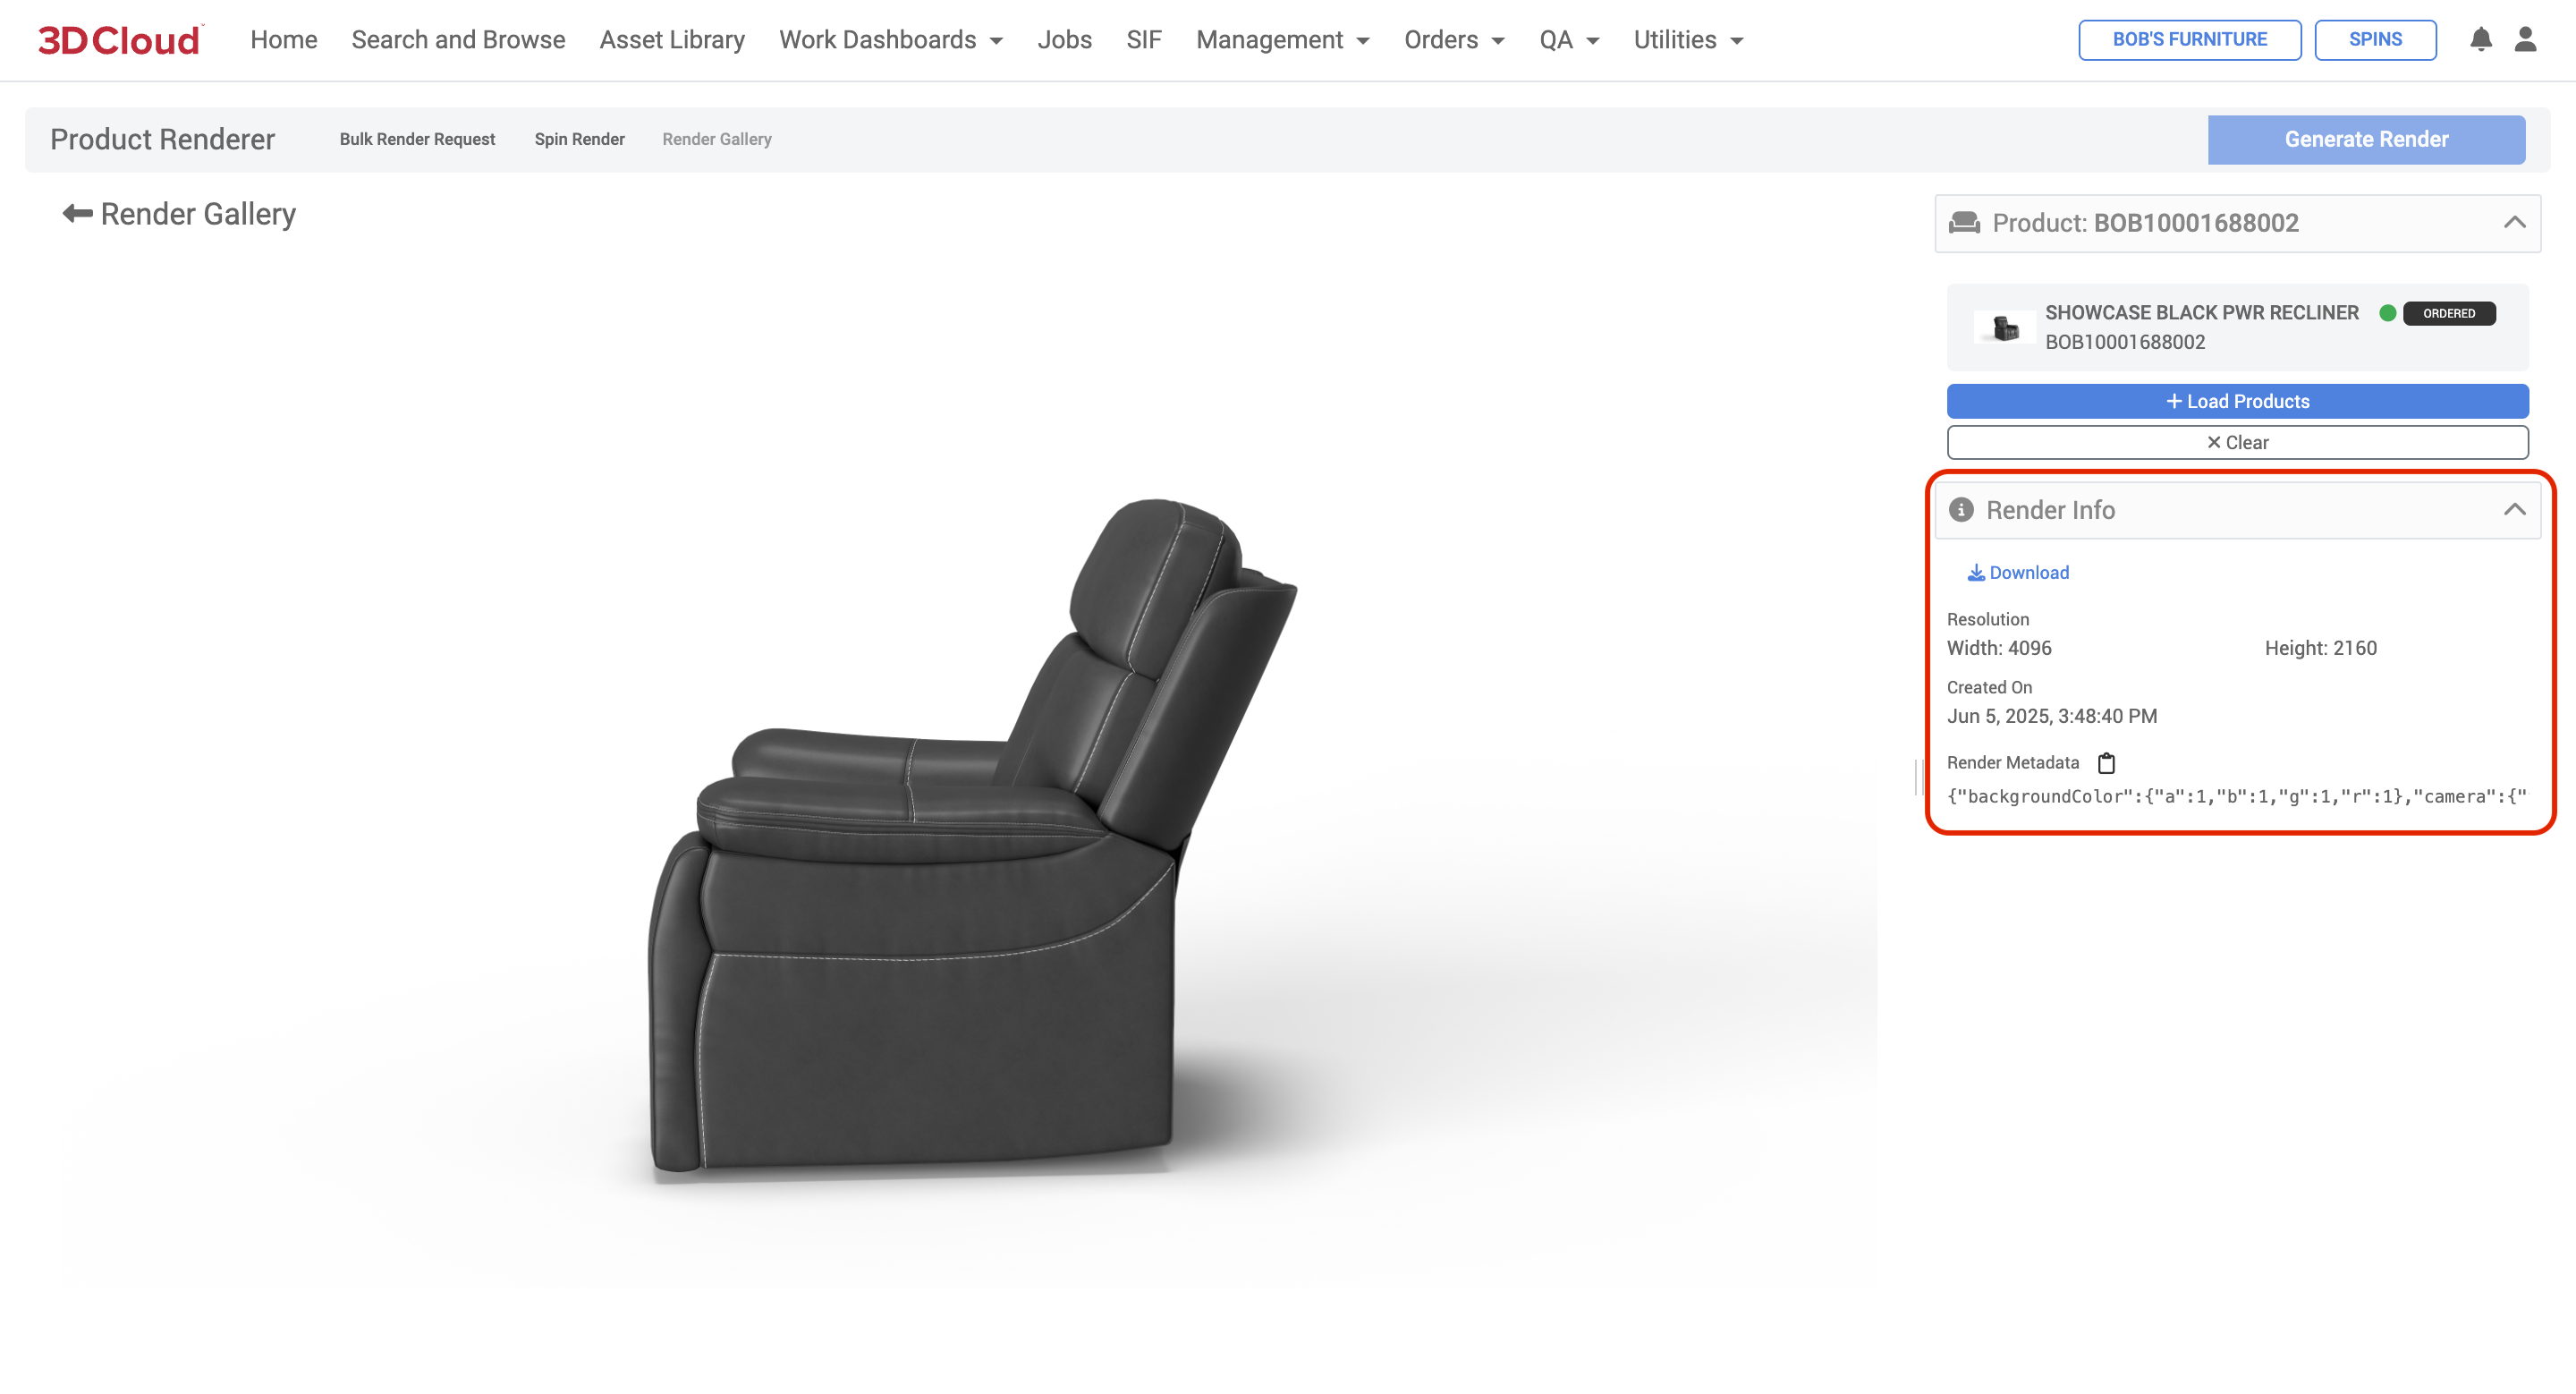
The Render Gallery shows all previously completed renders for a specific Product.
Clicking on any individual render will display the Render Info for that image. Information includes the resolution, creation date/time, and render metadata for that particular image.
Next to the Render Metadata heading, clicking the “clipboard” icon will copy the metadata.
A Download link brings up the full-sized image in a new browser tab, from which it can be saved to your computer (via right-click “Save as” on most browsers).
Bulk Product Renders
Bulk Product Renders are possible in the 3D Cloud AMS Product Renderer. This feature allows the user to submit render jobs containing hundreds of renders at one time. Utilizing a spreadsheet xlsx list of Product IDs (one per row), one can create a Bulk Render Request sheet that defines different rotation angles, presets and custom settings.
Planning Your Bulk Renders
When anticipating bulk renders, it is good to have a plan to produce a large volume of renders, across different product categories, color ranges and product placements (Floor or Wall/Ceiling). Key activities in this process include these recommended steps:
Create Presets
Using our Product Rendering Guide (“Which HDRI do I use?” page 27), decide on an HDRI that matches your lighting style (or arrange with the 3D Cloud team to set up your own custom HDRI).
Create a Preset Planning Sheet to identify the Presets that will work across product sizes, colors, camera heights, etc.
Keep a record of all presetIds used and their purpose
When saving presets, communicate a standard naming convention to all users who will be creating product renders. Use the “Fit to Screen” checkbox when saving the preset to auto-size white space around products.
Test render samples of products at lower resolutions to dial in the presets.
Create Bulk Render Request Sheet(s)
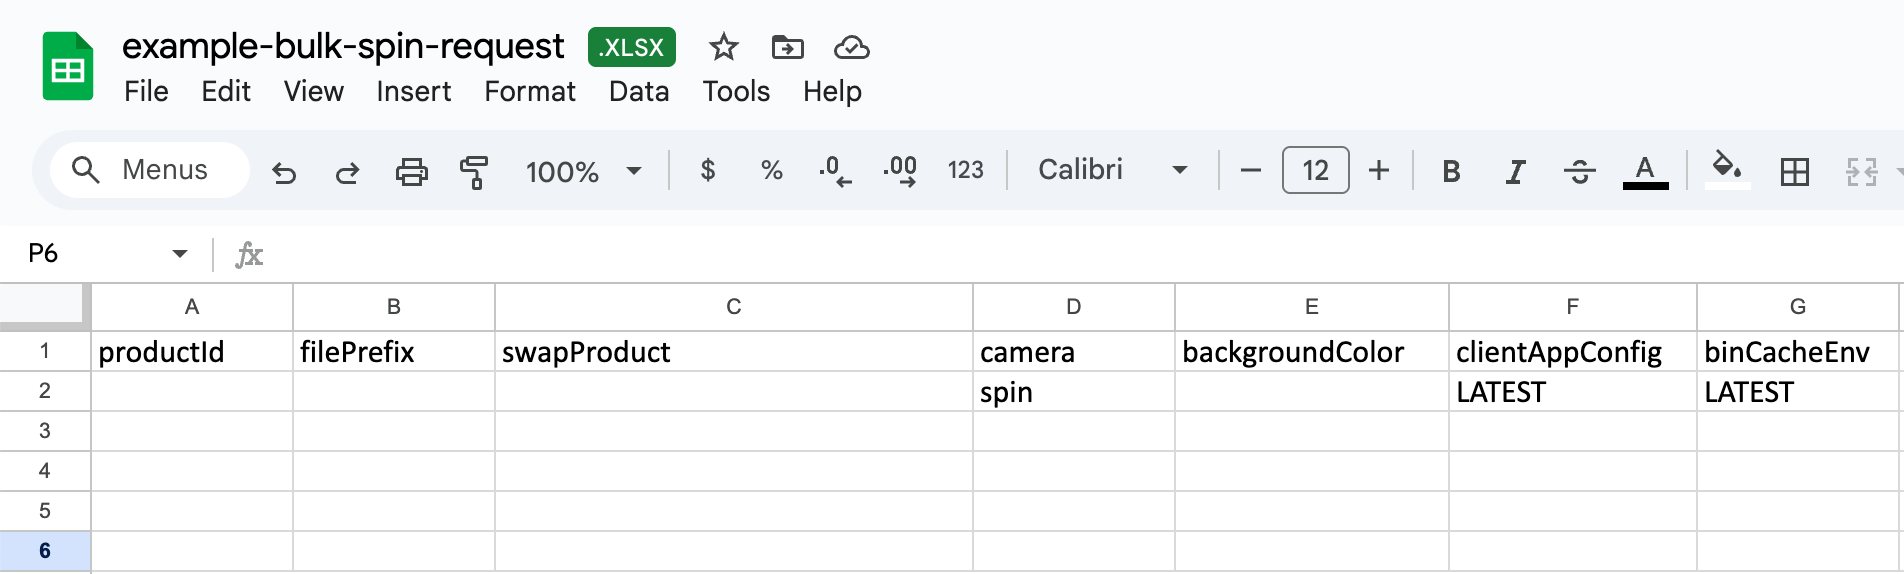
Download the example bulk render request sheet. (Make a copy for each batch of renders desired)
Fill out the bulk render request sheet and export an .xlsx copy.
If using presets, you only need to fill out the following minimum columns for each row (Product ID) being rendered:productID
filePrefix (file prefix or exact file name)
presetId
Any additional columns per row can be filled out, which will “override” the preset settings
Render Previews and Requests
Go to the Product Renderer section on the 3D Cloud AMS and load any product (a bulk request can be started on any product, even ones that aren’t in the request sheet)
Click on Bulk Render Request in the Product Renderer page title bar.
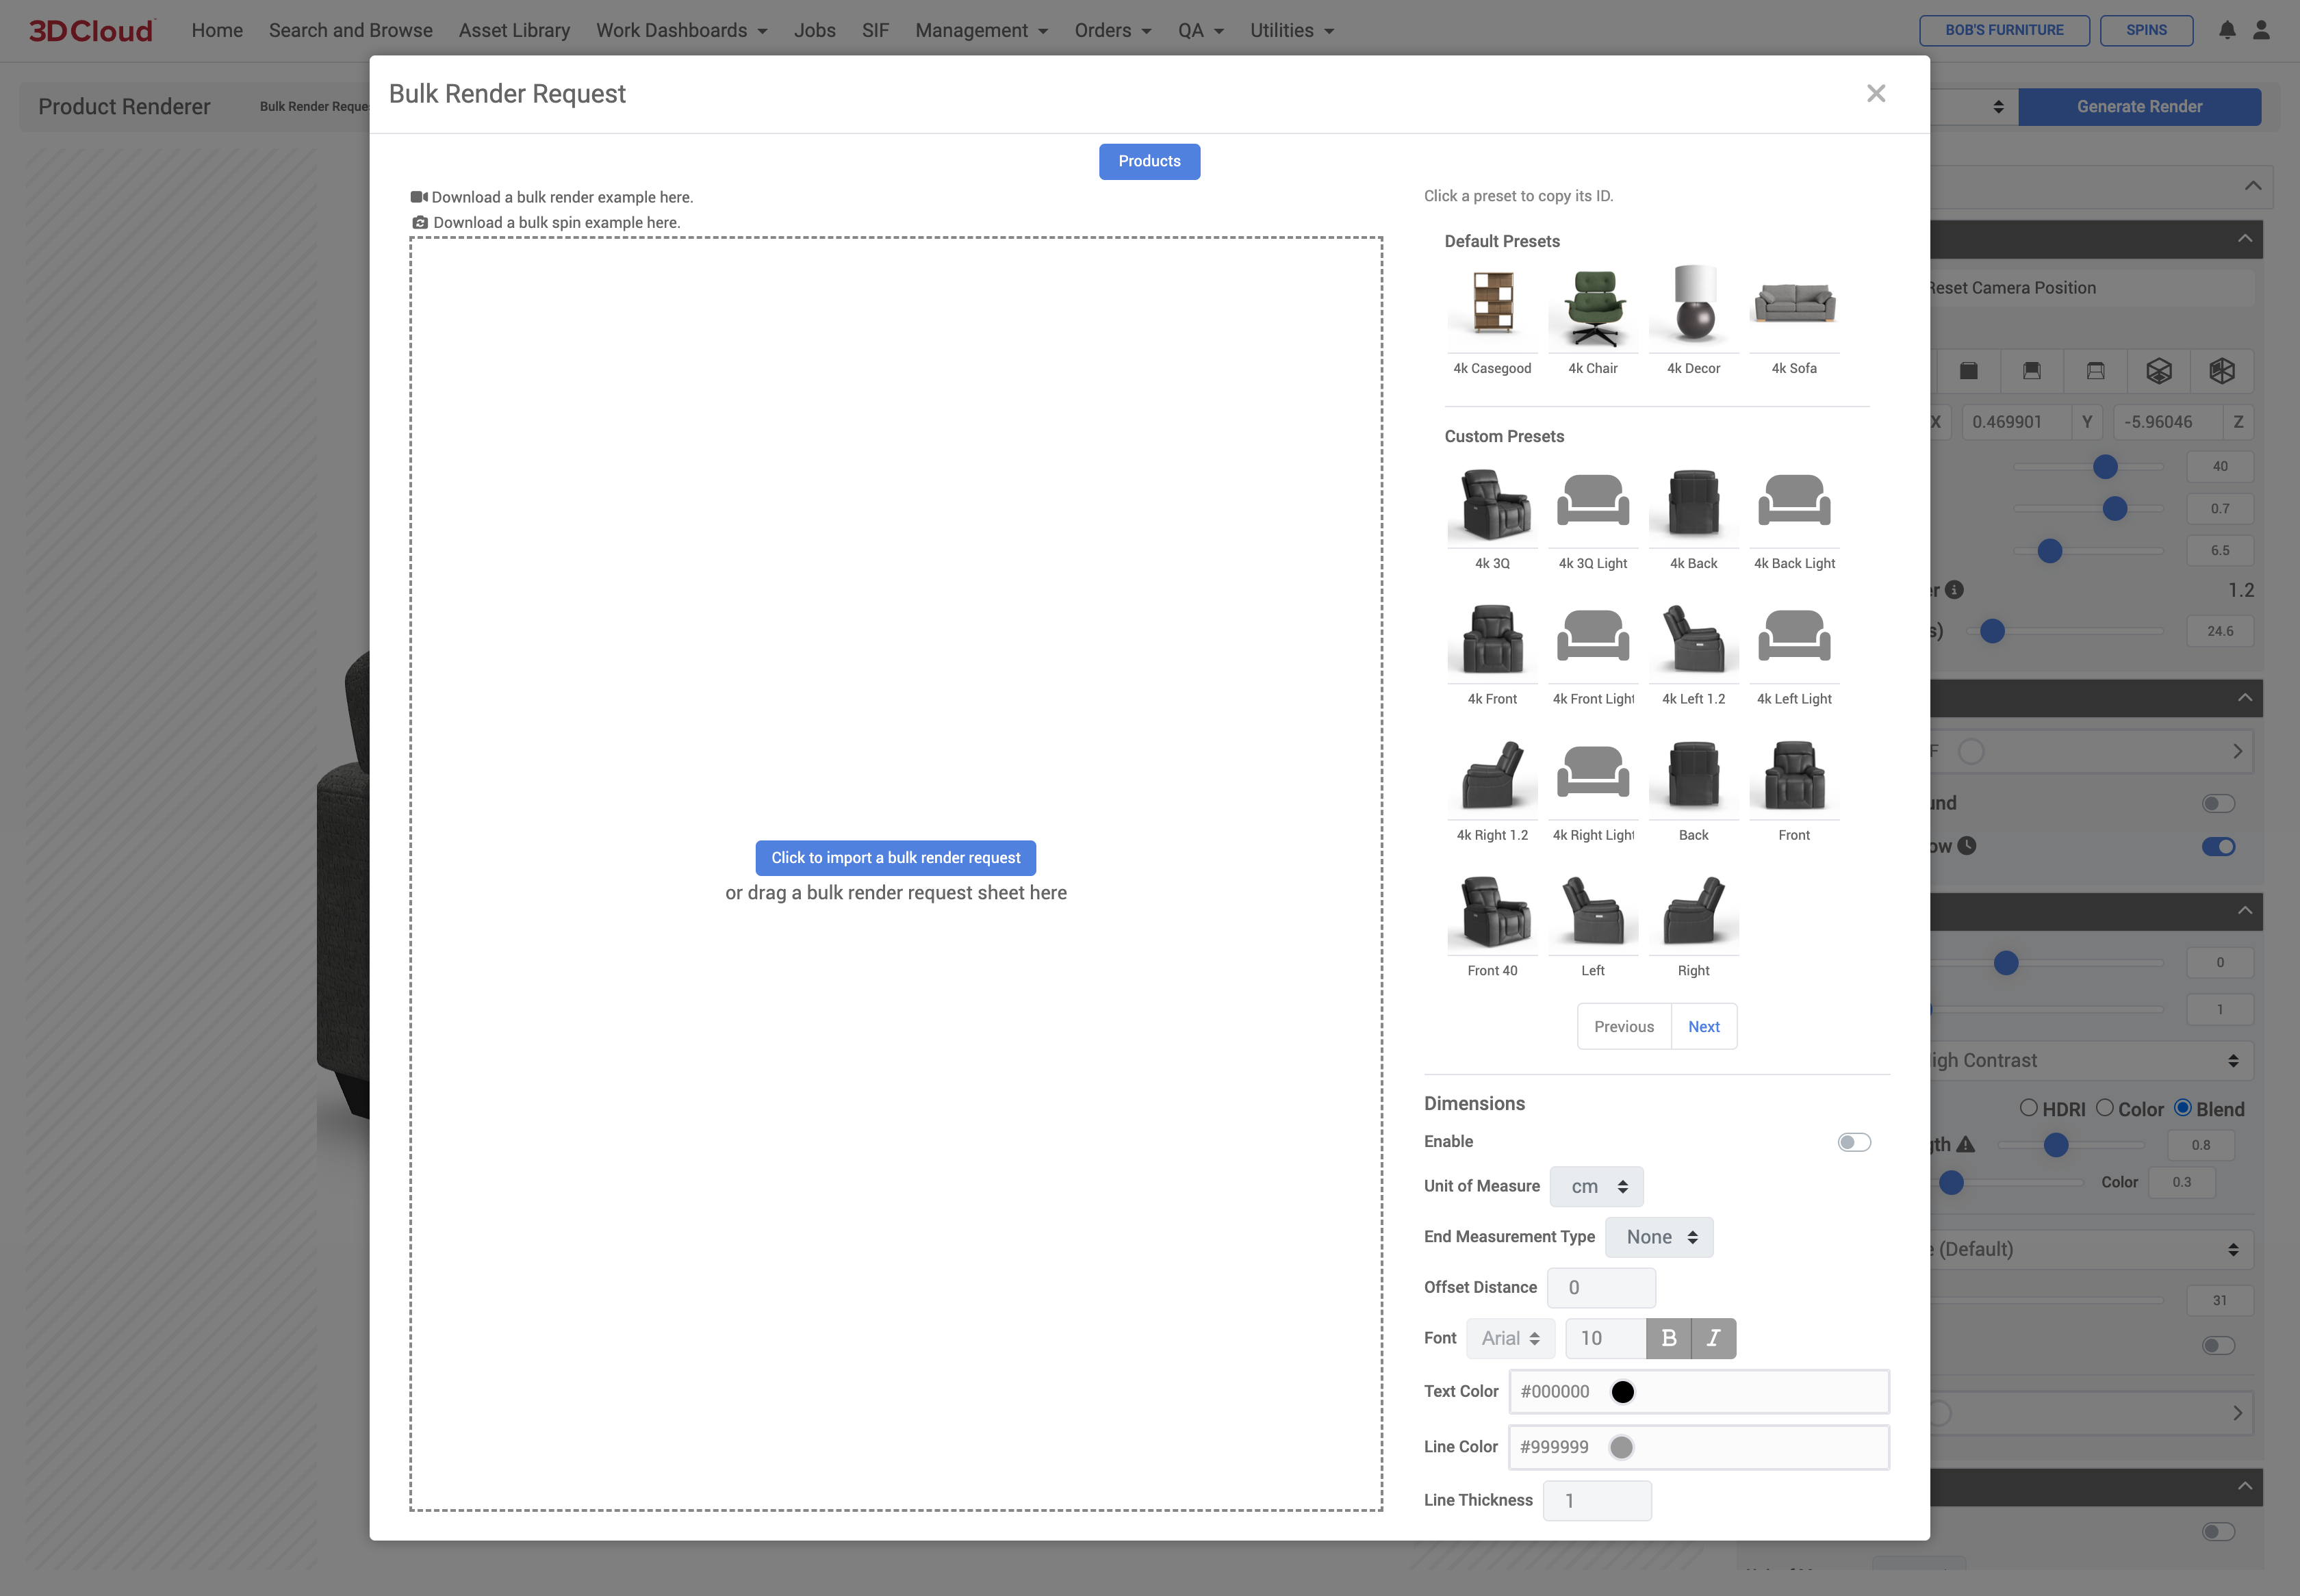
Select the “Click to import a bulk render request” button and select your .xlsx sheet.
Click the “Show Camera Preview” button first before rendering to check your cropping.
Edit the Bulk Render Request sheet with overrides to fix any outliers that are getting cropped off by a preset (see instructions following)
Confirm your overrides using the “Show Camera Preview” button.
Click the “Request Bulk Renders’ blue button to submit the request.
Monitor your email for the job completion notification.
Click the link in the email to download assets and route appropriately.
Step-by-Step Instructions
Go to Utilities → Product Renderer and load product(s).
On Product Render view, you can select an existing preset, or adjust your camera and lighting settings under “Advanced Options”.
.png)
Existing Preset Selected
Adjust Advanced Options as needed
The preview window shows the camera and product position.

When setting presets, be aware of the Fit-to-Screen Multiplier is greater than 1.0 to avoid renders cutting off the product.
Click on Bulk Render Request. Select the “Click to import a bulk render request” button and select your .xlsx sheet or drag and drop the xlsx file in the dotted input box.
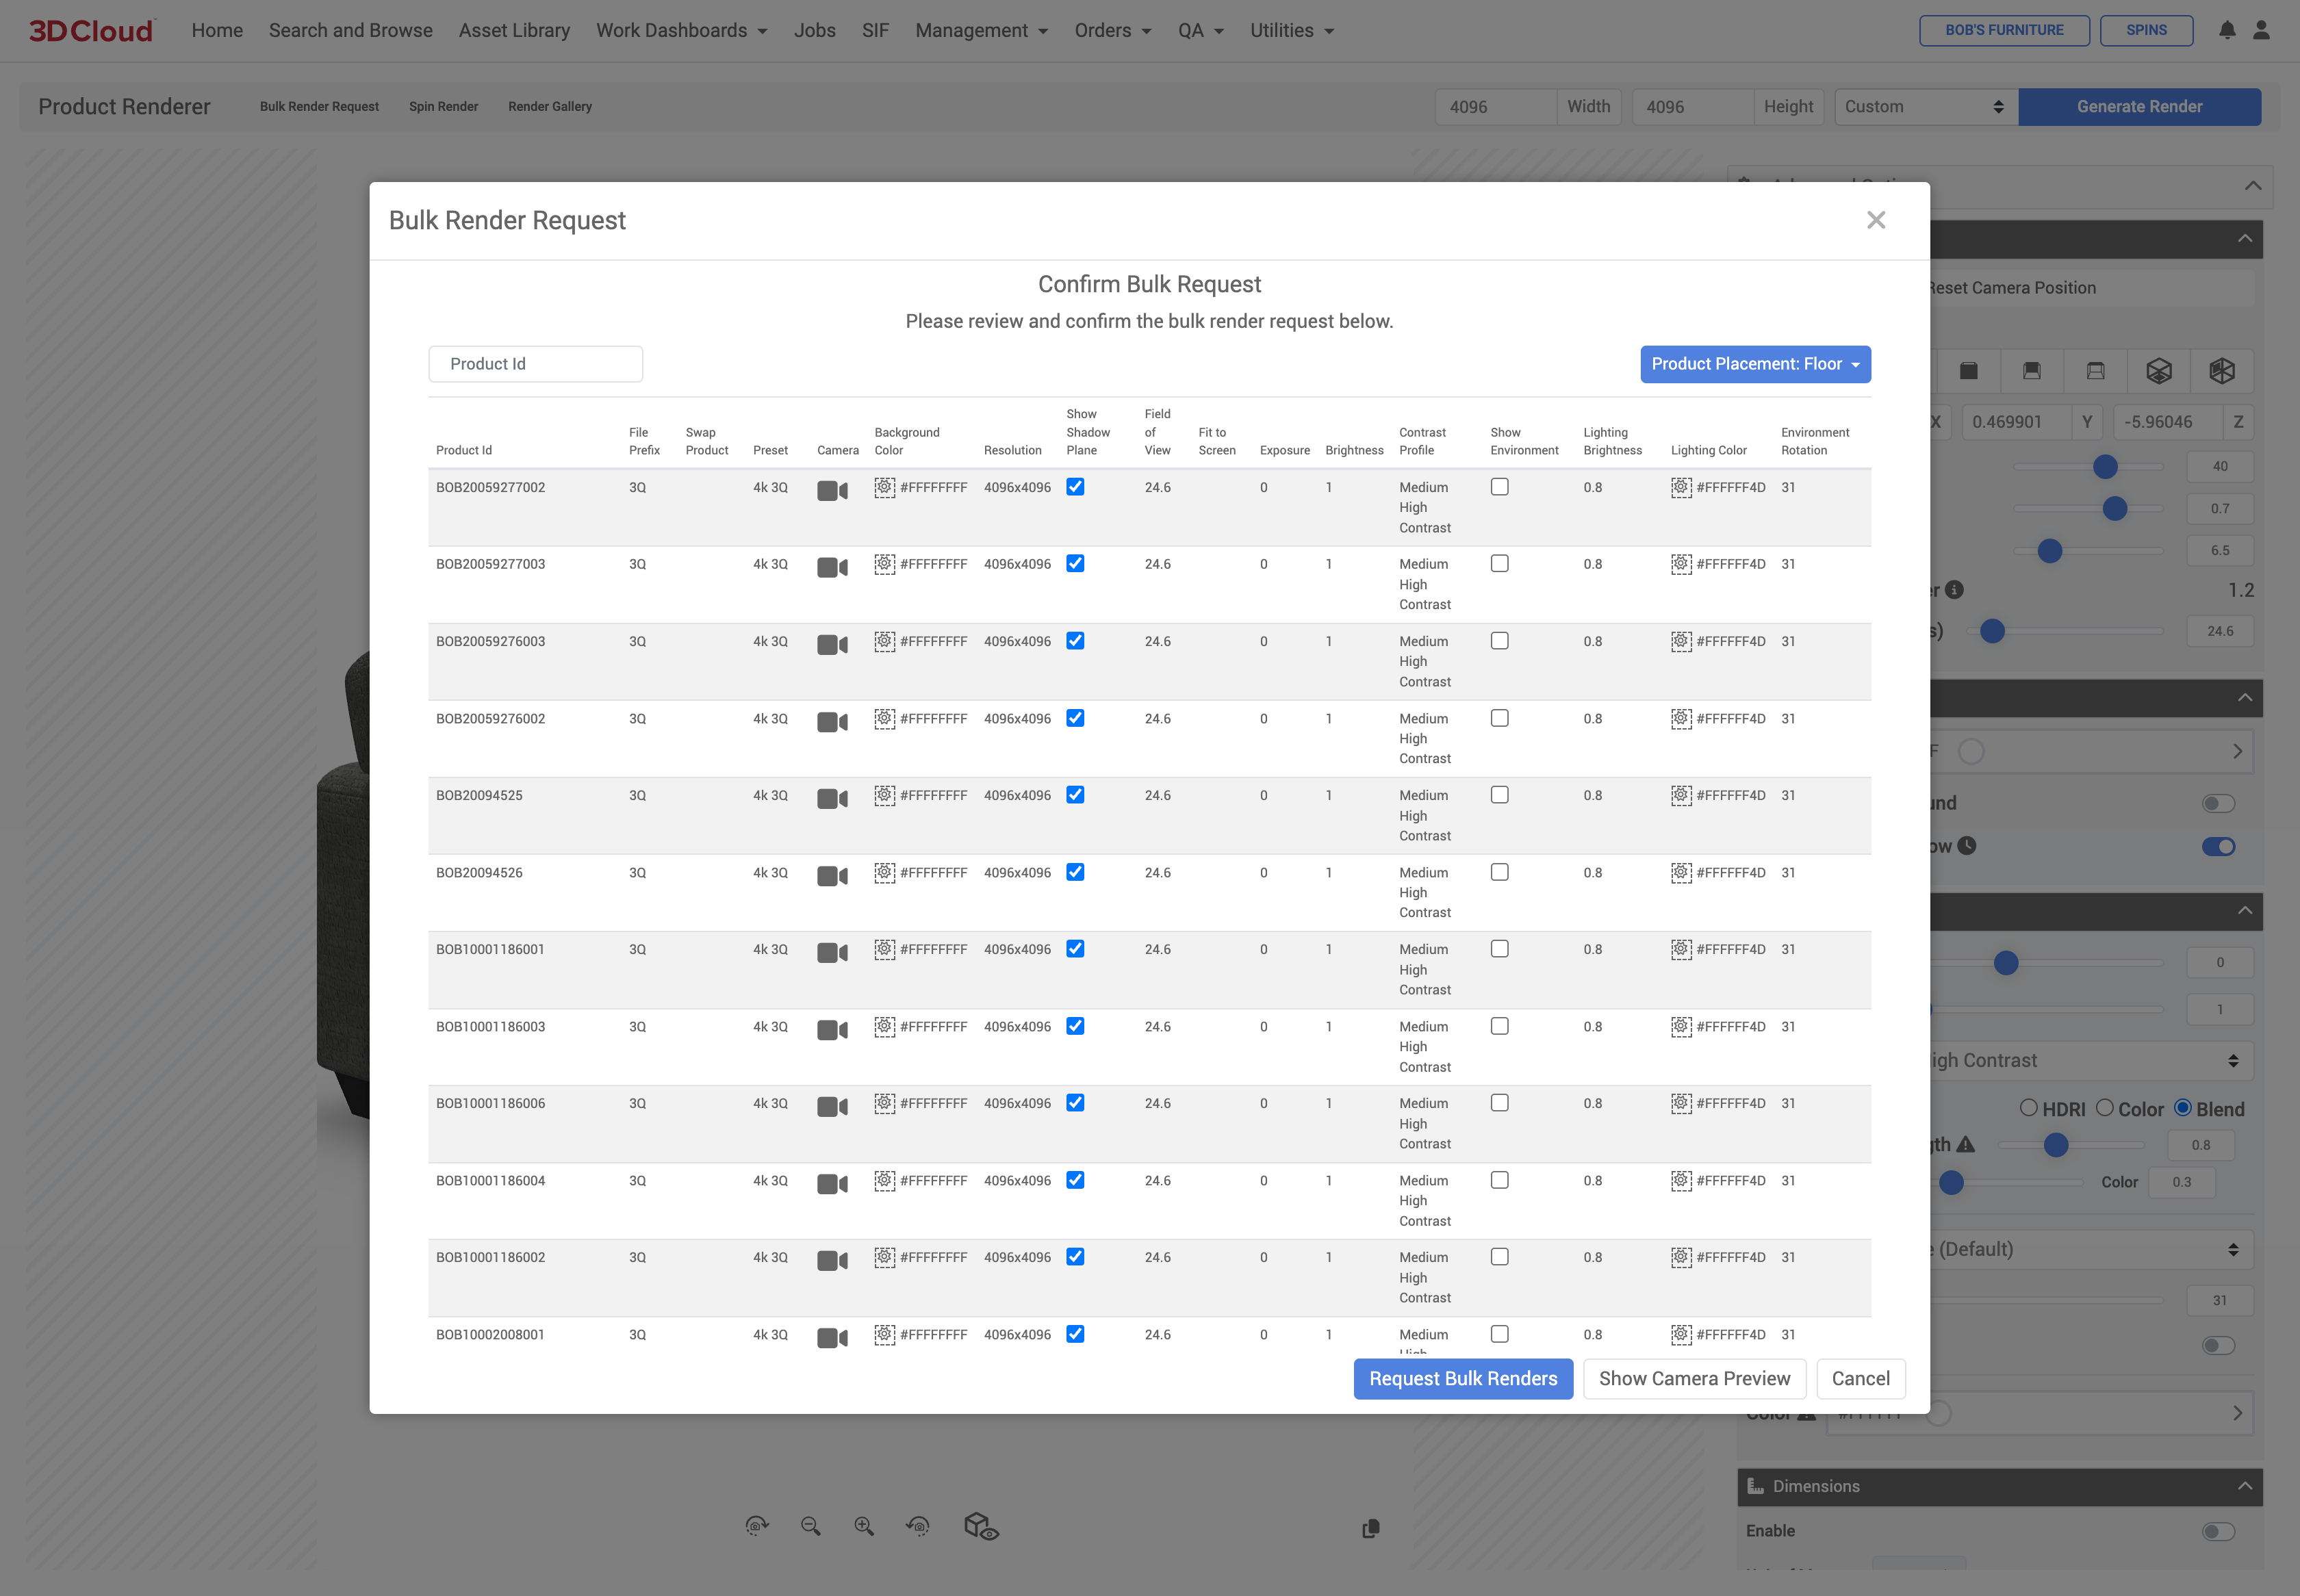
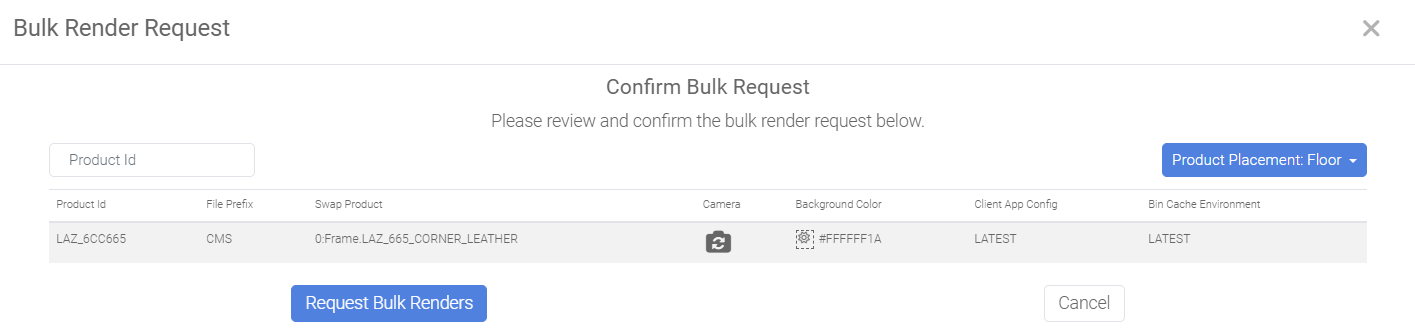
A confirmation window shows all items in the bulk request.
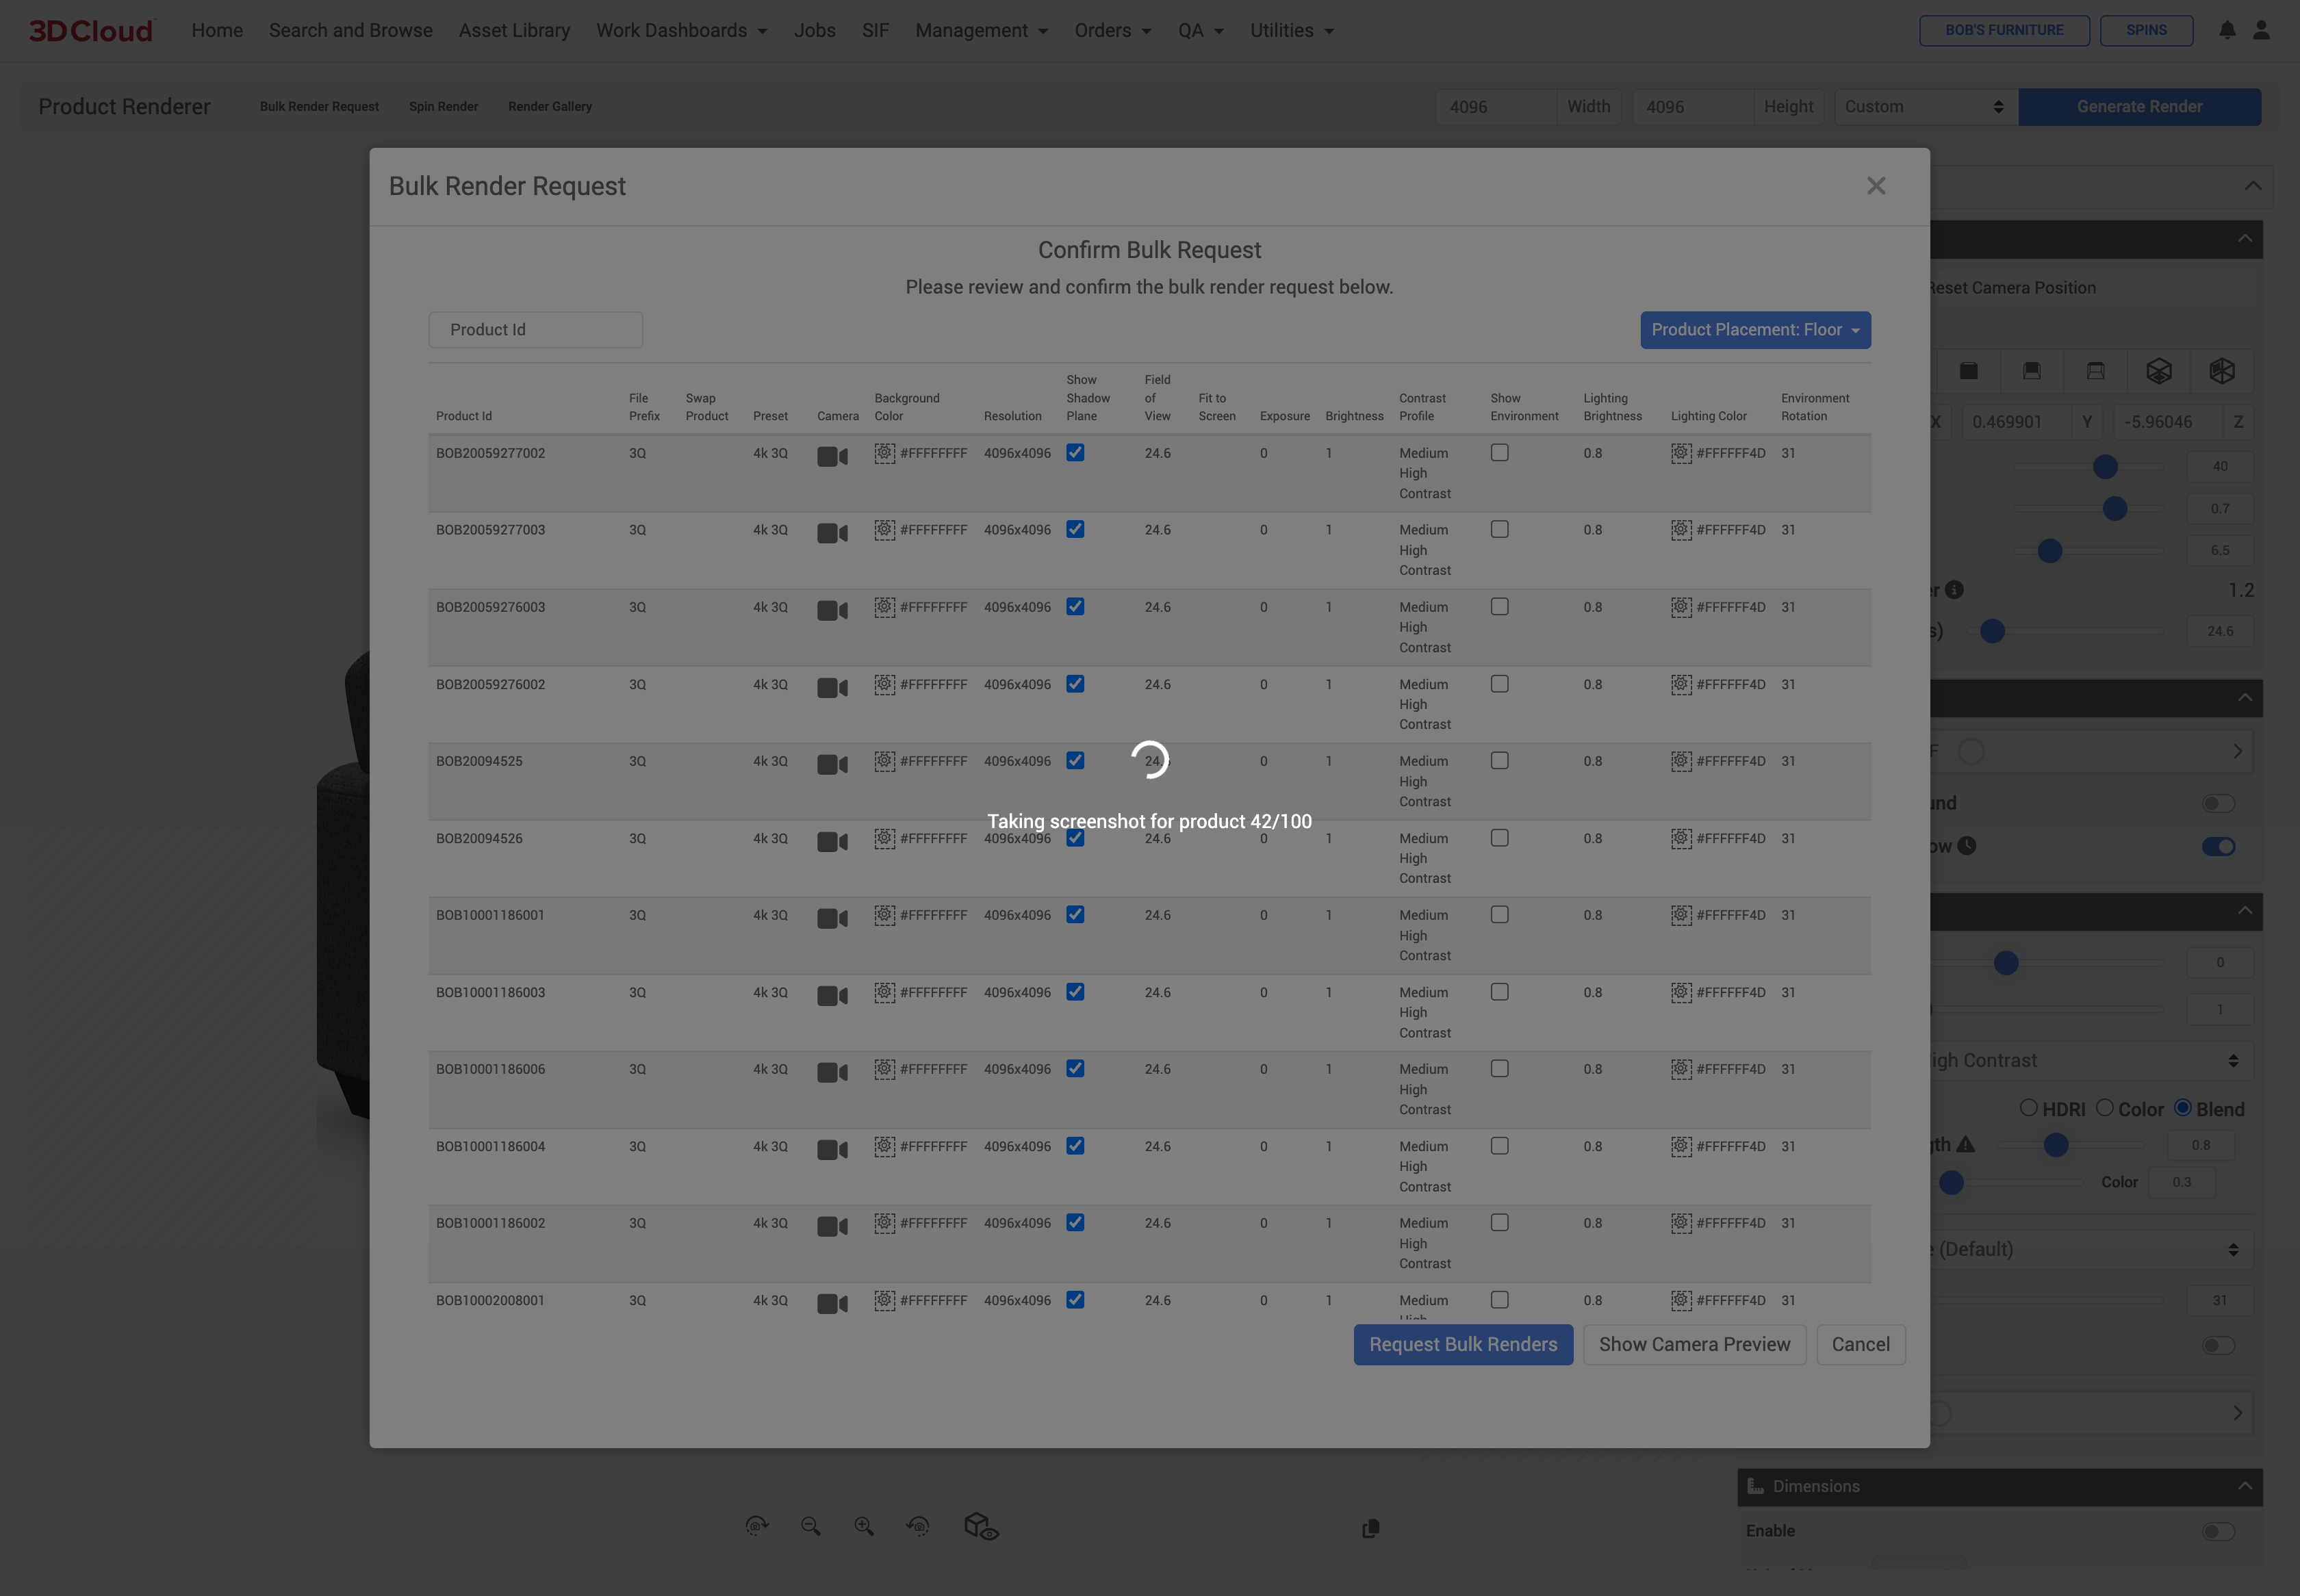
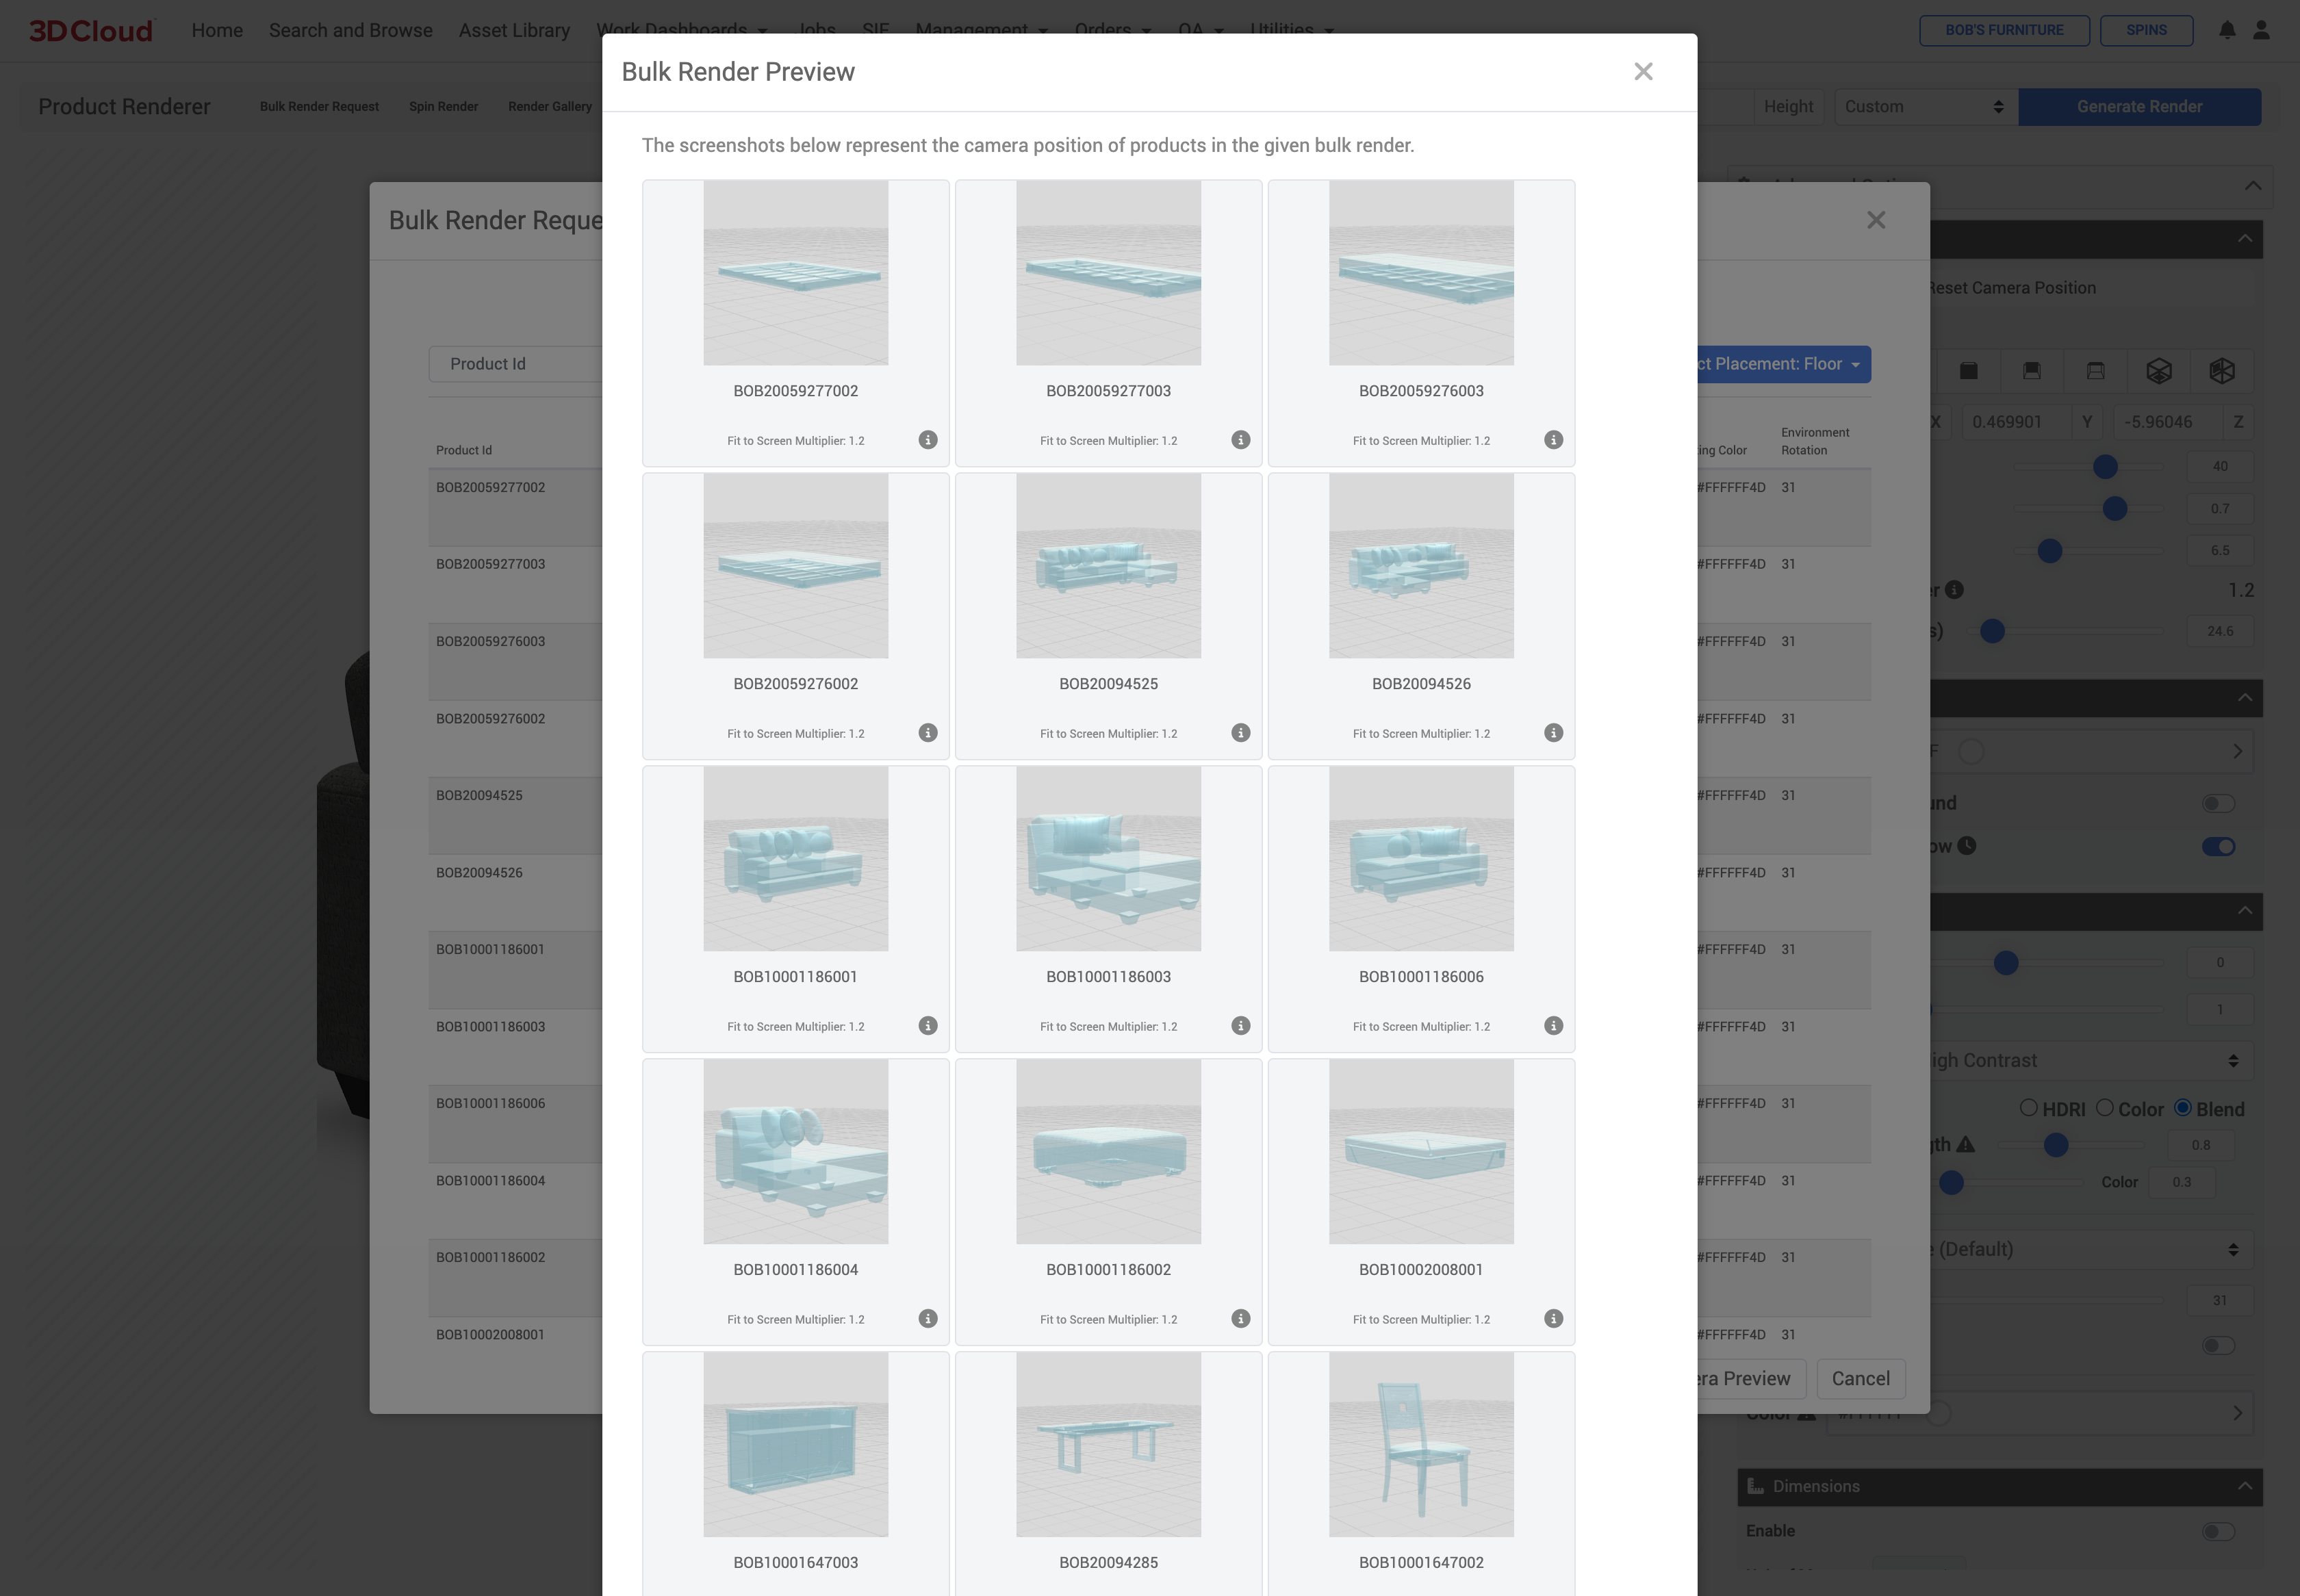
Click the “Show Camera Preview” button to check your crops. It can take up to 1 min per 50 products to load the preview.
Check the preview and adjust any abnormalities with overrides in your bulk render sheet.
Creating an override. If you are using a preset on a product (even with Fit-to-Screen on the preset) and the camera preview is not appearing as expected, you can exit the camera preview, load that Product ID into the Product Render page, select the preset and then make camera or product adjustments. Click on the Copy icon under the product viewport and use the “Copy All Render Options” button to copy and paste into the desired sheet row.

Products that may need an override to fit into the render frame are indicated with red arrows in the screenshot examples below. You can see that the products are extending outside the viewport/canvas.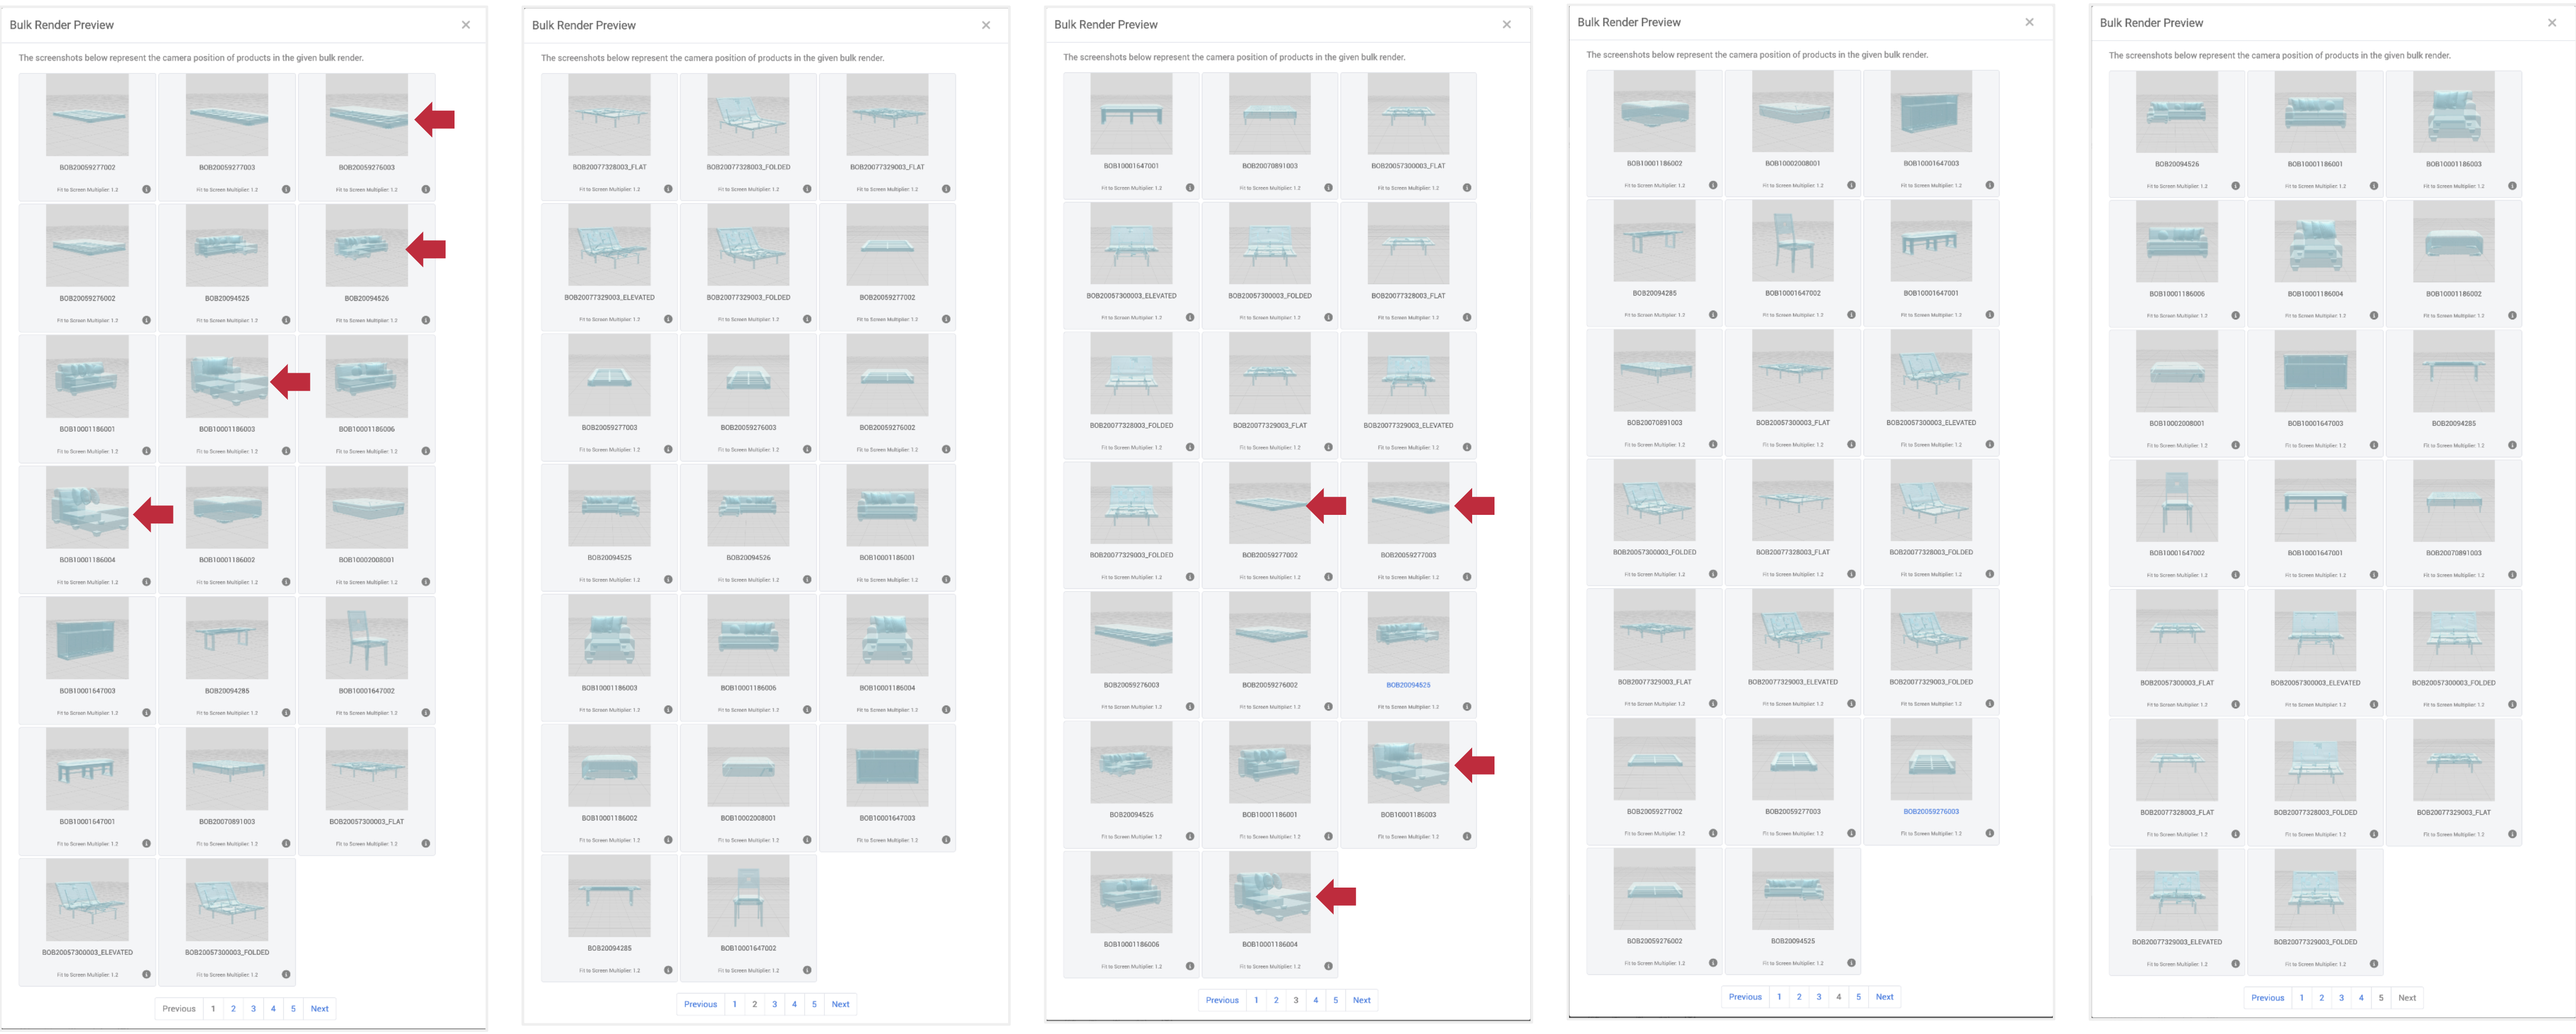
After adding “override” rows for the offending products to the bulk render sheet, reupload the sheet and click the “Show Camera Preview” again. The products are now fitting in the render frame shown in the Camera Preview. You are now ready to submit the bulk render job.
.png)
Make sure to select the Product Placement option for the bulk request (“Floor” or “Wall and/or Ceiling”) and click the Request Bulk Renders button to submit the job.
.png)
NOTE: Do NOT close your browser window at this point until the job is complete.
After your bulk render request is complete, you will receive an email notification with the subject line: “3D Cloud - Render Complete”

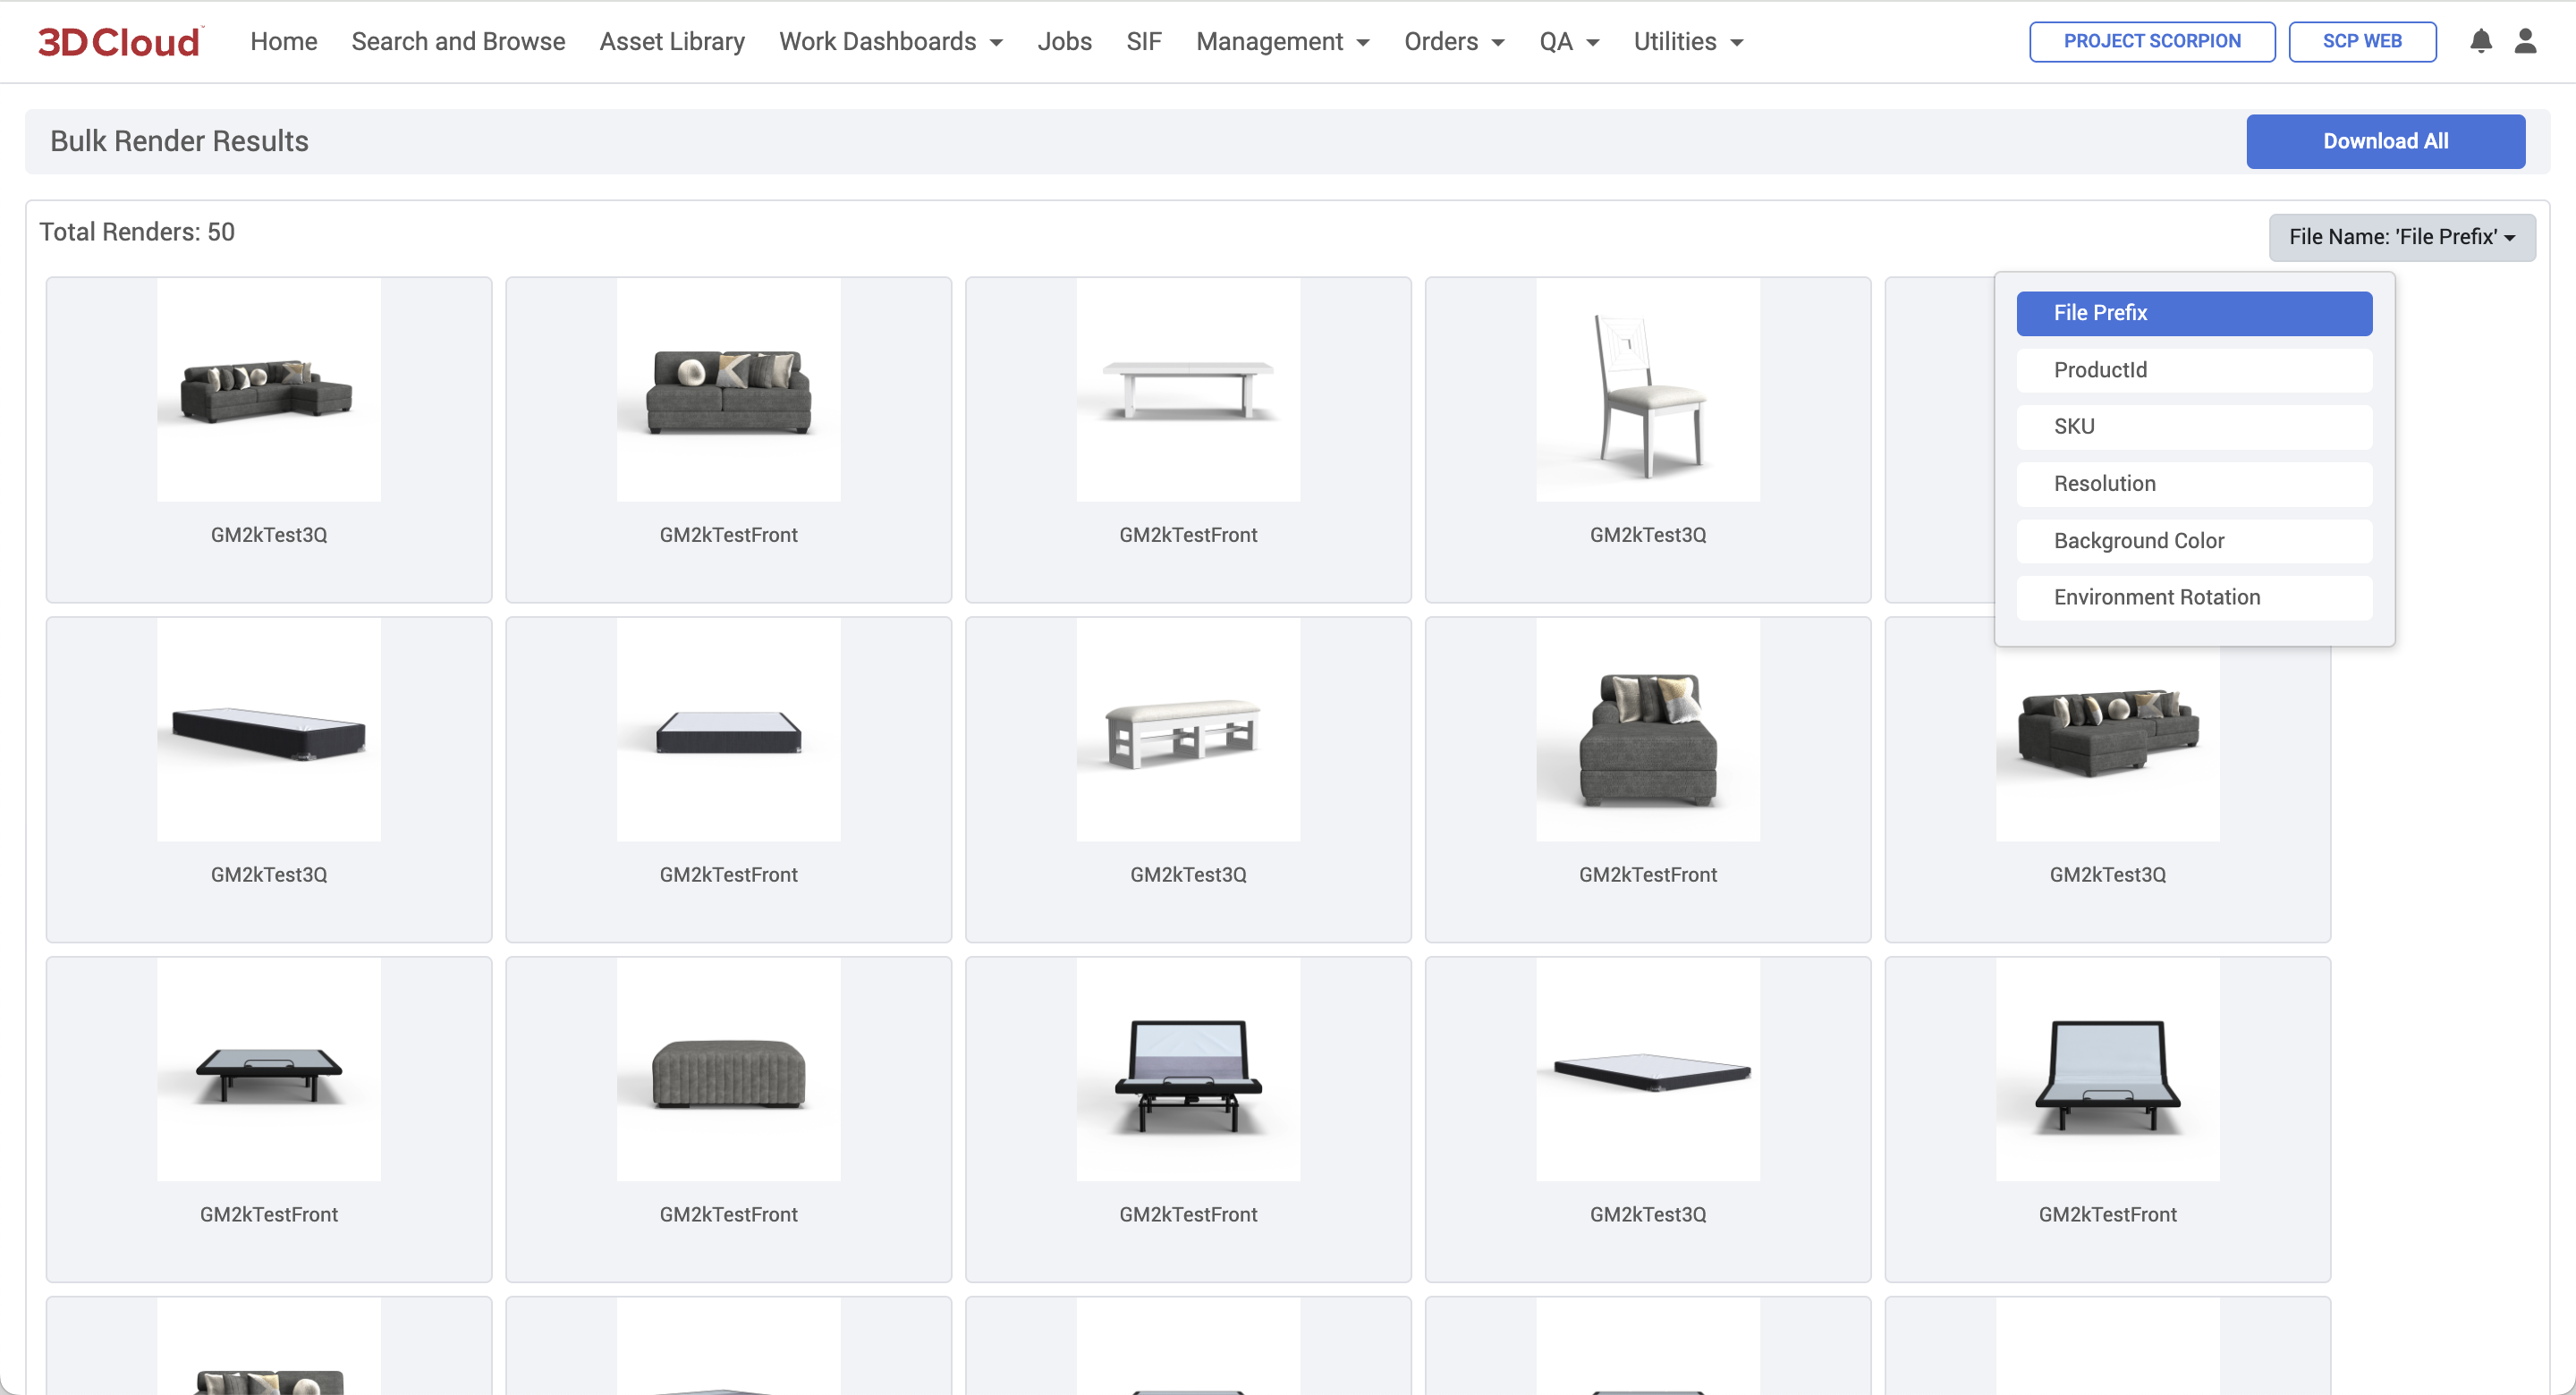
Clicking the link will take you to a download page, where you can select to download all files—specify “File Prefix” only if you want the downloaded files to have the filePrefix (filename) from your bulk render sheet.
Spin Renders
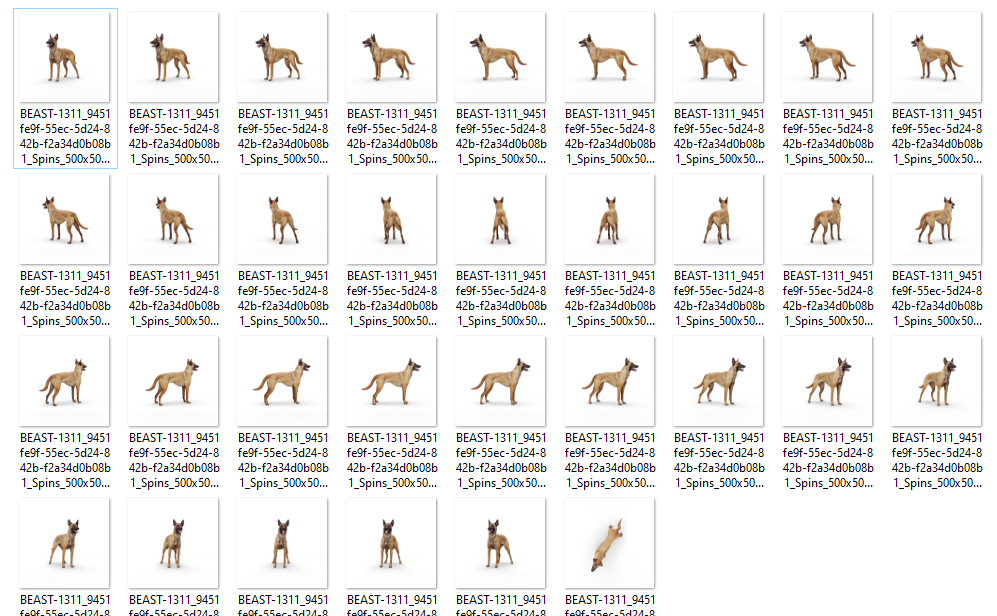
A Spin Render generates 33 images of a product, rotating the camera counter-clockwise in 12° increments around the object, plus a top view. It can be accessed on the Product Renderer Page next to the page title.
Step-by-Step Instructions
Load your desired Product(s) and press the “Spin Render” button in the Product Renderer title bar to switch to spin render mode.
.png)
This will change the render Advanced Options to read-only.
Note: All spin render options (except for Background Color) are controlled by/inherited from the Client App Config file (which cannot be edited through the AMS). To adjust your Client App Config settings, coordinate this with your 3D Cloud account team.
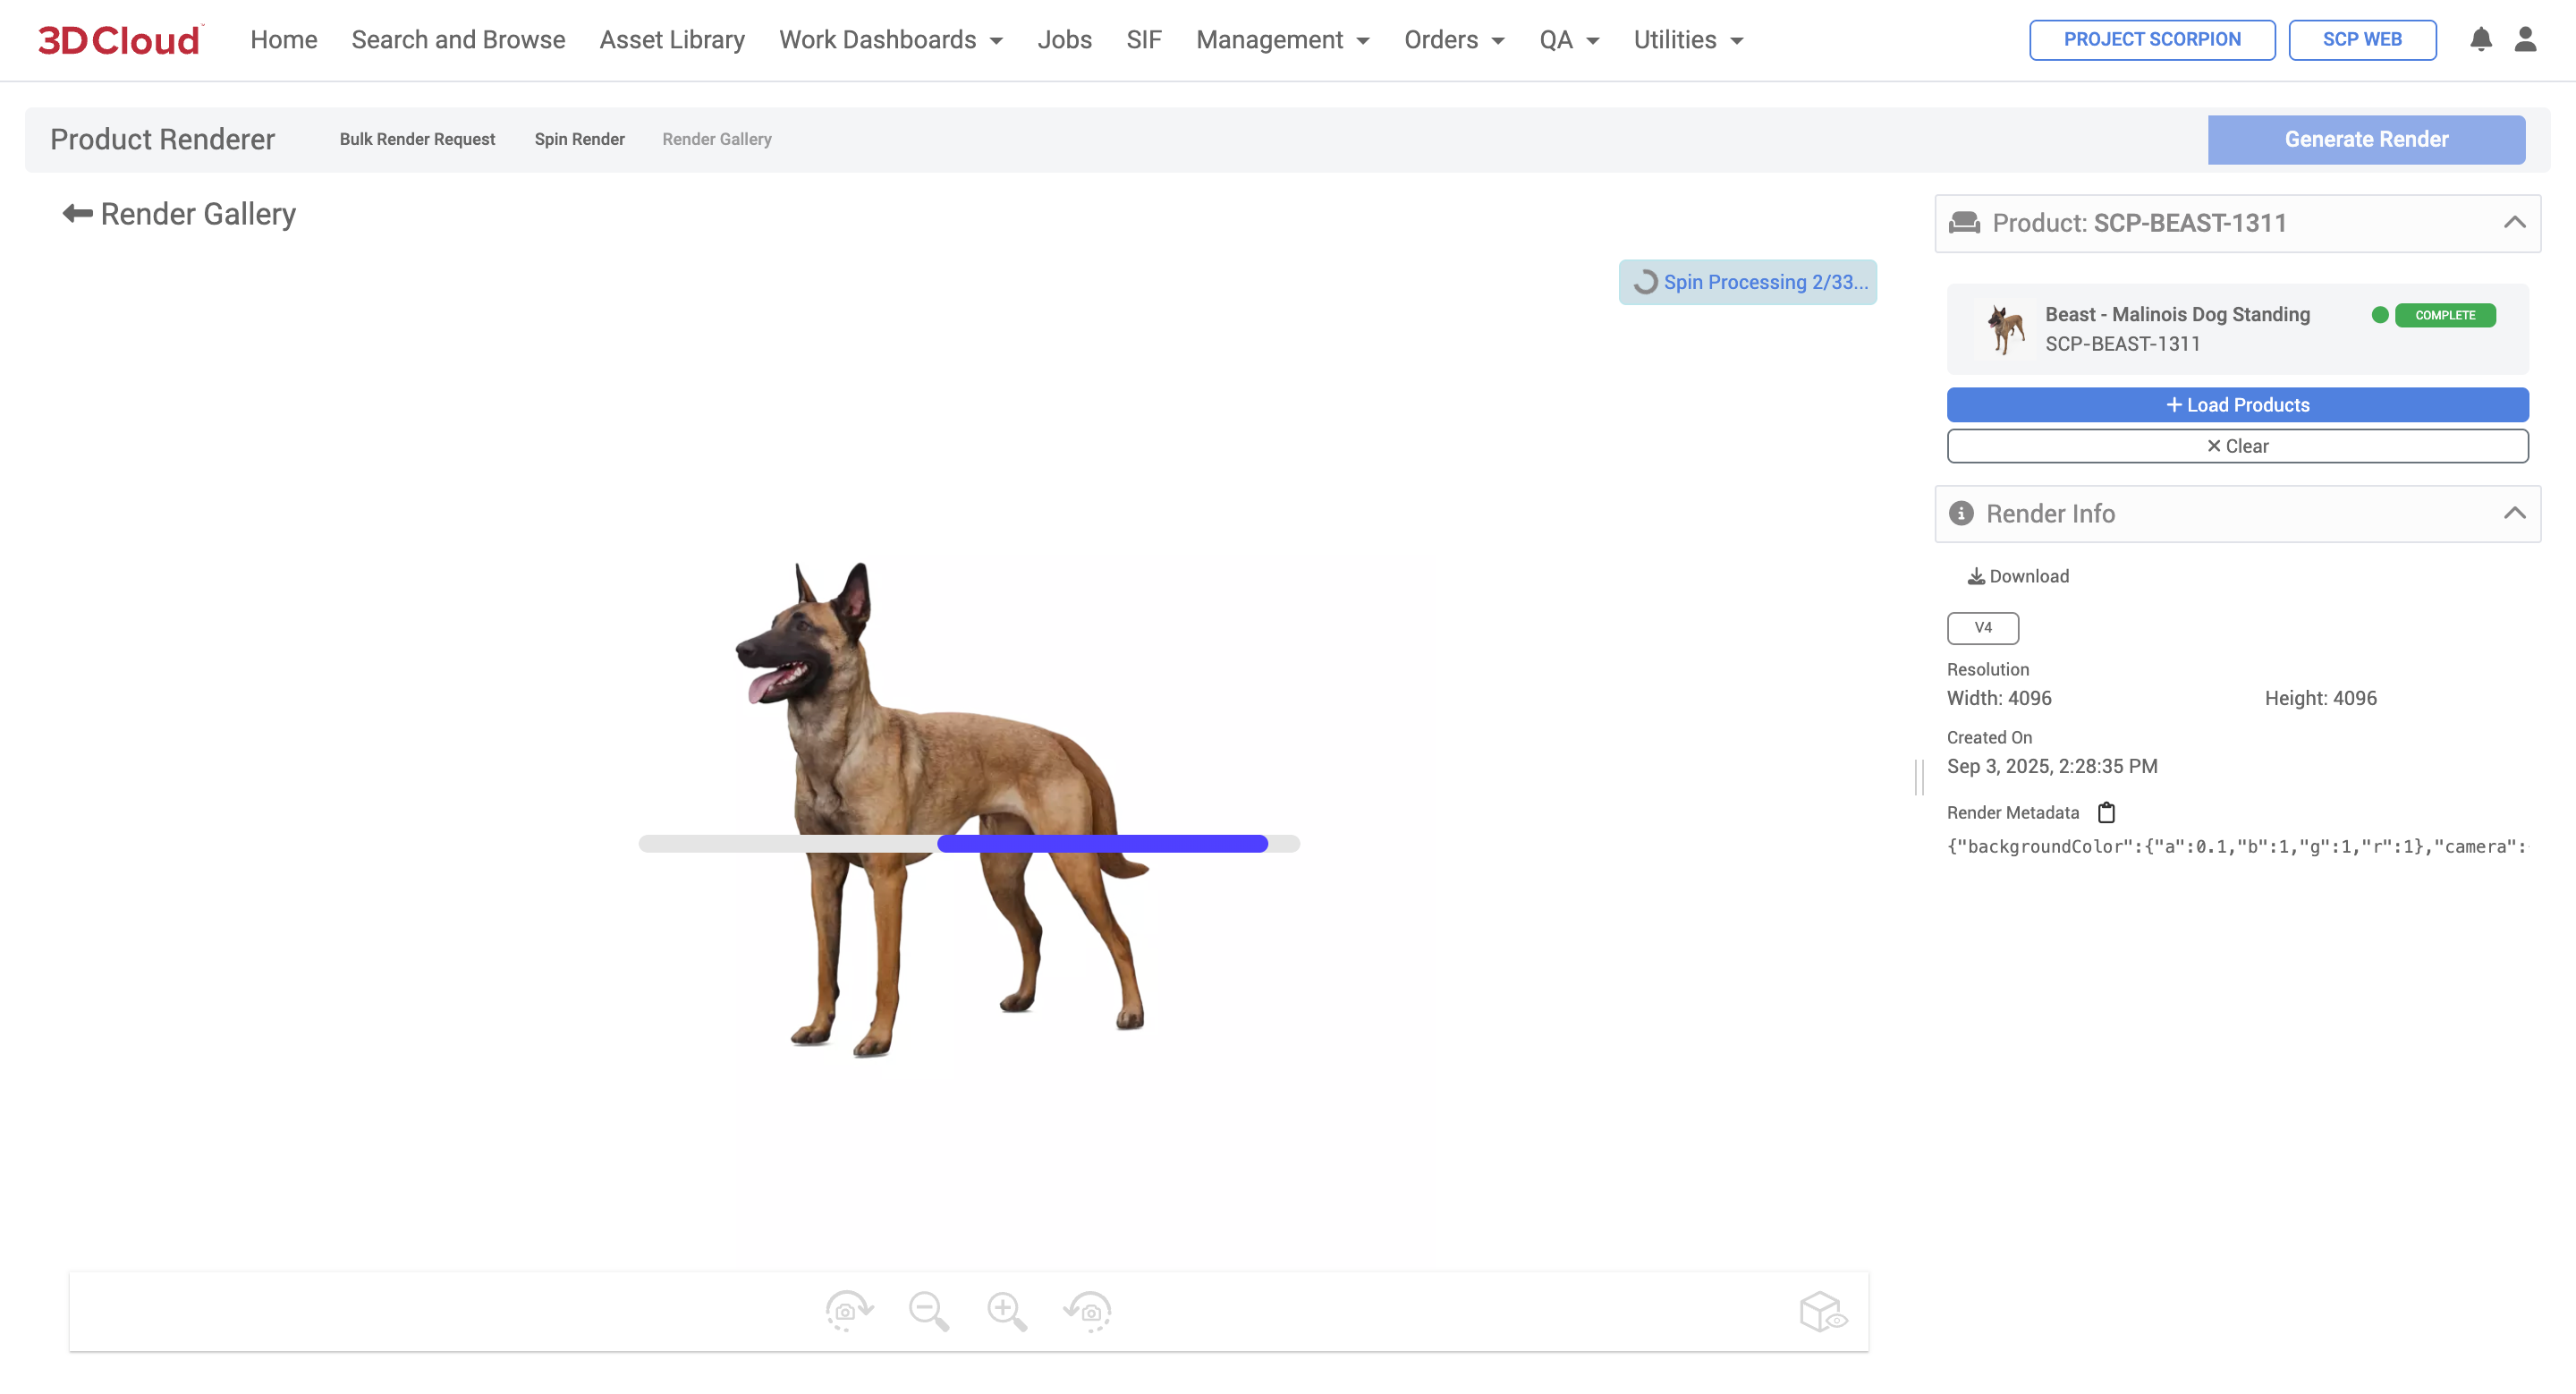
Click the “Generate Spin” button on the Spin Render mode page.
While your render is processing, you can view it’s current status for all 33 spin images by clicking the notification bell at the top right of the AMS window. Your spin render will not be visible in the Render Gallery until at least 1 image has been created in the spin. If you visit the Render Gallery before the first image is created, you won’t see any spins.
Note: It can take up to 19 hours generate a spin render depending on the complexity of the 3D model, because it is run on a slower Cloud node. You will not receive an email notification for Spin or Bulk Spin Render requests.
.png)
Bulk Spin Renders
Multiple product spin renders can be made using the “Bulk Render Request” functionality but with a different .xlsx template sheet tailored for Bulk Spin Renders.
Navigate to the Bulk Render Request modal window on the Product Renderer page.
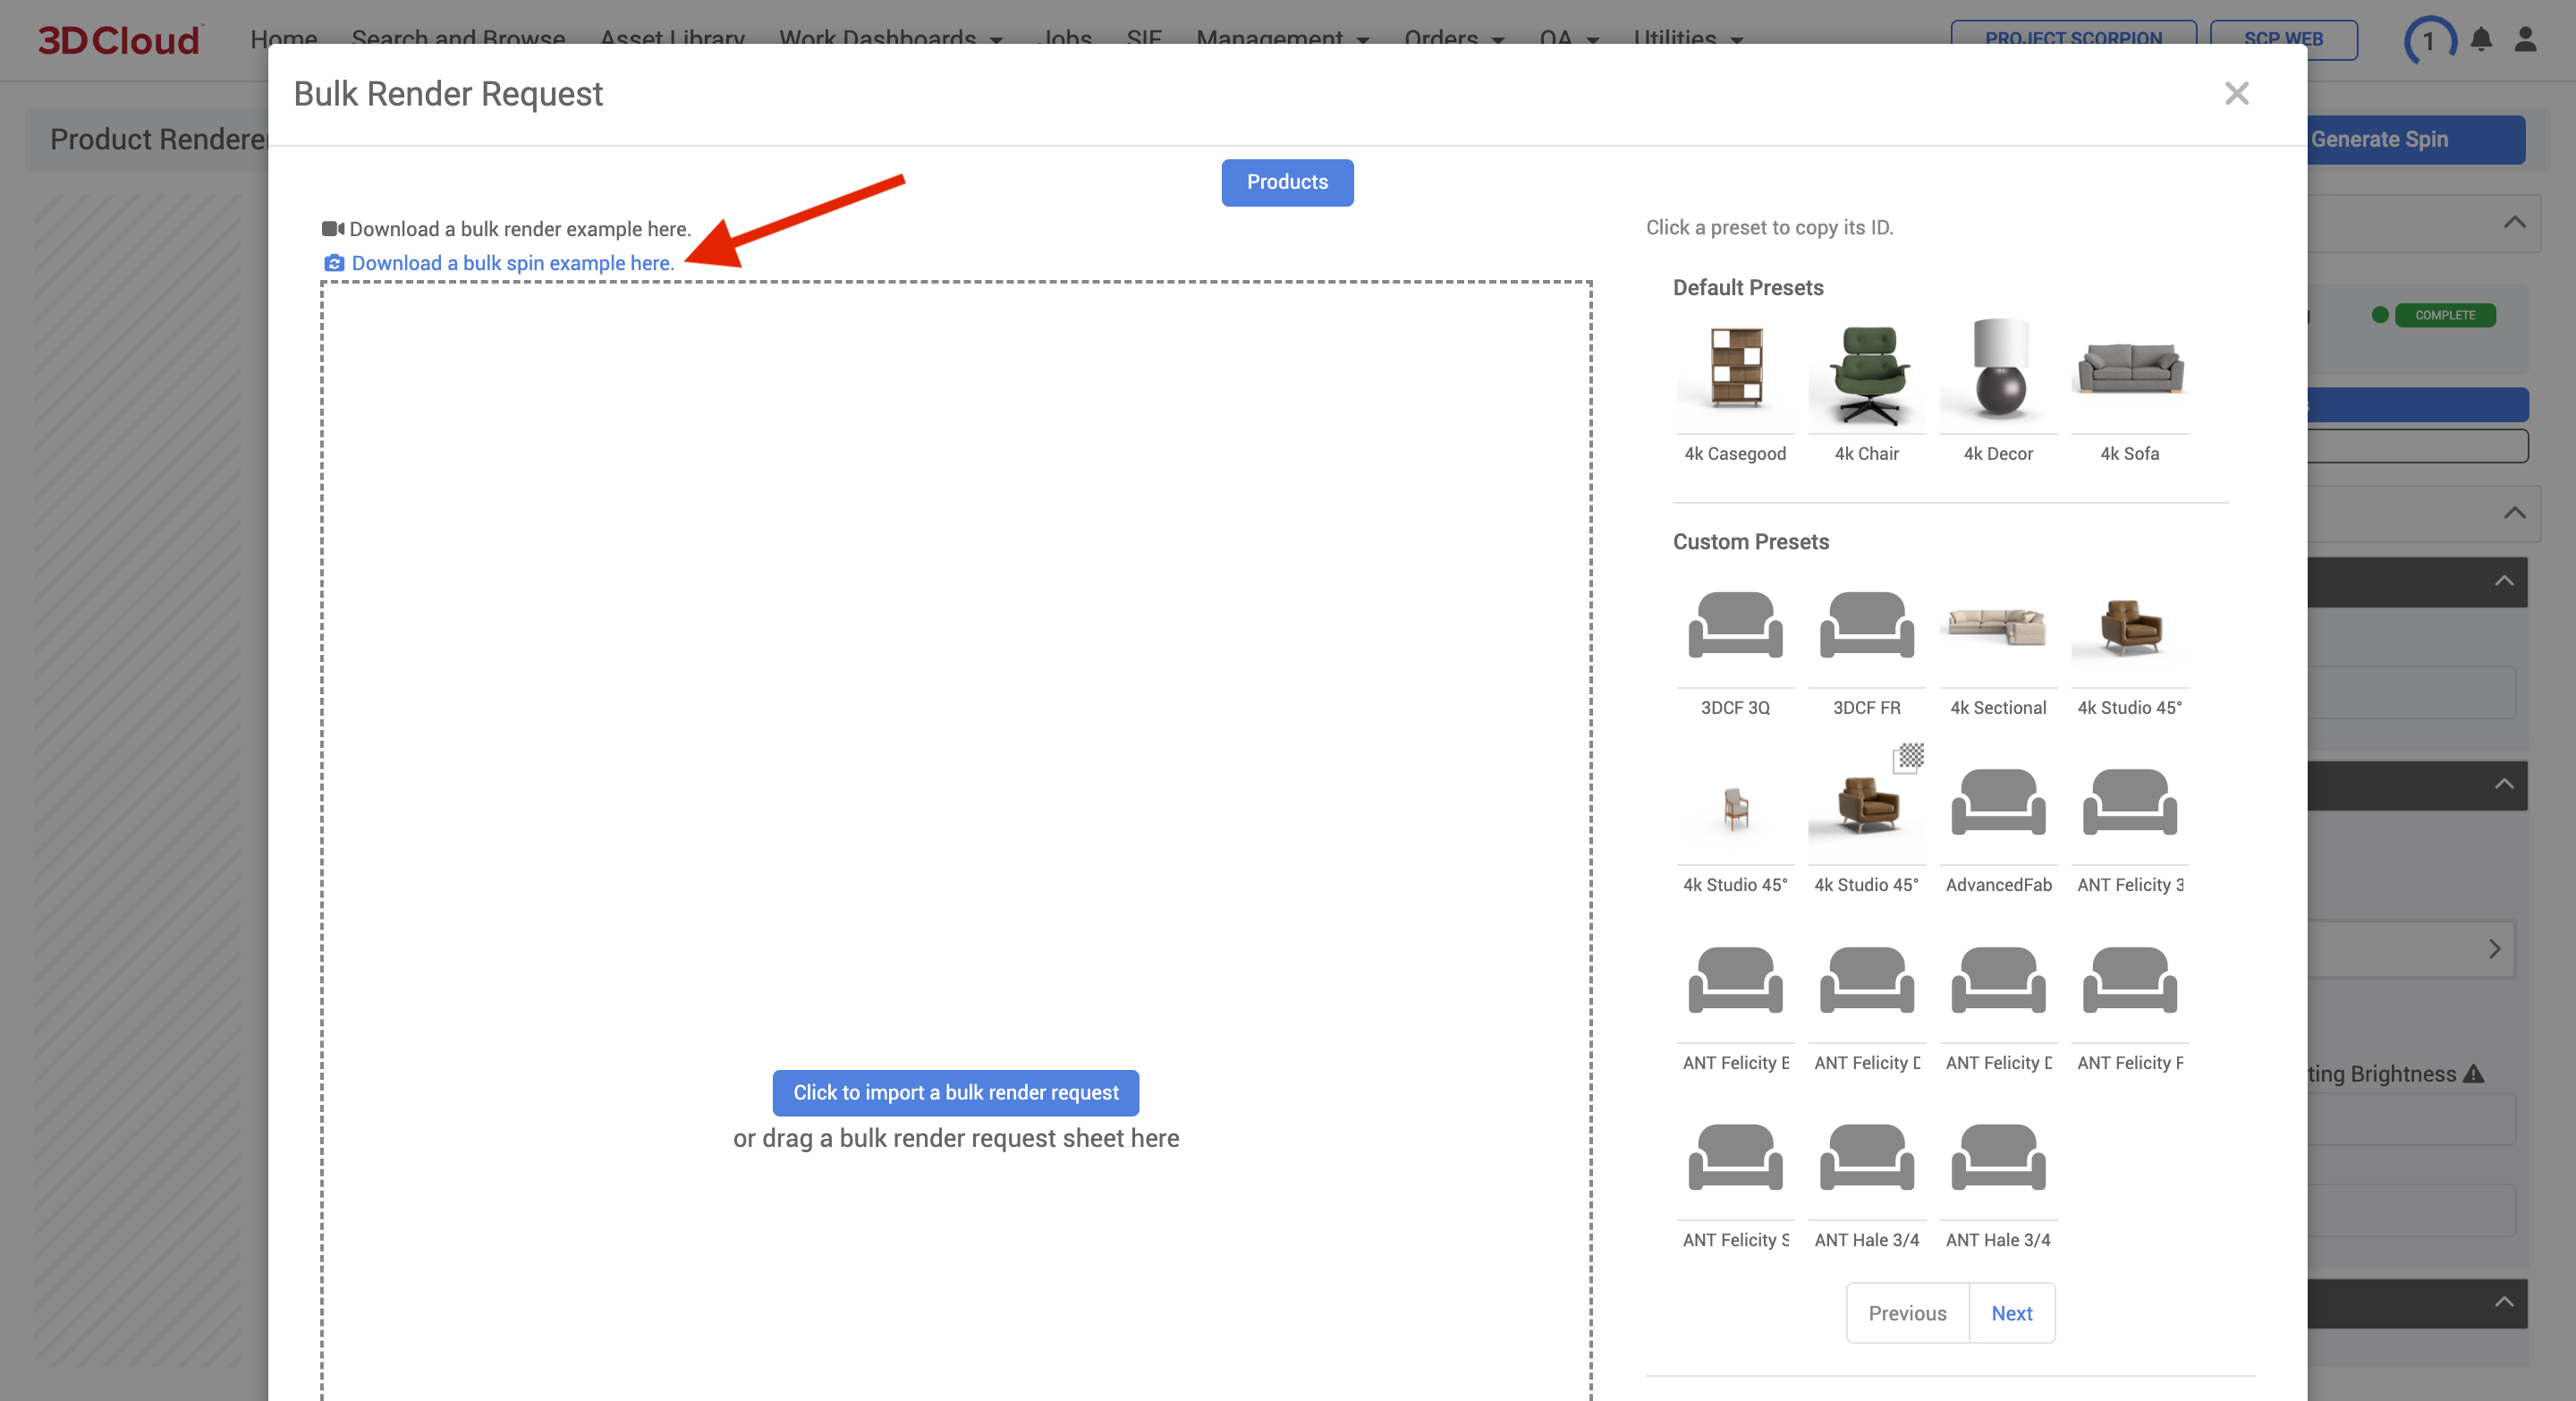
Download and fill out the example-bulk-spin-request.xlsx template. Make sure “spin” is specified in the “camera” column D. Note that Preset IDs are not present on the Bulk Render Spins sheet, since settings are controlled by the Client App Config.
Click the “Click to import a bulk render request” button to import the bulk spin sheet or drag and drop it onto the dotted input window. A Bulk Render Request confirmation modal will open, allowing you to see one final snapshot of your render request prior to submission.
Note: If you select Product Placement: Wall and/or Ceiling a warning will appear indicating Shadow Planes will be disabled for Wall and Ceiling products.
Click the Request Bulk Renders button.
Note: It can take up to 19 hours per product spin render, because it is run on a slower Cloud node. You will not receive an email notification for Spin or Bulk Spin Render requests.
Product Configurator Render
To generate an HD render of an individual product configurators, follow the steps below:
Access Product Configurator via Utilities → 3D Product Configurator.
Navigate to the Product Configurator you want to render.
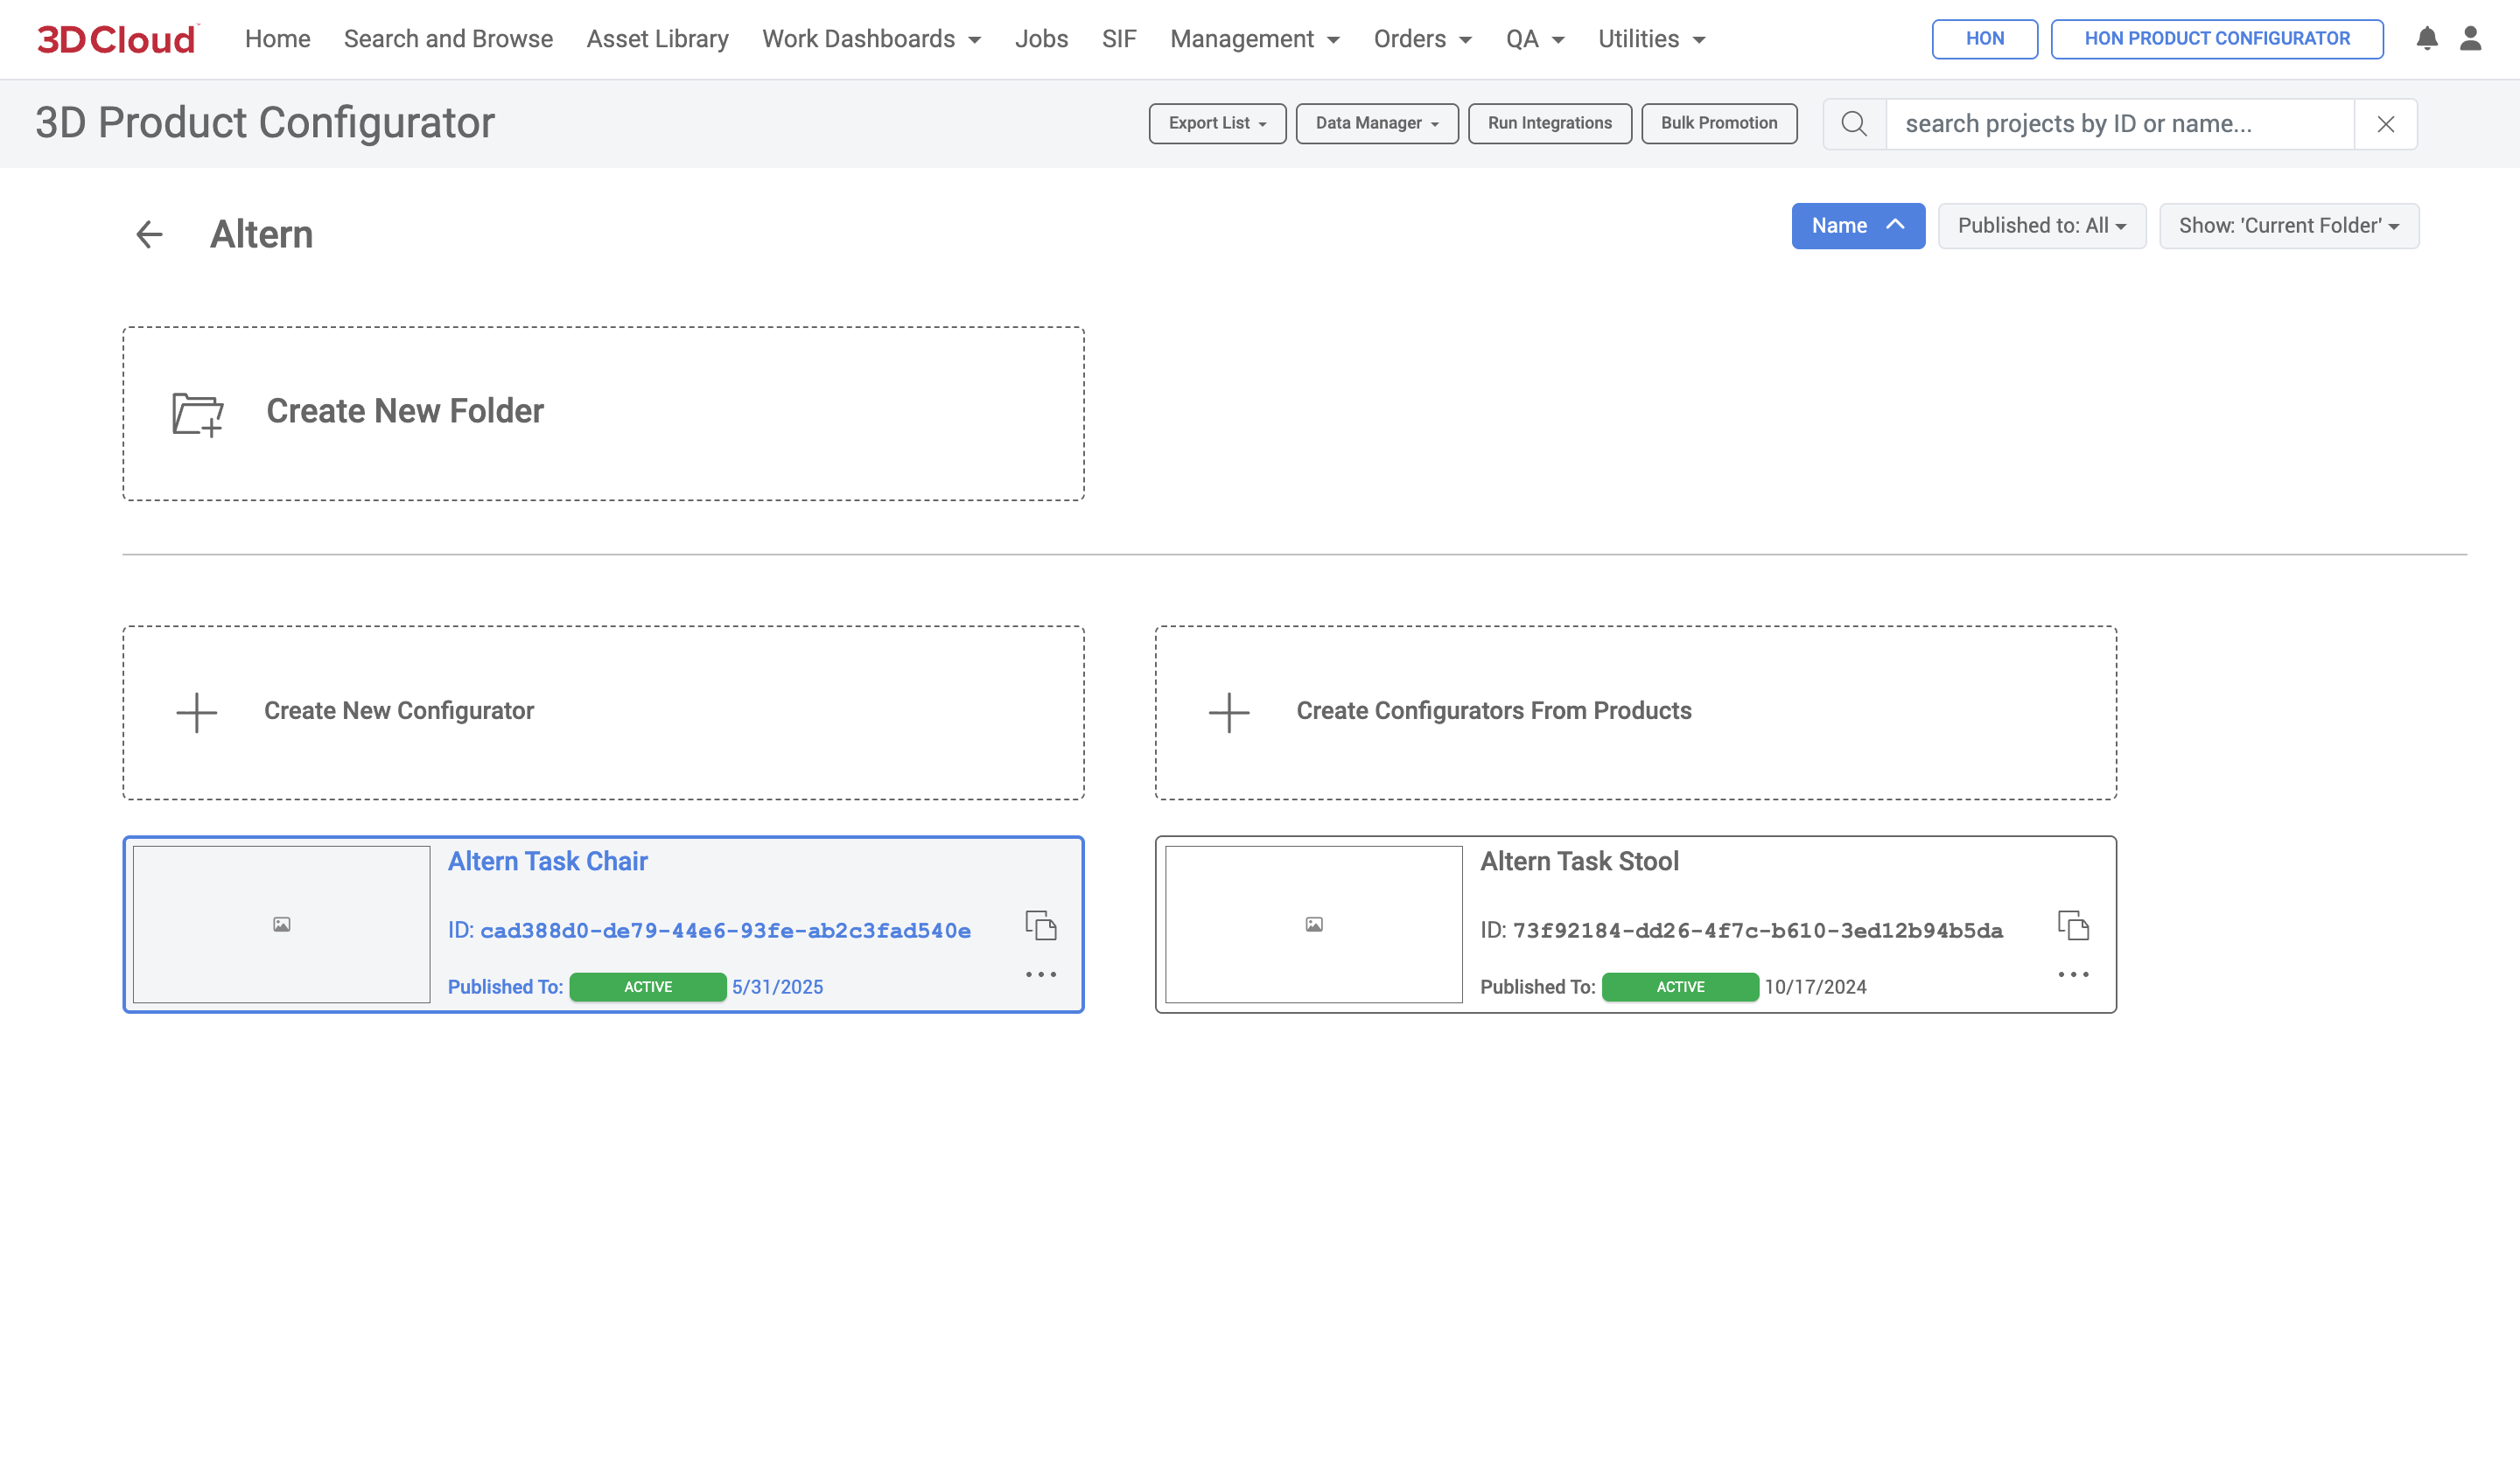
Click the “Generate Renders” button
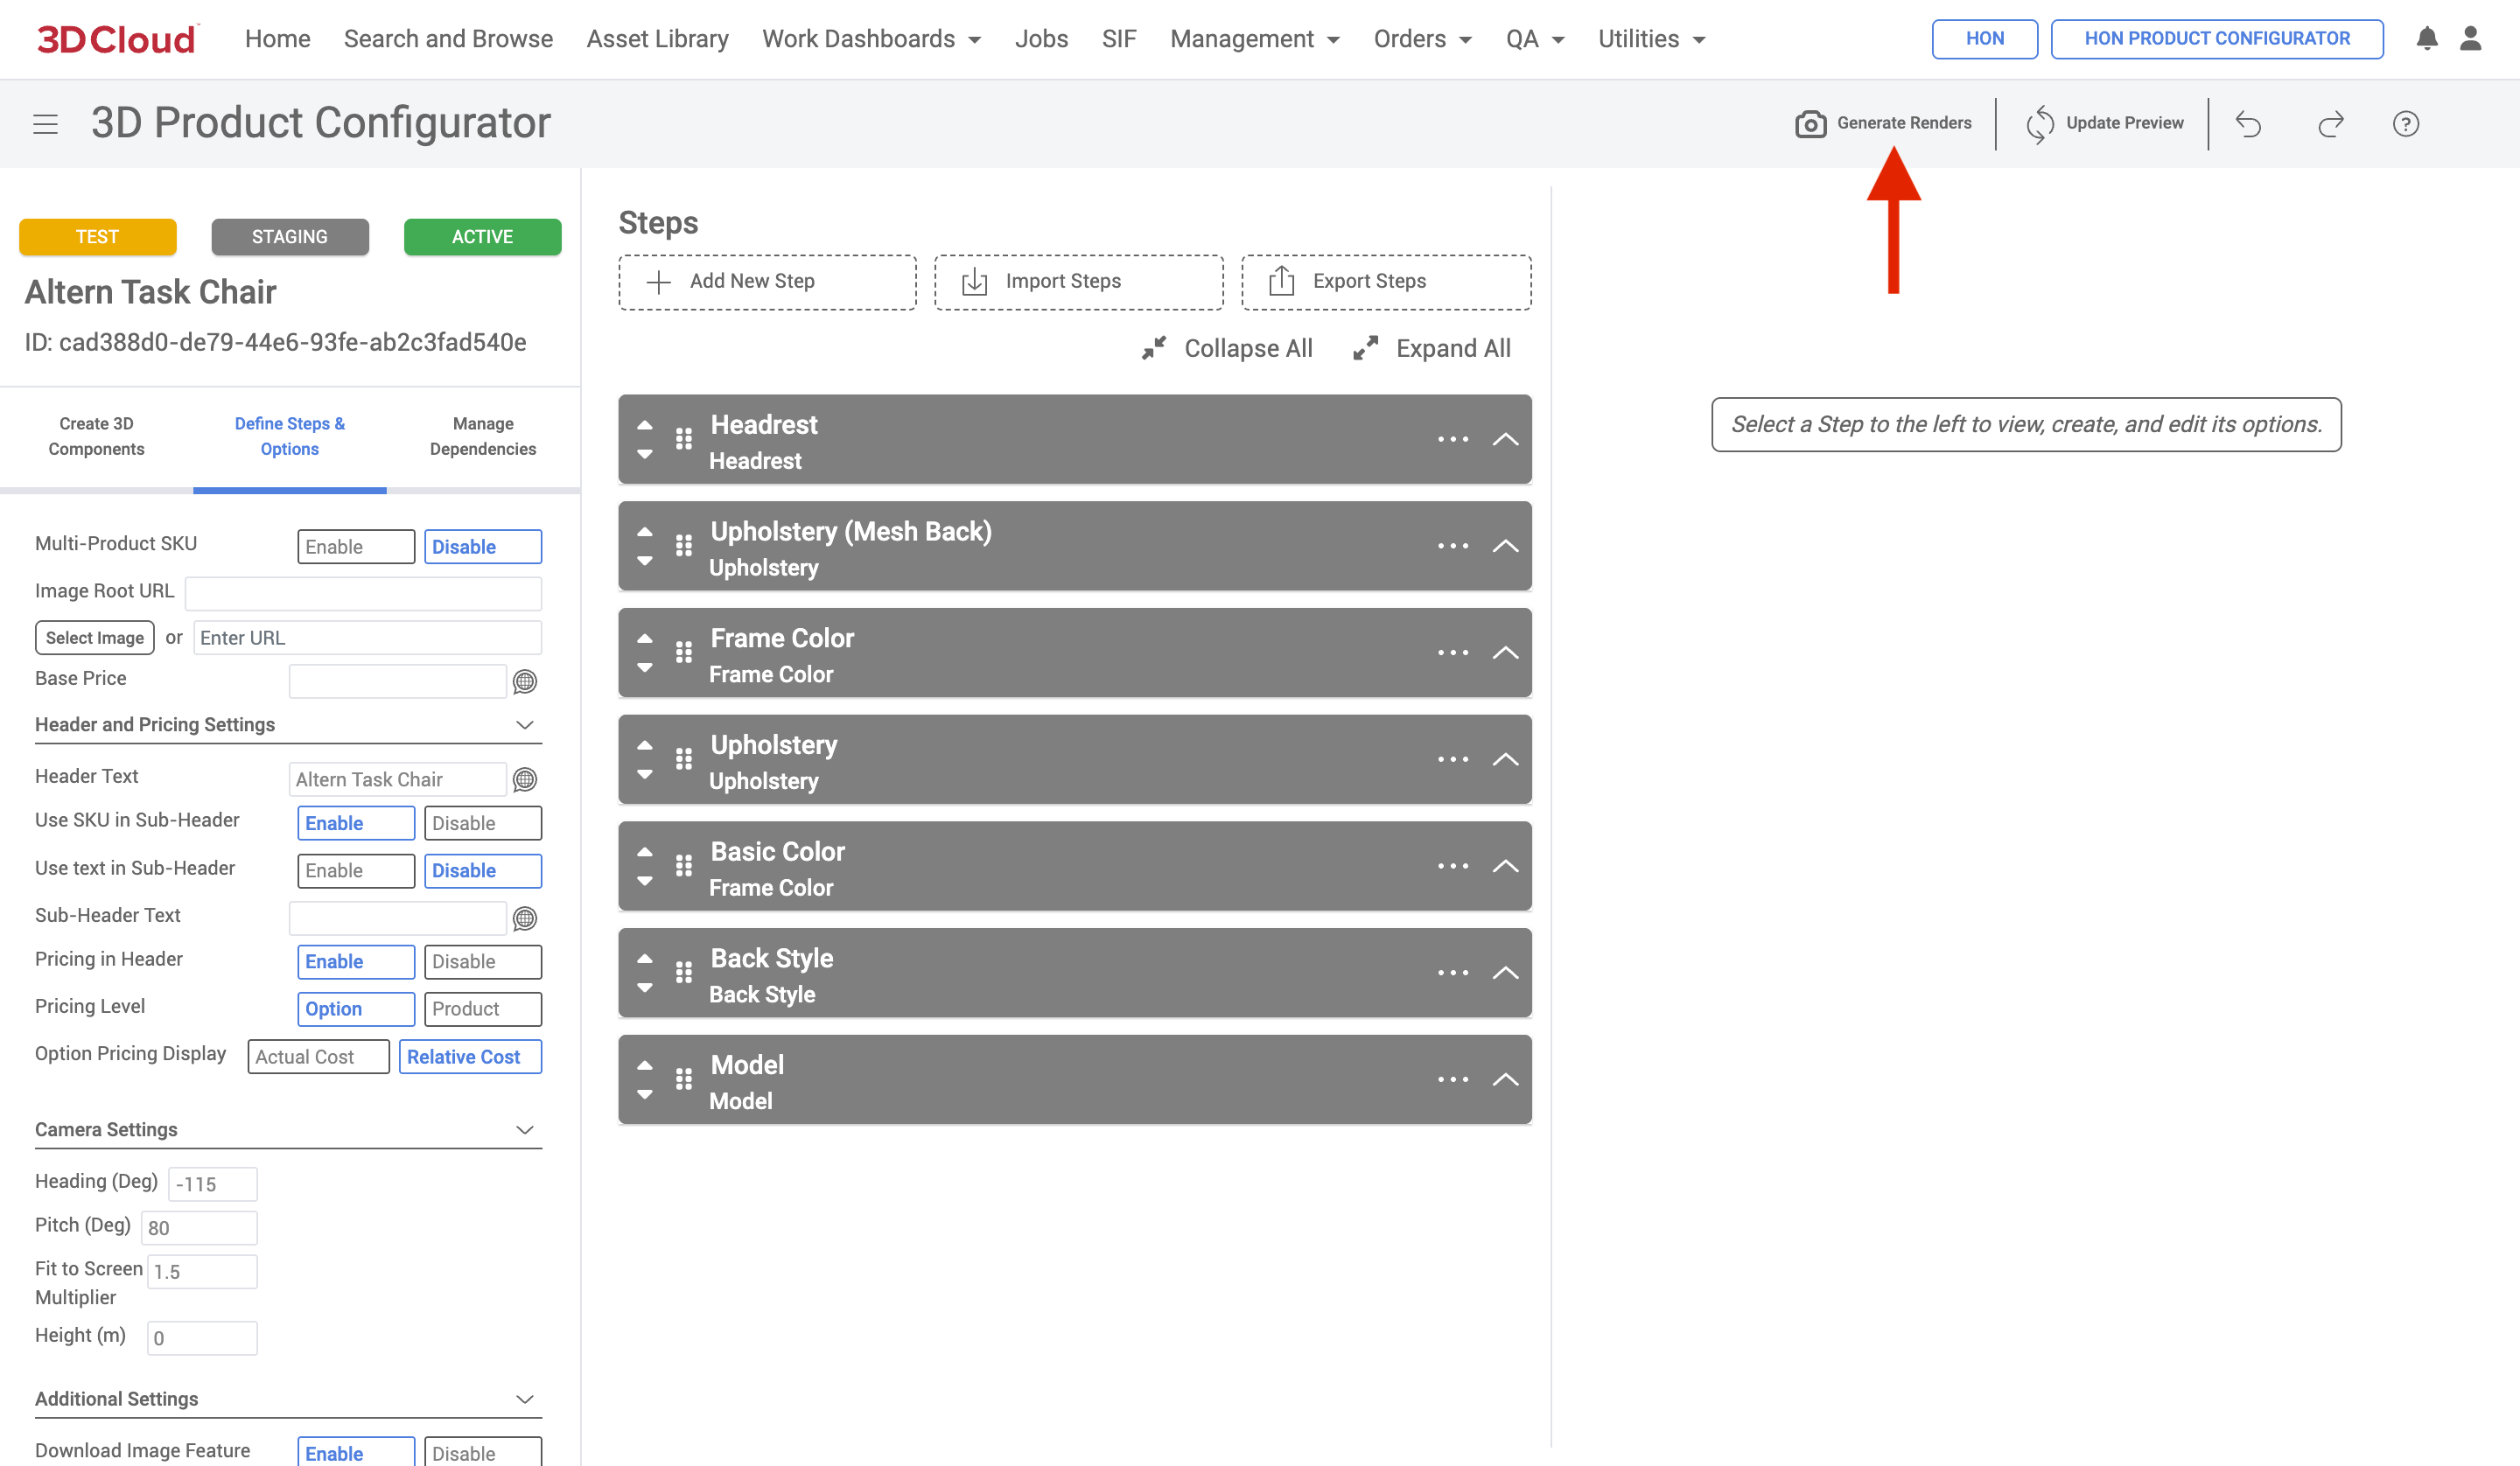
A Product Renderer page will be shown, with the configurator loaded into the 3D preview area.
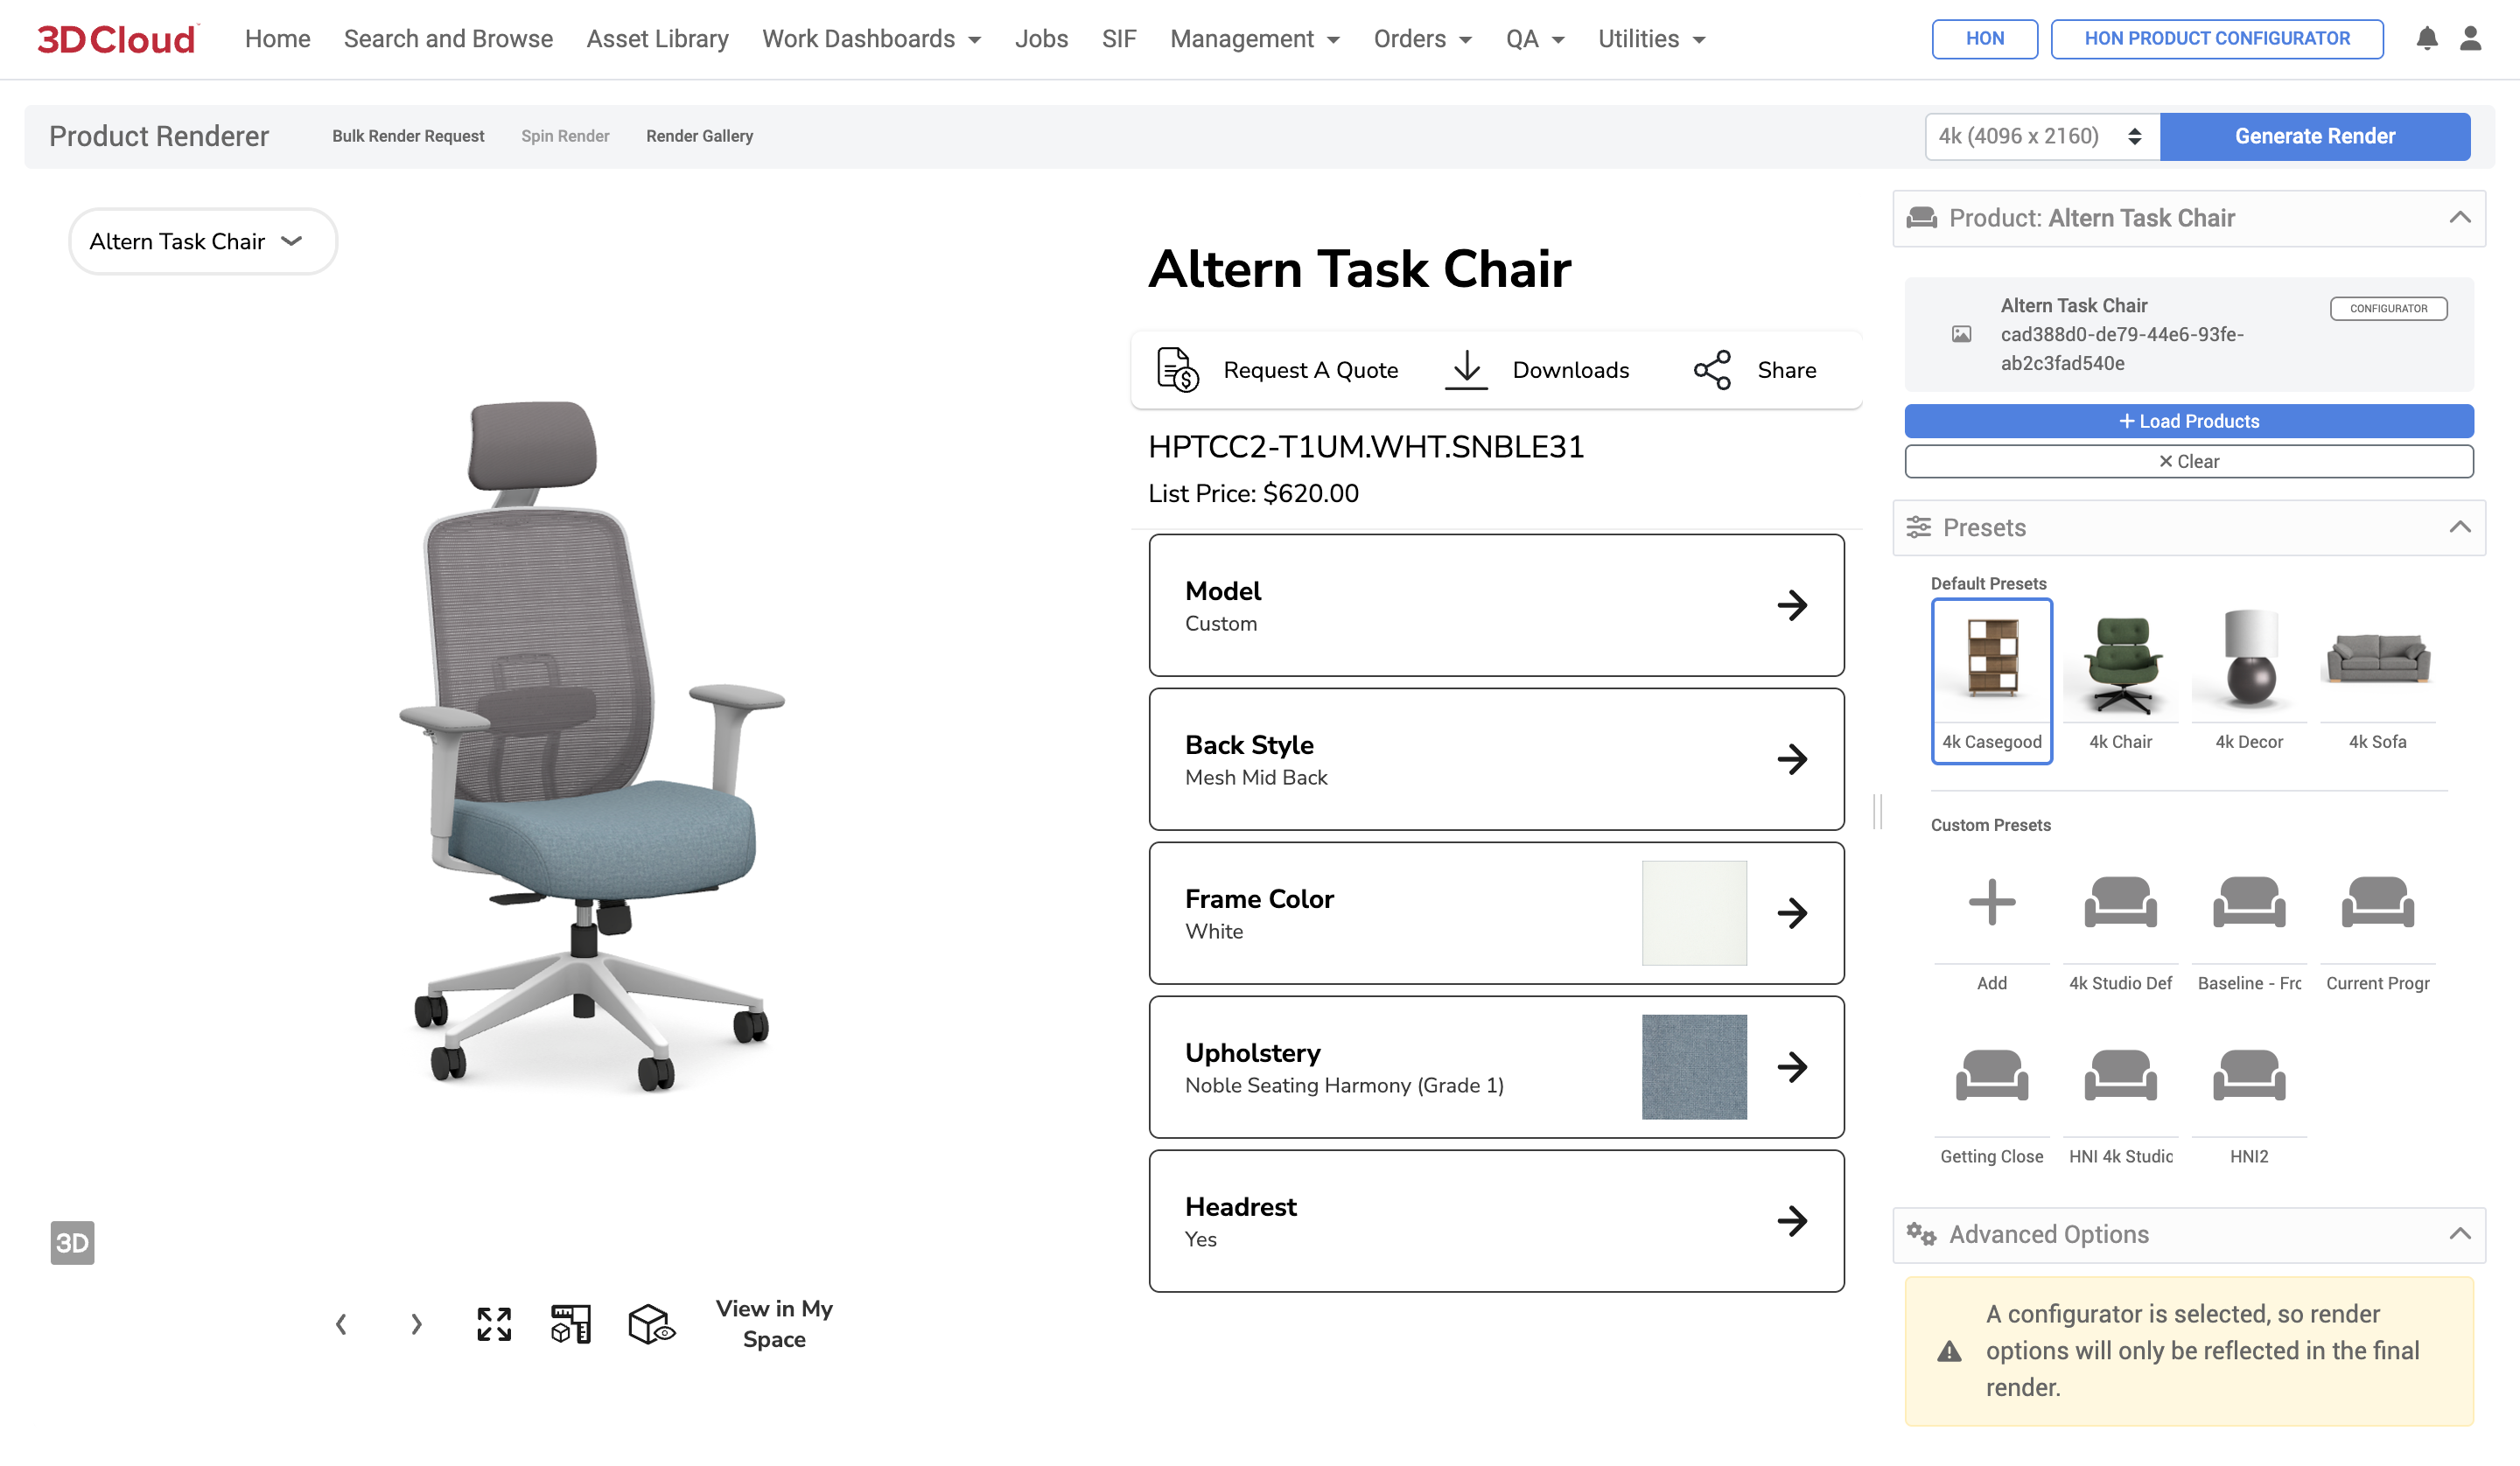
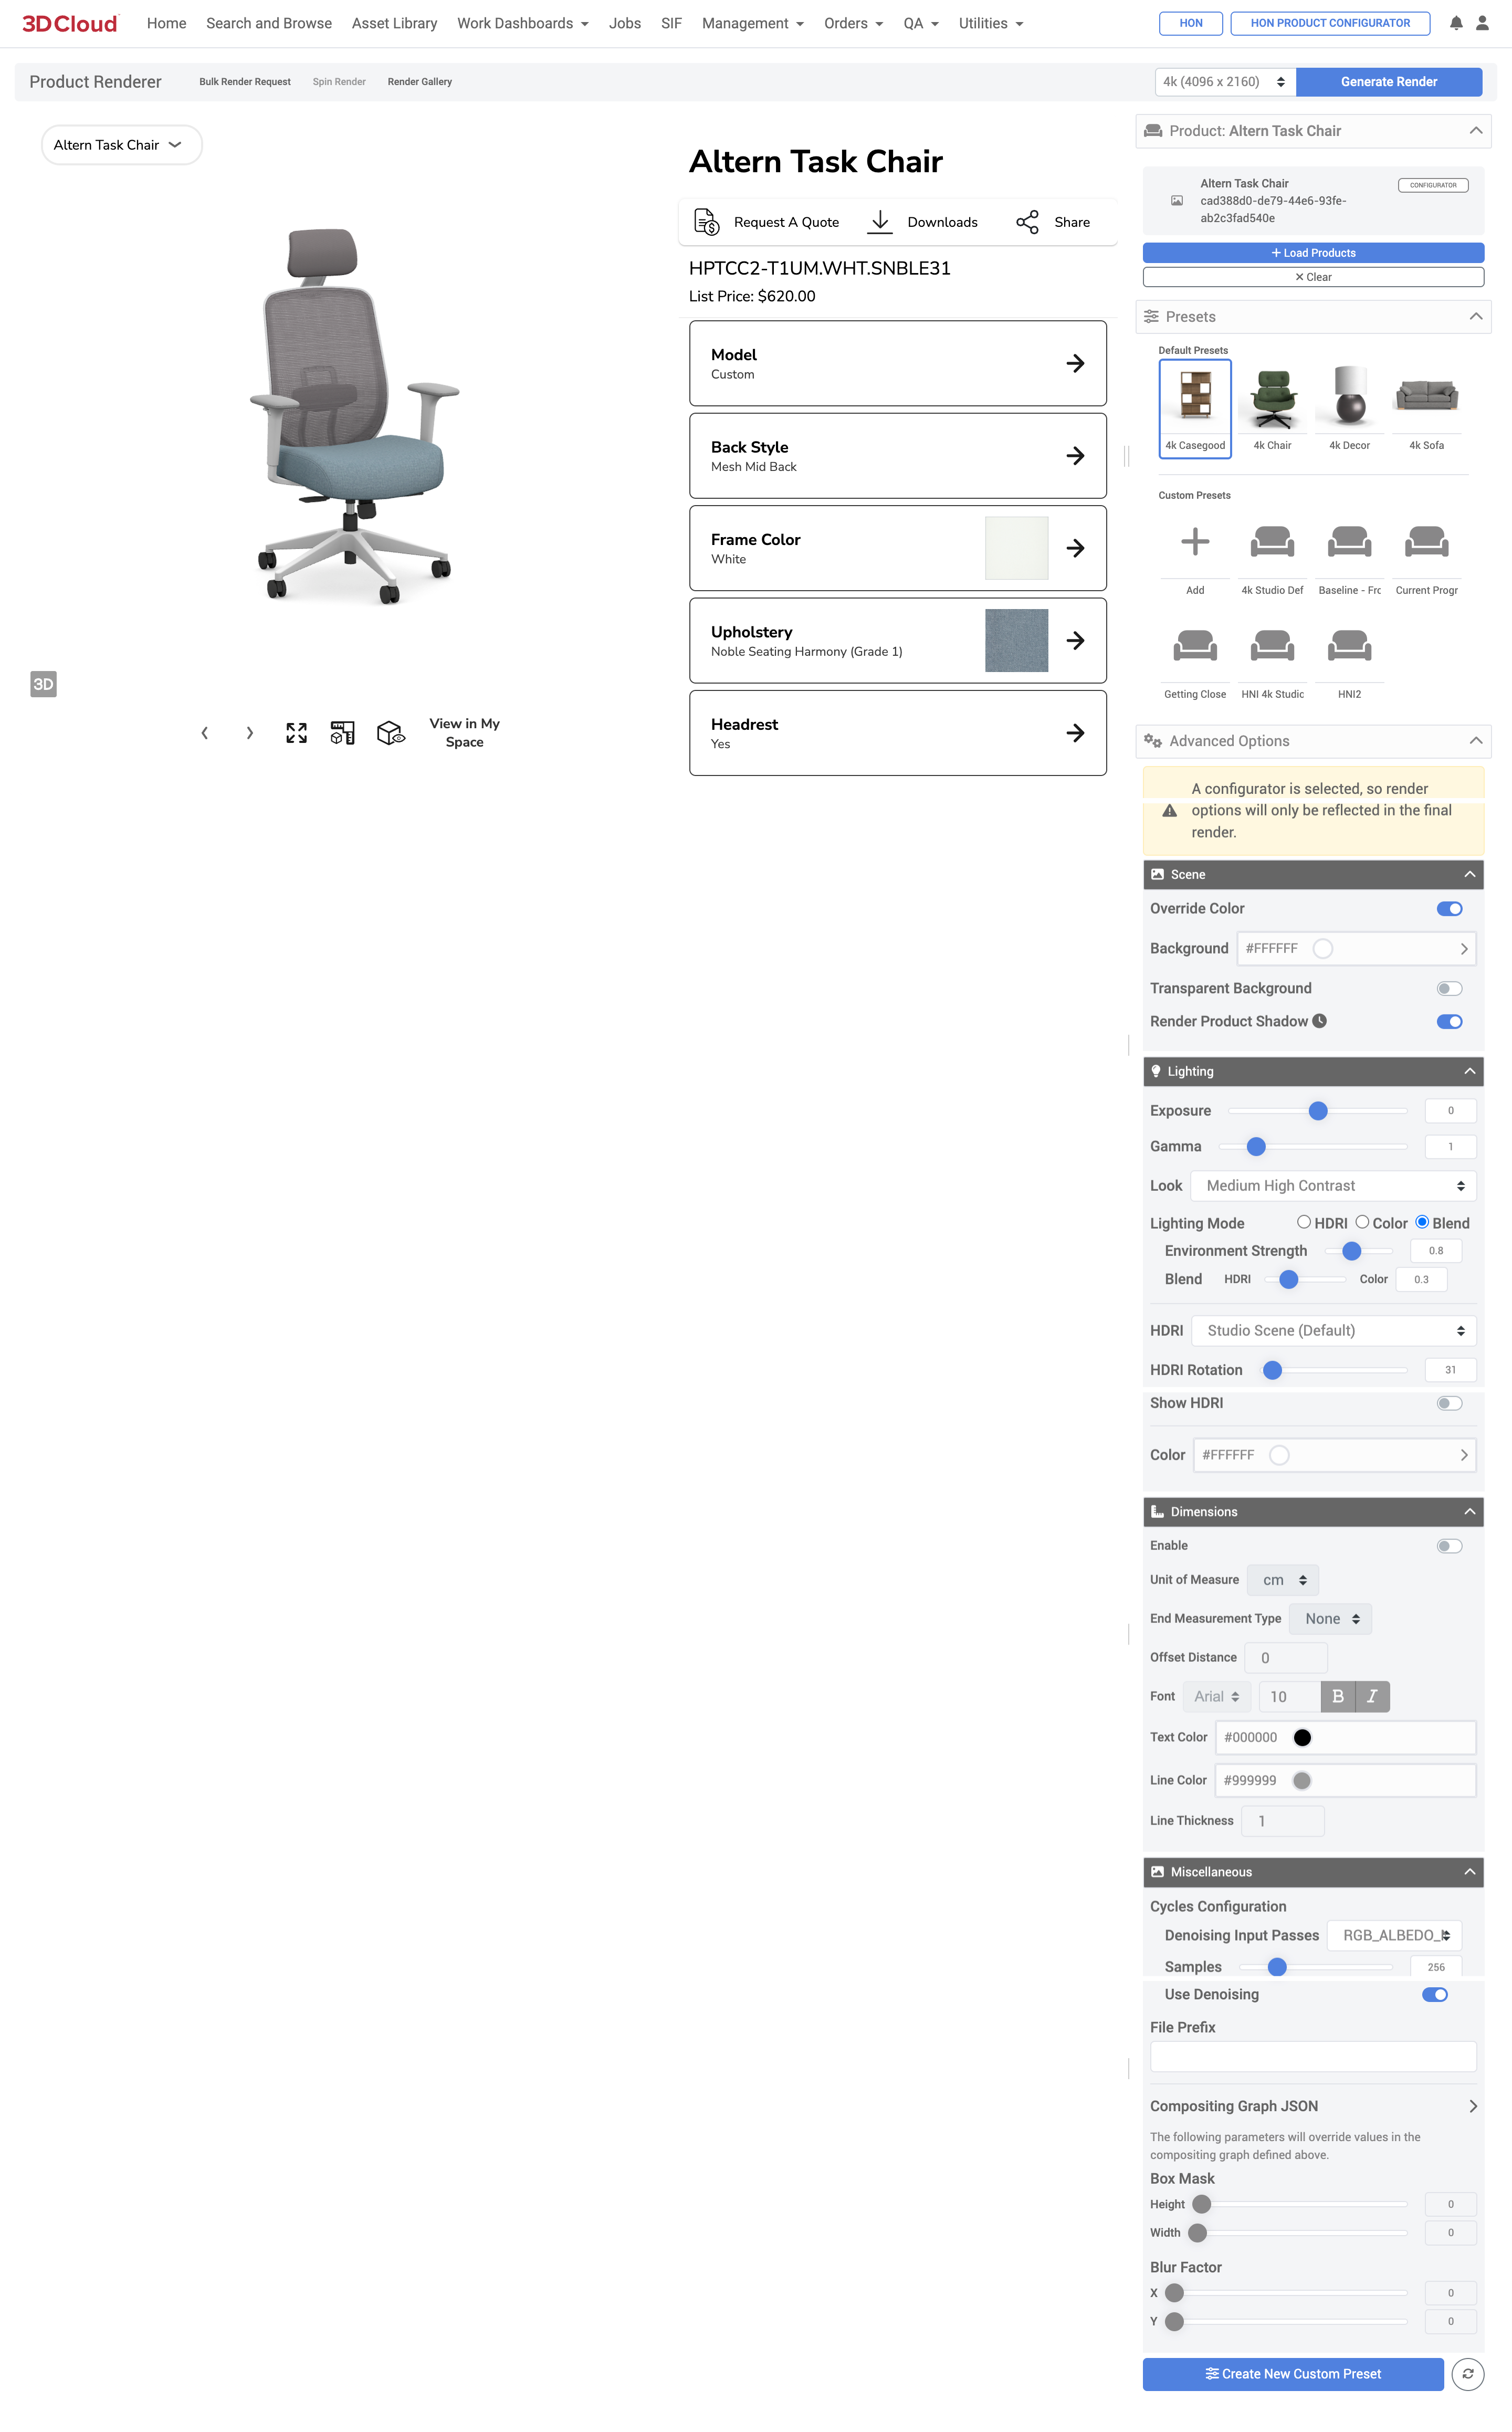
Presets can be selected for use in your render, as in Single Product Renders. Adjust your Advanced Options settings to your liking and click the “Generate Render” button.
Note: Advanced Options for Product Configurators are the same as in Single Product Renders, but do not include Camera Position controls. Render options are also not reflected in the Configurator preview, so running test renders is required to preview your results should you want to create/adjust your custom preset settings.
Render status messages and notifications are the same as Single Product Renders. When render jobs are completed, you will receive email notifications with download links, or can watch the notification bell area for a completion message. Final renders are stored in the Render Gallery of the associated product configurator.
Product Configurator Bulk Render
Bulk requests from a Product Configurator can be made via the “Bulk Render Request” button.
To generate an HD render of an individual product configurators, follow the steps below:
Navigate to the Product Configurator you want to render as in the single Product Configurator Render scenario.
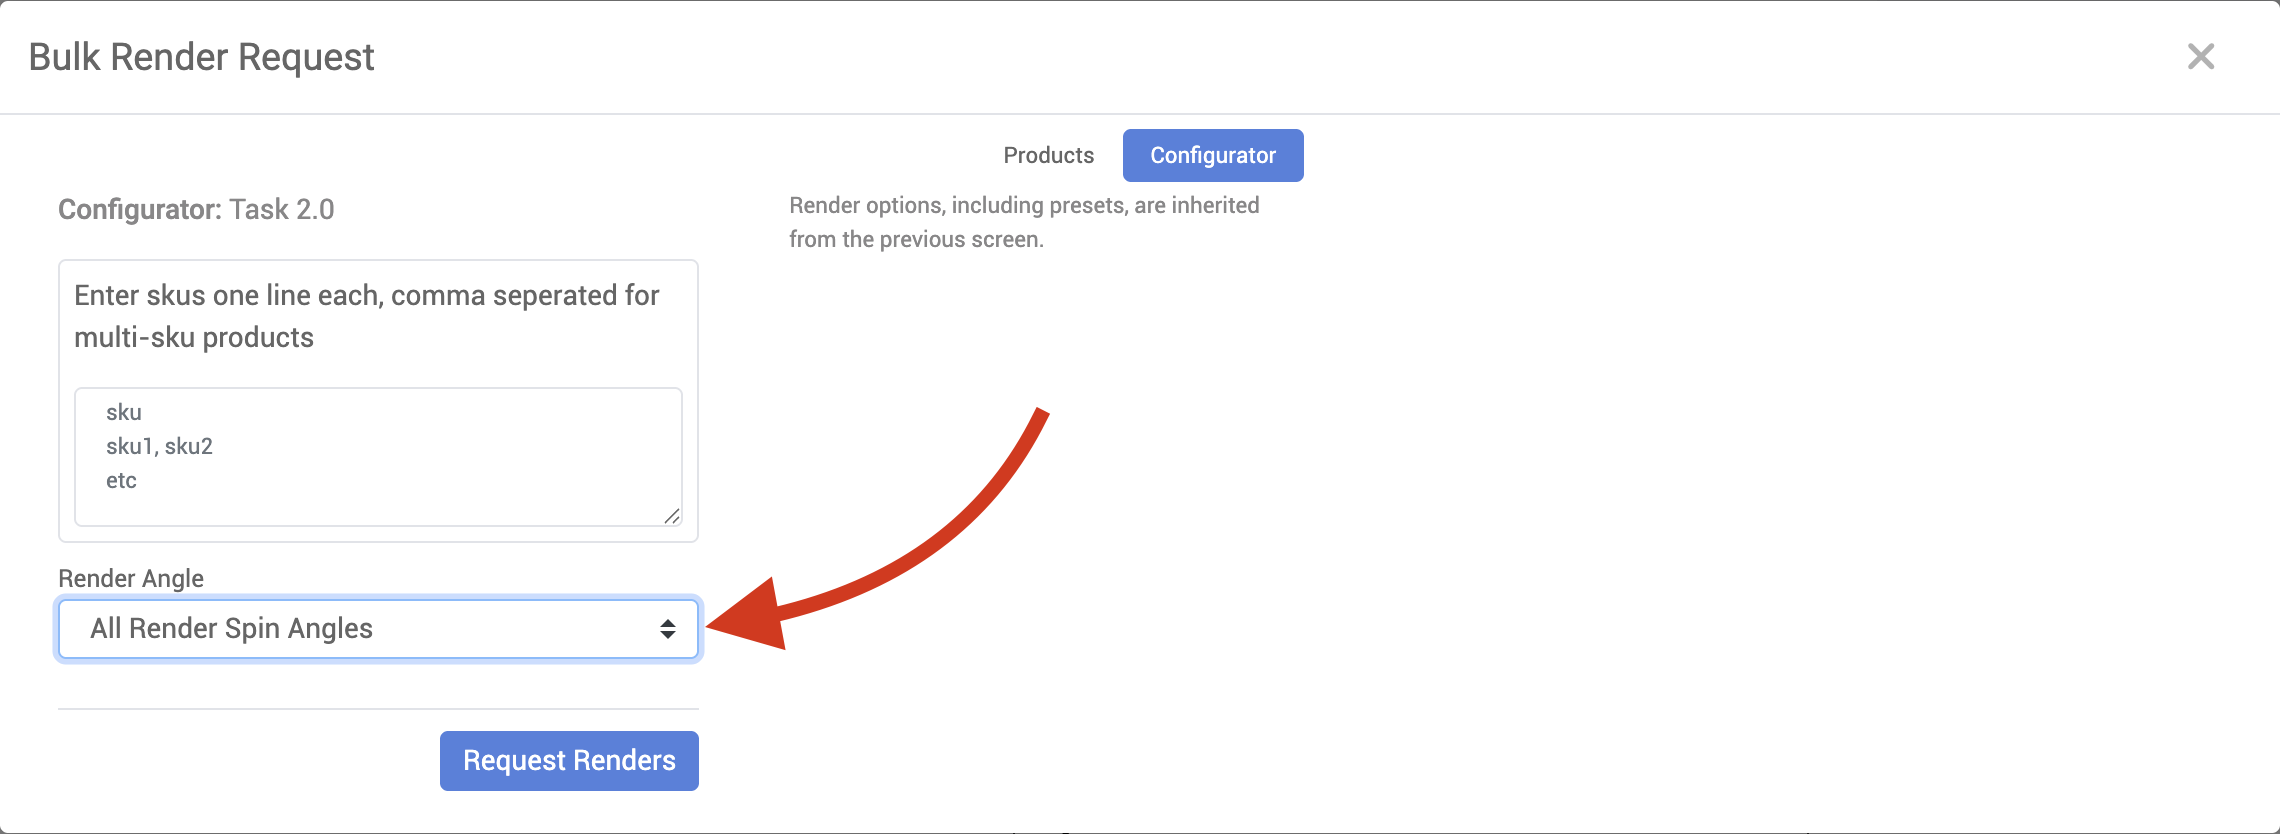
After clicking the button, the Bulk Render Request modal window appears, where you can submit a list of SKUs (one line each) for bulk renders.
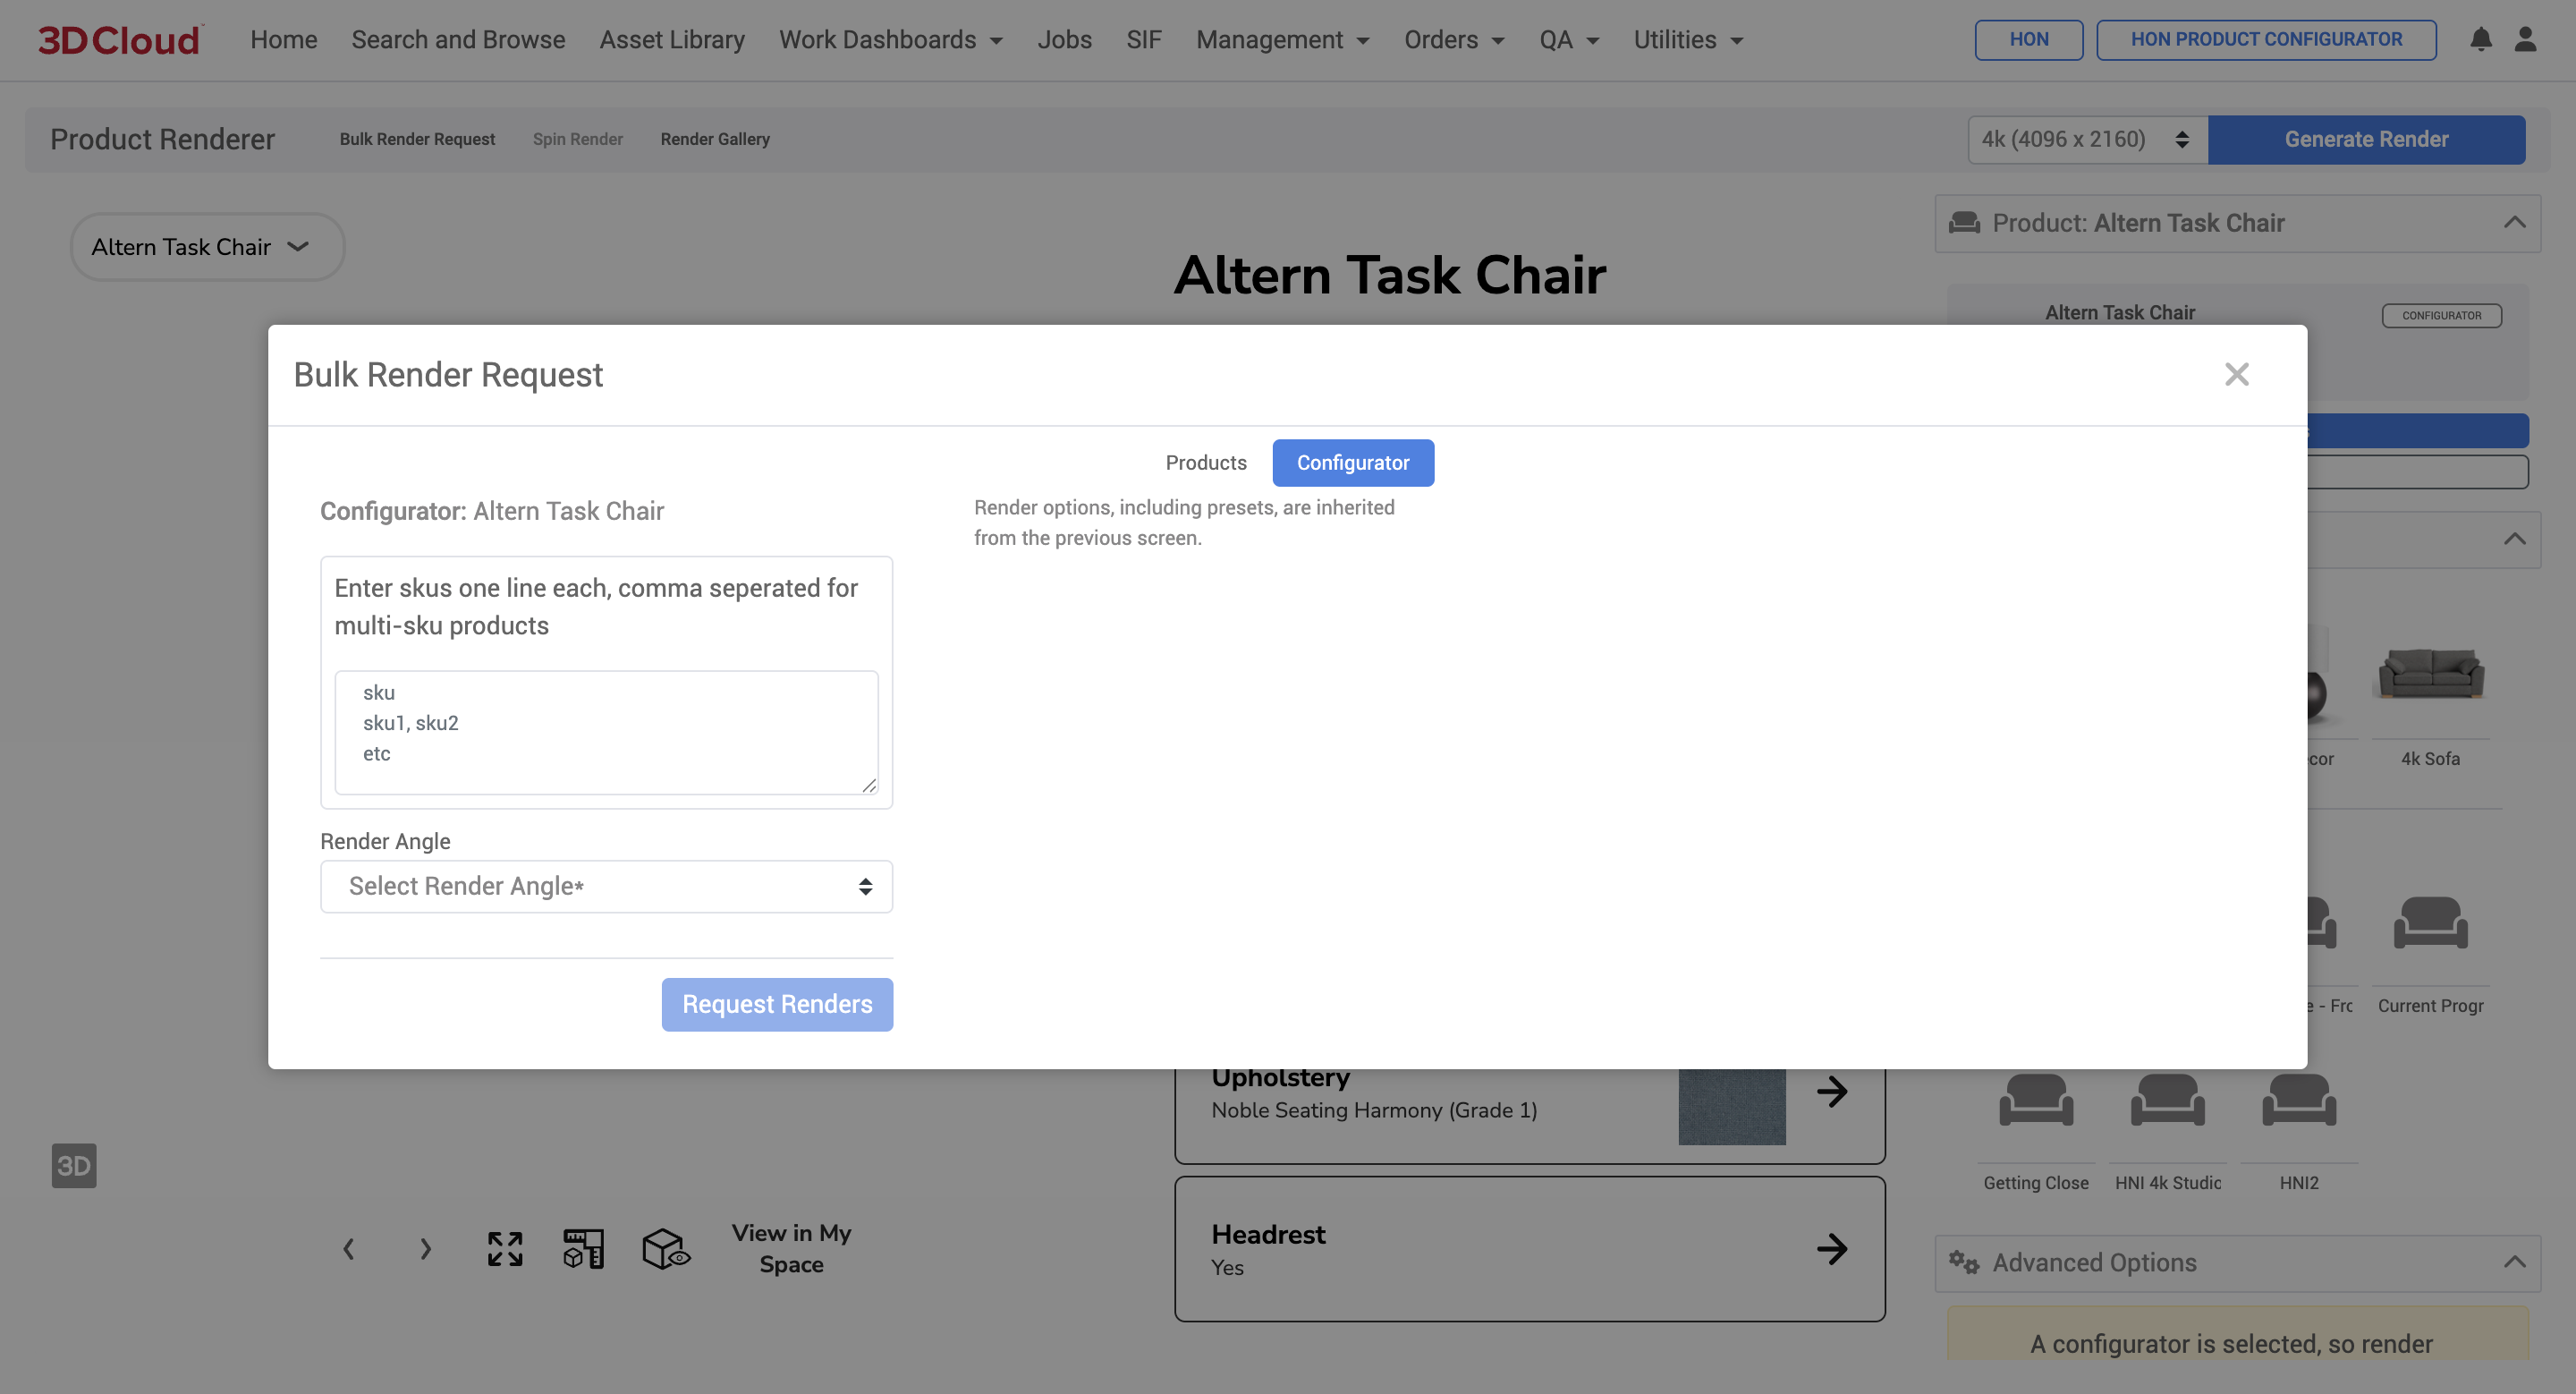
The render angle options for Bulk Render Requests of Product Configurators include:Current View Angle Only
All Render Spin Angles
Click the “Request Renders” button to submit your render job.
Render status messages and notifications are the same as Single Product Renders. When render jobs are completed, you will receive email notifications with download links, or can watch the notification bell area for a completion message. Final renders are stored in the Render Gallery of the associated product configurator.

Multi-SKU Products
To render multi-SKU product configurators, each line in the Bulk Render Request modal window can contain all the SKUs in one line separated by commas (no spaces).
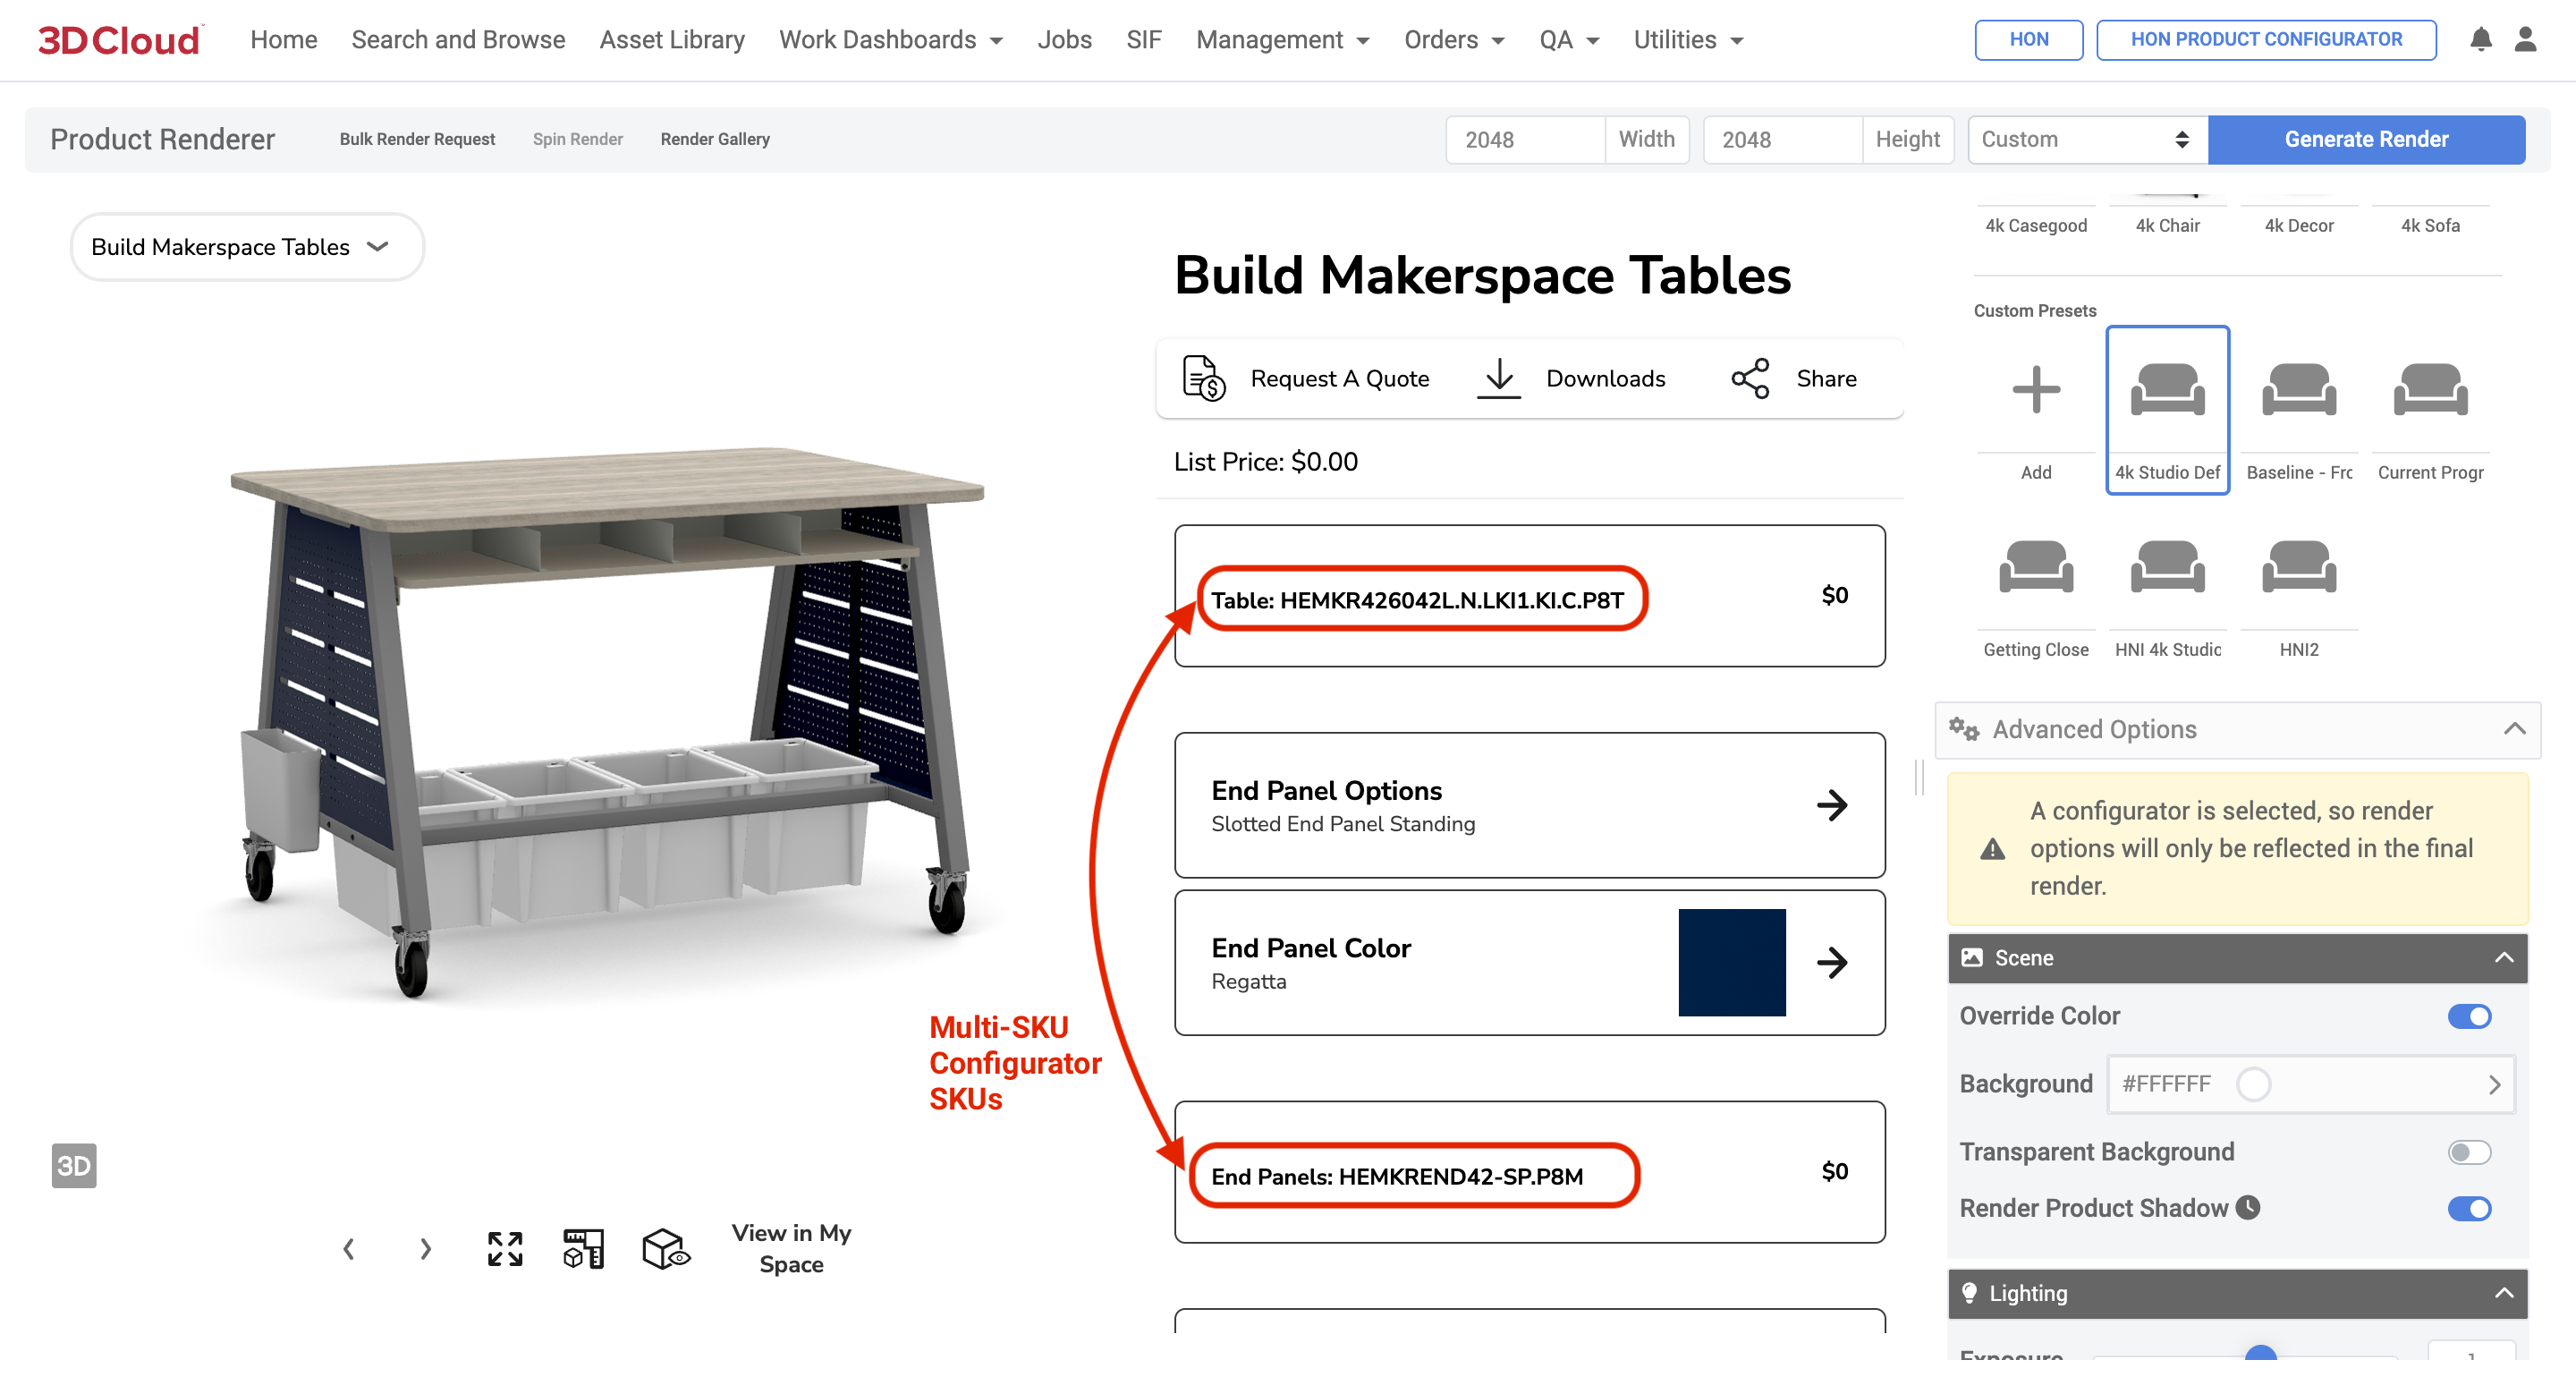
Example: Multi-SKU Product Configurator
.png)
Multi-SKU Product Configurator Render Request
_HEMKR426042L.N.LKI1.KI.C.P8T,HEMKREND42-SP.P8M,HAESS.DW,HFMBIN12,HEMKRSHELF.LOFT.LOFT,HEMKRDIVIDER.LOFT(1).png)
Multi-SKU Product Configurator Render
Product Configurator Spin Render
Product Configurator Spin Renders are created by selecting the “All Render Spin Angles” dropdown option on the Bulk Render Request modal window.
Note: The render spin angles are determined by the Client App Config settings.
Product Configurator Rendering On Demand
The customer-facing view of 3D Cloud’s Product Configurators have a feature to request and download HD Renders at preset angles.
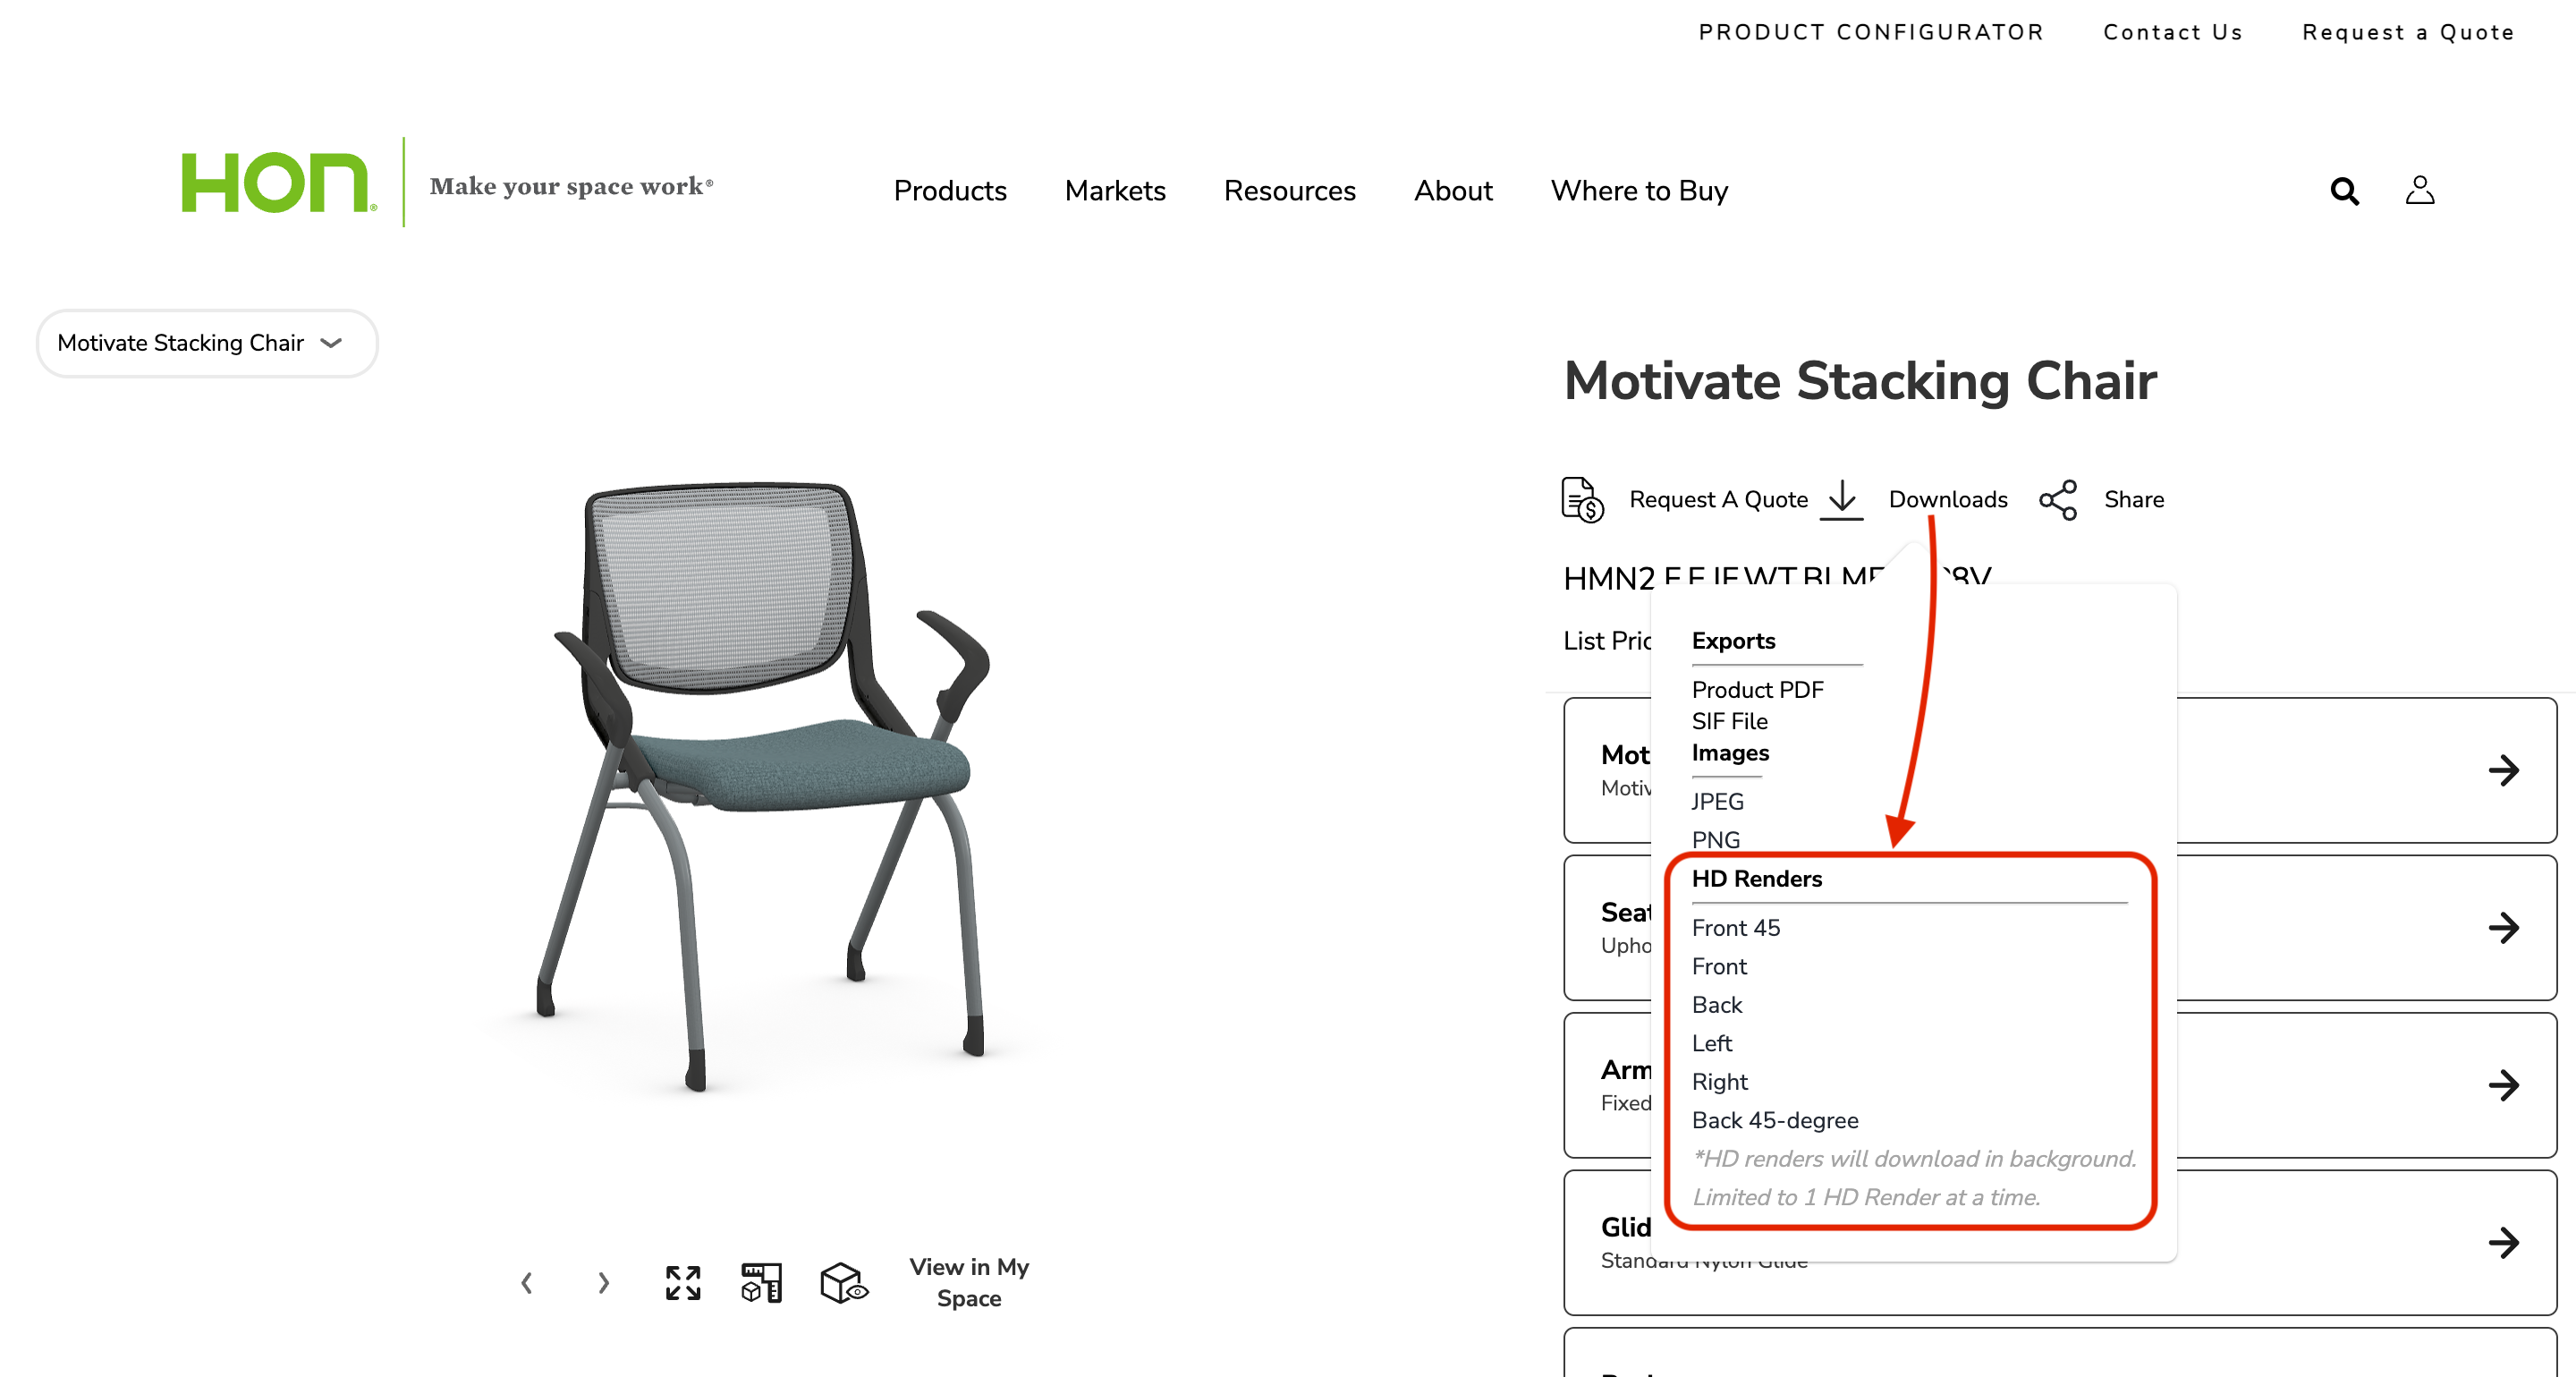
Download HD Renders feature
On Demand Render Processing message

HD Render Complete message
Clicking on “Download HD Render” will download a final render to your computer.
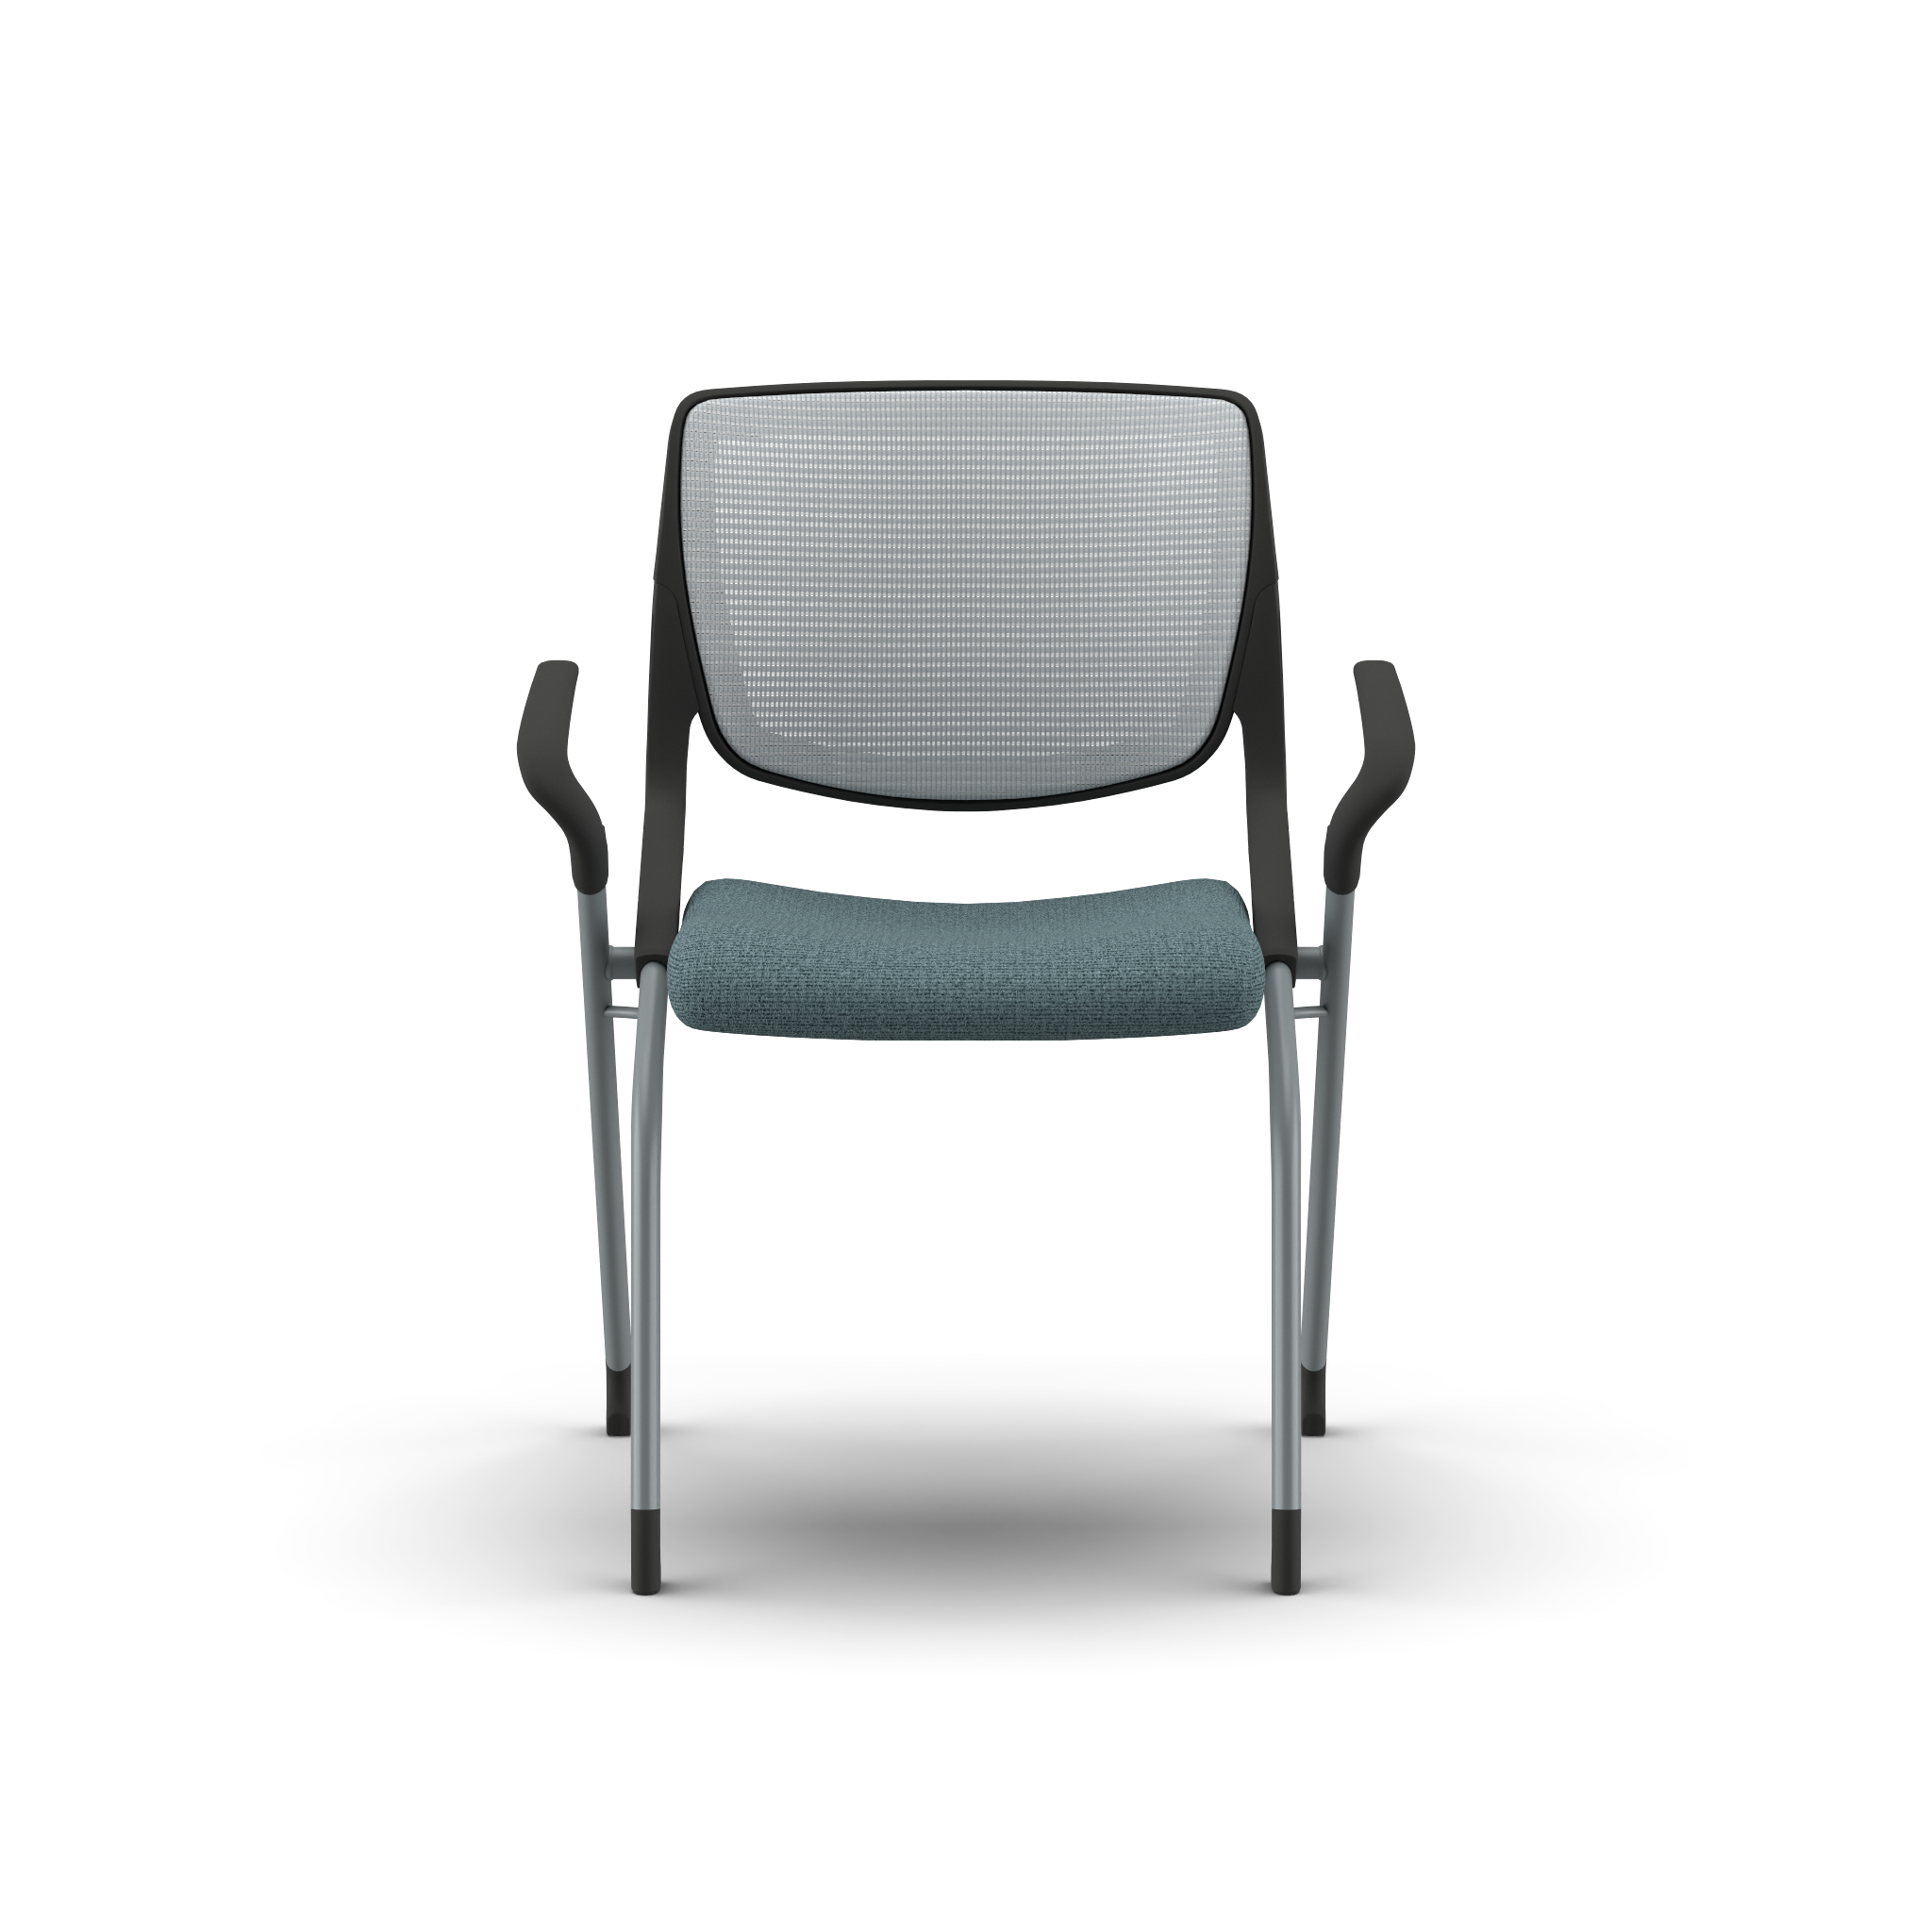
Product Configurator On Demand Final Render
Lifestyle HD Renders
Inspirational Lifestyle HD Renders are possible using the 3D Cloud Room Planner. For guidance on how to use the Room Planner to generate room scenes like the ones below, refer to our Room Planner User Guides or your 3D Cloud Room Planner Training advisor.